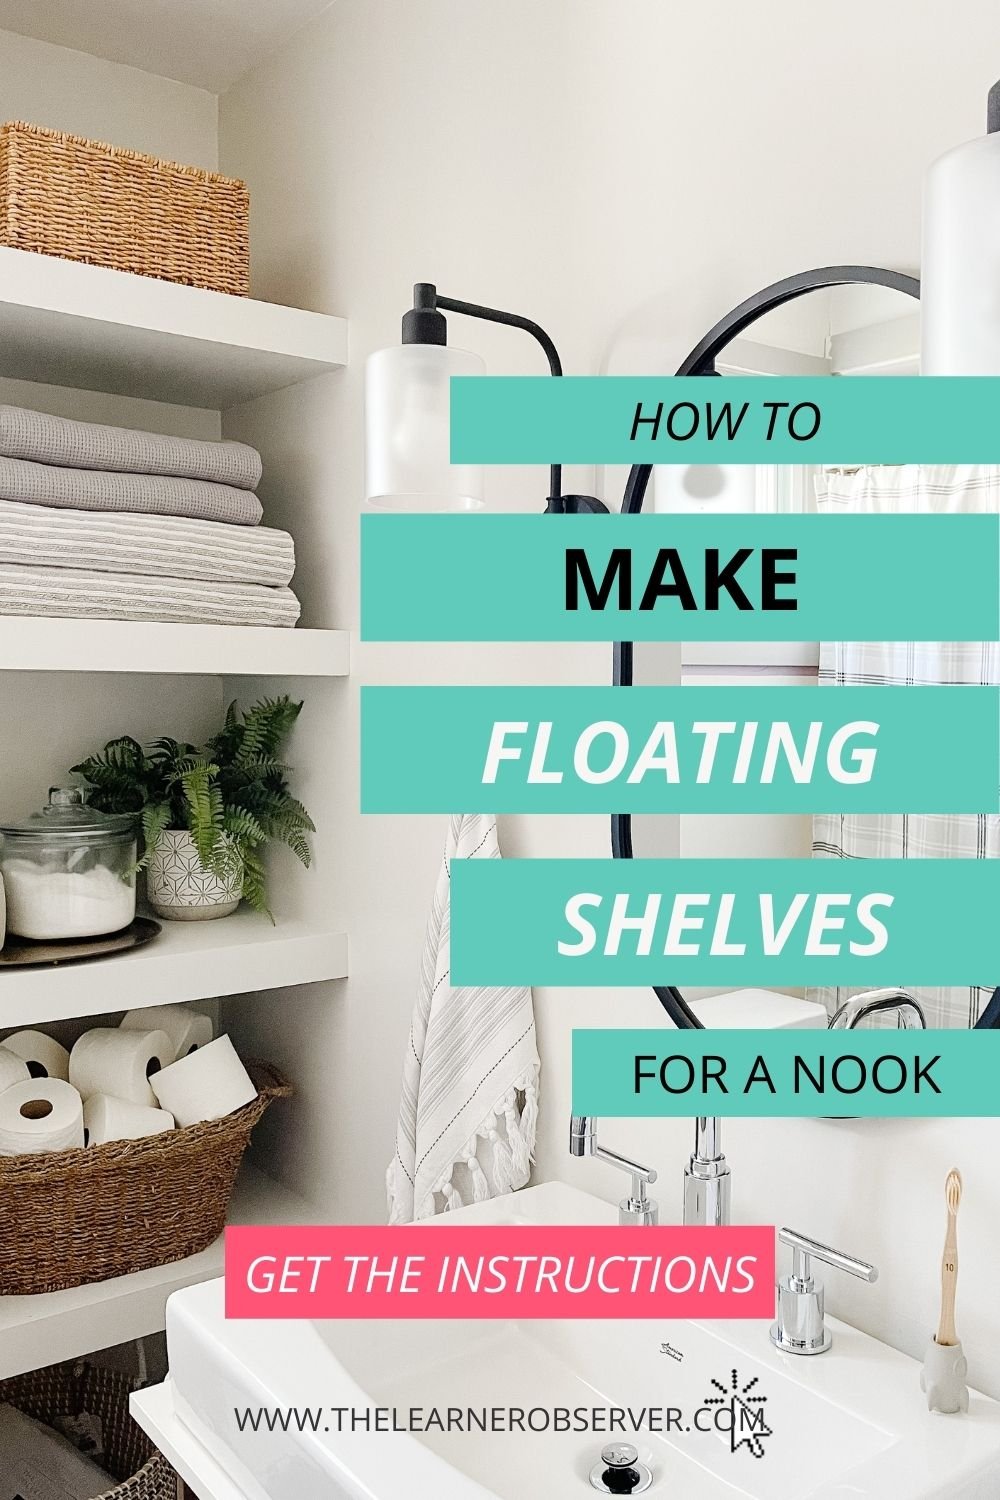
How to make strong DIY floating shelves
Have you ever wondered how to build your own floating shelves? Better yet, want to have plans for building floating shelves that also don’t have any nails or screws showing? I’ve got a detailed plan for how I made floating shelves in a small nook using a Kreg Jig and some simple hardware store lumber. This is an inexpensive way to make DIY floating shelves that can hold a lot of weight and look great! These DIY floating shelf plans can be used in a nook where no brackets are needed - just some 1x2’s screwed into studs and you’re good to go! If you’ve ever wondered how to make your own floating shelves in the easiest way possible, this is it!
*This post is sponsored by Kreg, but all opinions and ideas are my own
Materials for building floating shelves:
2x 1/4-inch x 3-inch x 4 Feet Poplar Hardwood Hobby Board
2x 1/2-inch x 4 Feet x 8 Feet Sanded Aspen Plywood
2x 1x2x8 Framing Lumber
1” Kreg wood screws
1” finishing nails
Wood filler
Paint or stain of choice
1.5” wood screws
Tools for DIY floating shelves:
Cordless impact driver
Cordless drill
Mitre saw
Nail gun
Small level
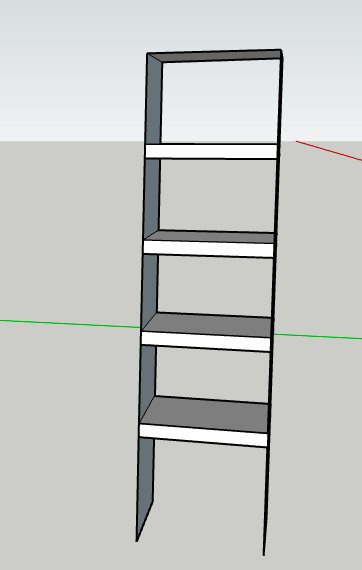
Measure the floating shelf nook
The nook I built these shelves in is in our kids’ bathroom and is approximately 22.5” wide, 16.5” deep. I wanted the floating shelves to fill in the whole depth, so I measured the plywood as such. If you want the front of the shelf to be flush with the wall, make sure to take 1/4” off of the depth.
Prep all cuts for floating shelves
Using a table saw or the Kreg Universal Rip-Cut Circular Saw Jig, cut all pieces to size. Again, mine were as follows:
Plywood: 22.5” x 16.5”
1x2: 16”
poplar trim: 23”

Drill pocket holes and attach supporting pieces to the walls
I drilled pocket holes using my 720PRO Pocket-Hole Jig. I did them about 2” from the edges and made sure to point them in the direction of where the shelf would be most visible: ie: on the bottom shelves, I made sure pocket screws went into the top pieces and vice versa for the higher shelves. I did this so I wouldn’t end up with nail or screw holes to fill where the shelves would be most visible.
As far as spacing goes, I spaced each shelf about 15” apart with the exception of the bottom shelf where I left a little over 20” to the floor for a hamper or large basket to fit underneath.
And in case you’re wondering, yes, I did have to remove that top piece of 1x2 because I had not pre-drilled the pocket holes and hastily screwed it to the wall! Do as I say, not as I do, right? ha!

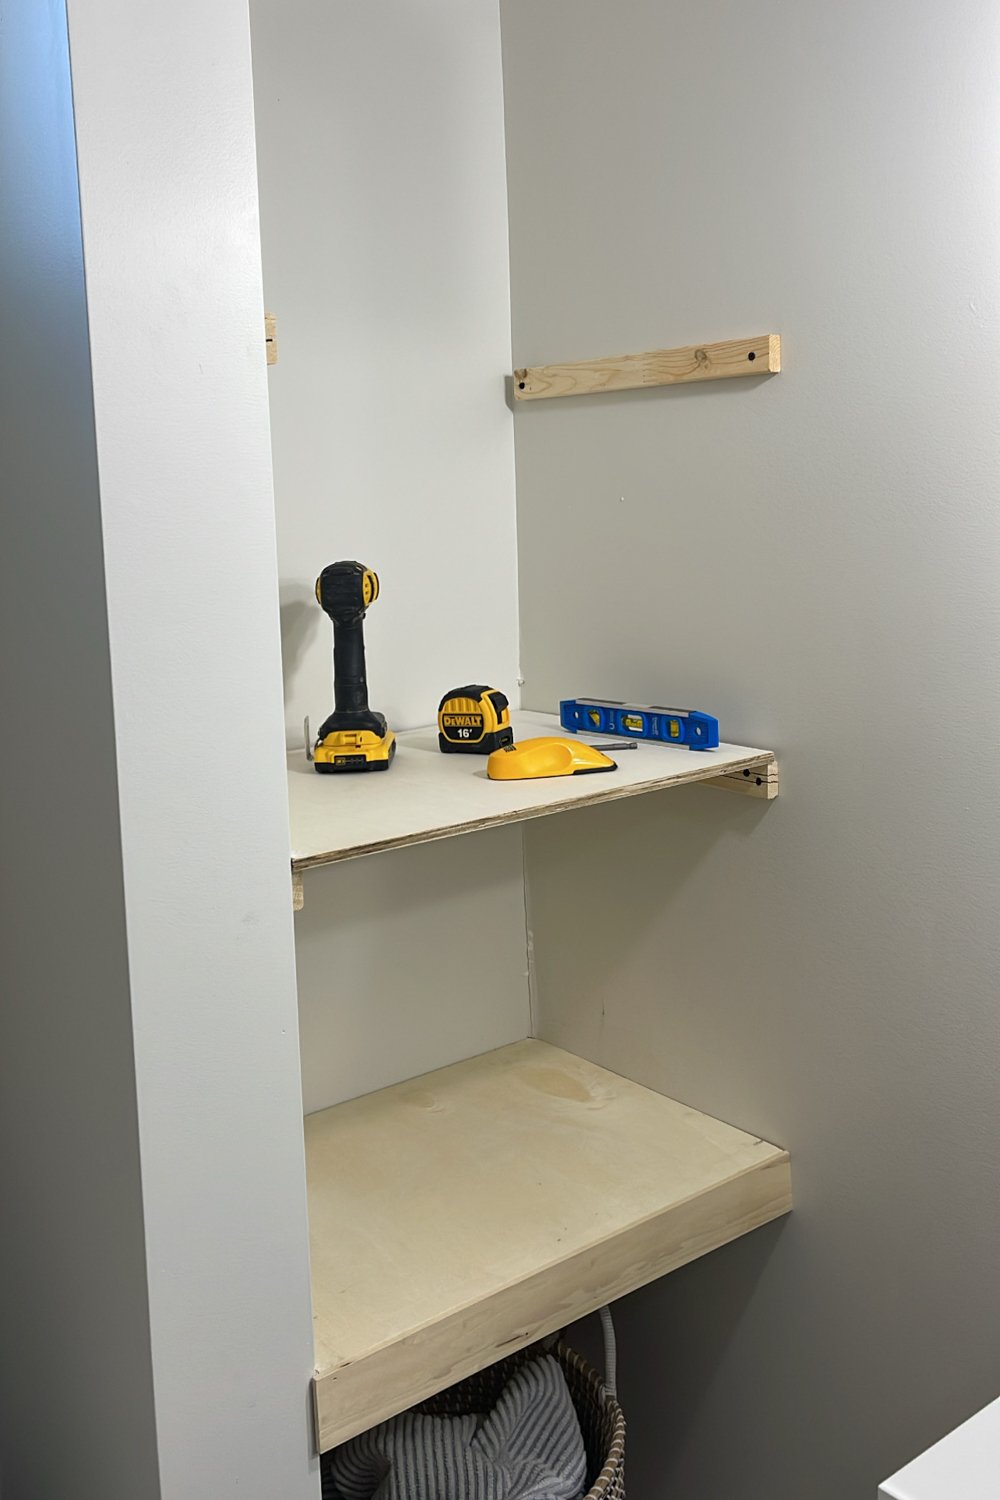
Add finishing pieces
At this point you can add your plywood - start with the pieces you’ll be using pocket holes for and then add the second piece using a nail gun and finishing nails. I also attached the front piece with a nail gun and filled in the holes with wood filler.

Paint or stain floating shelves
I chose to paint my shelves in the same colour as the walls to make them blend into the space, but these would definitely be stained as well! Make sure to test the stain on a scrap piece first to make sure it’s the colour you want.

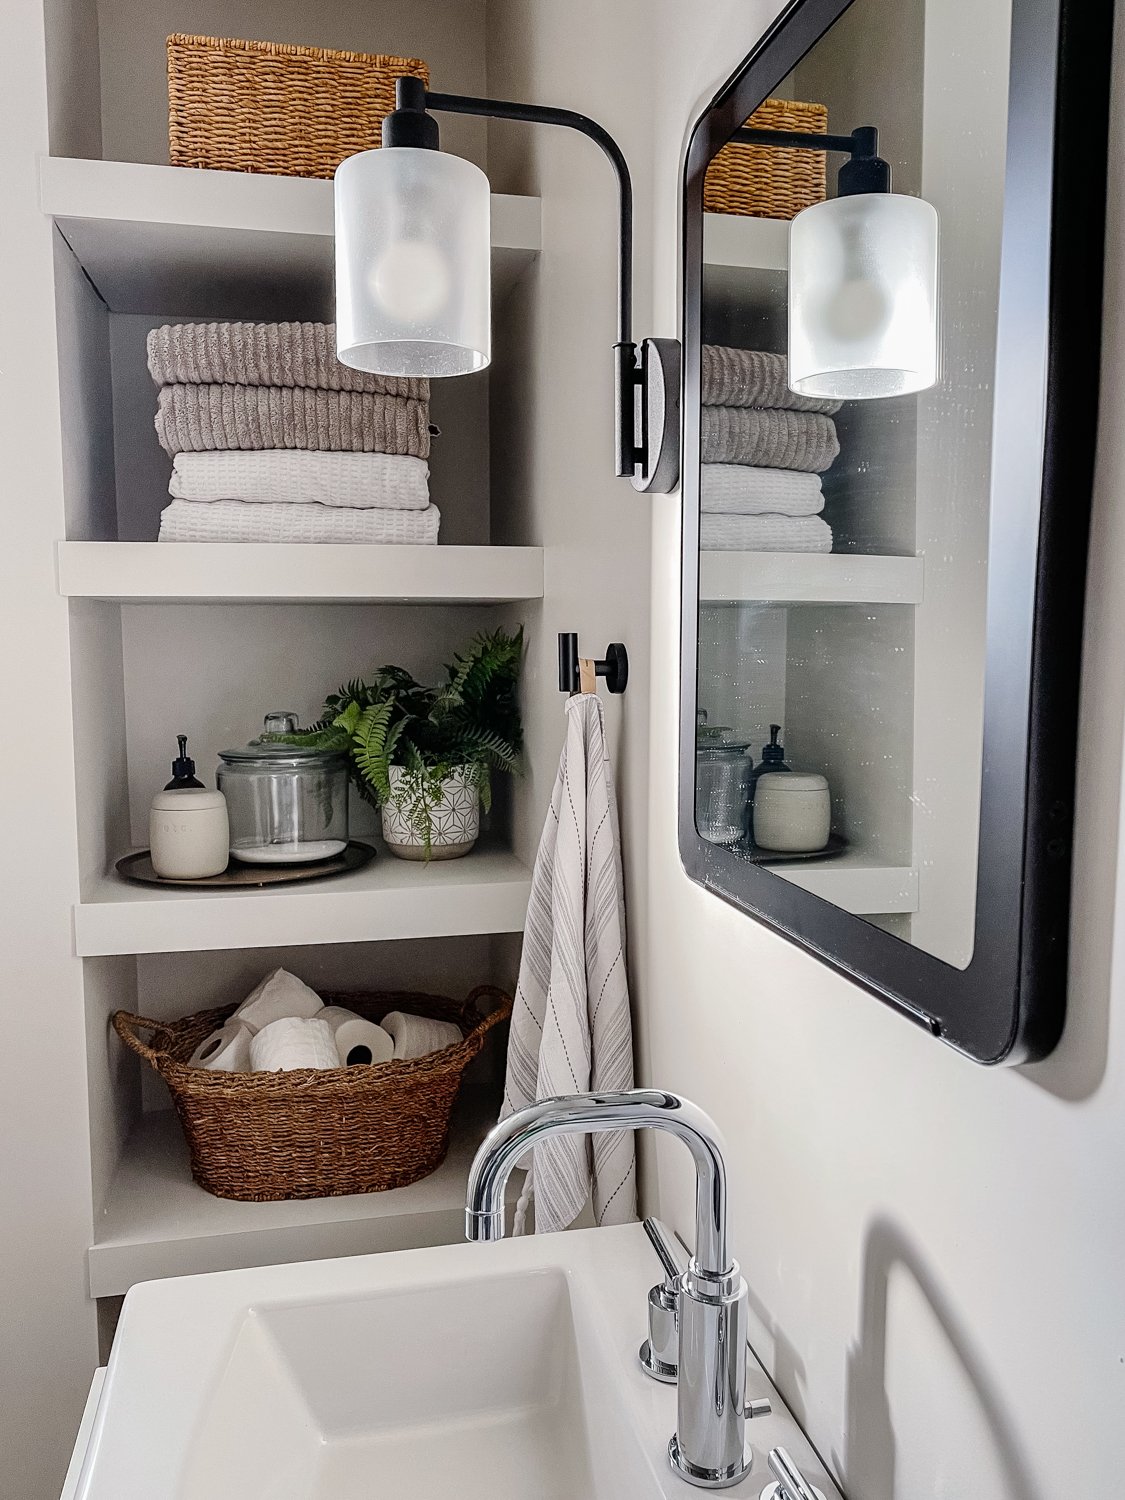
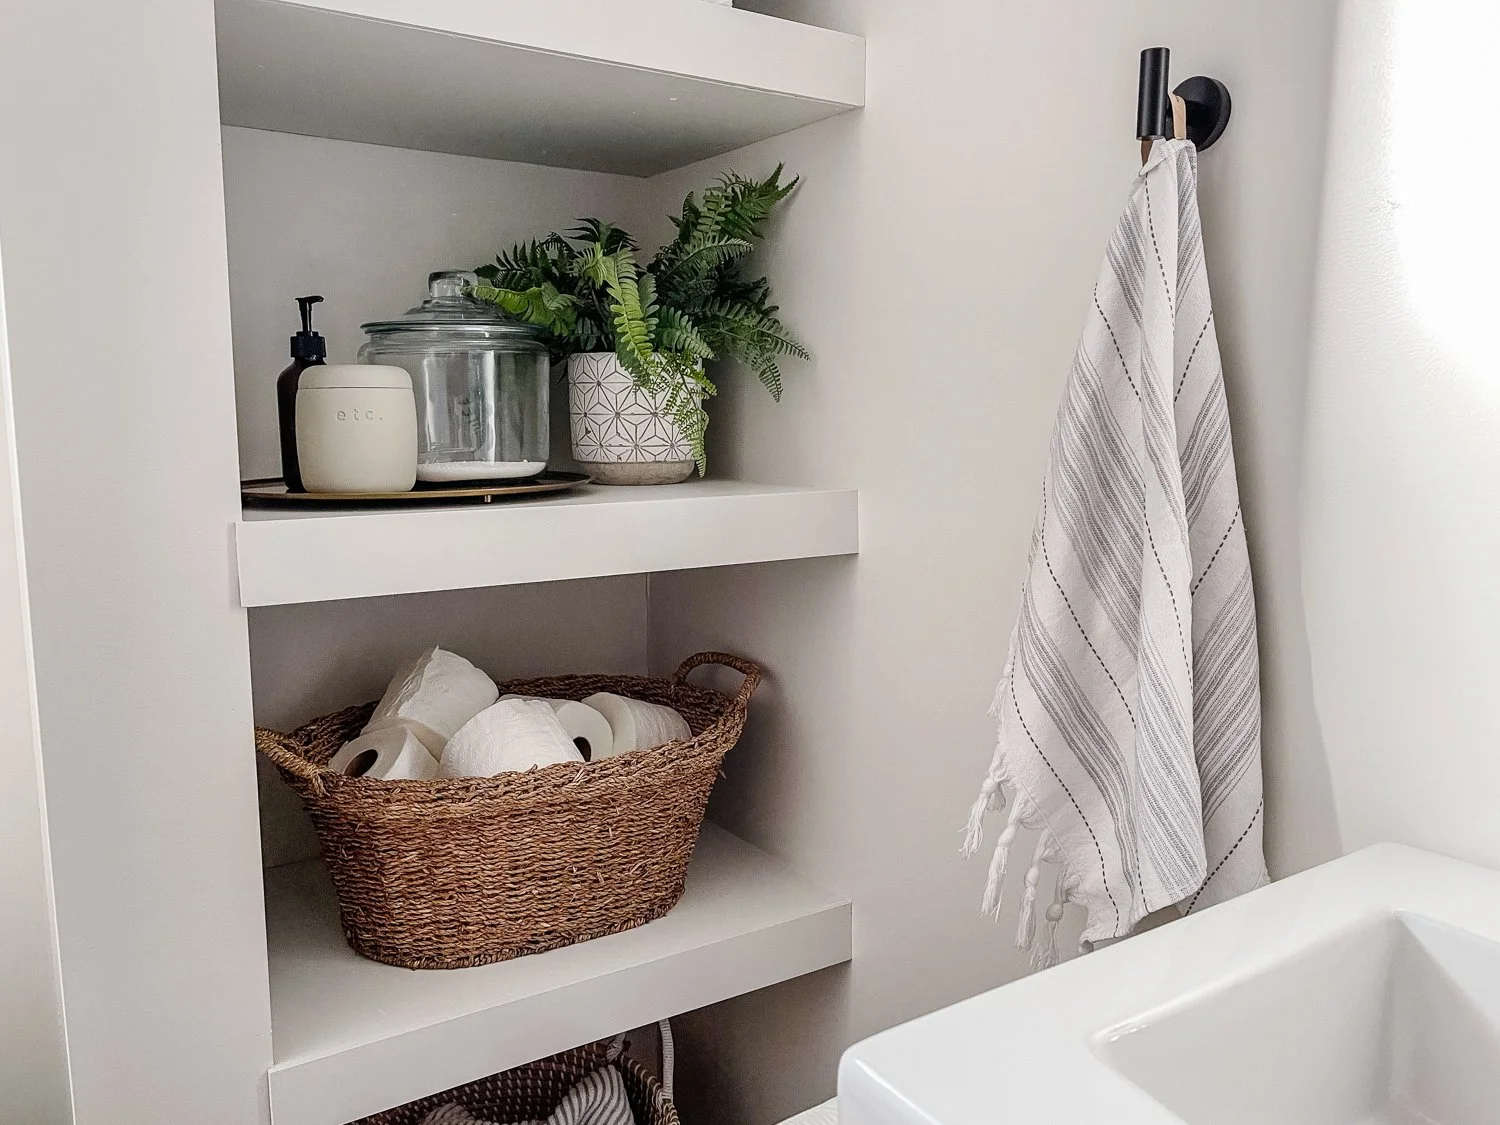
And there you have it! This nook went from being pretty useless to now being a space where we can easily access things we use daily, extra towels, and the kiddos have a place to throw in dirty towels that isn’t the floor - though I’m not holding my breath on that actually happening!
Thanks to Kreg for partnering with us on this project!