Chalkboard Kitchen Labels

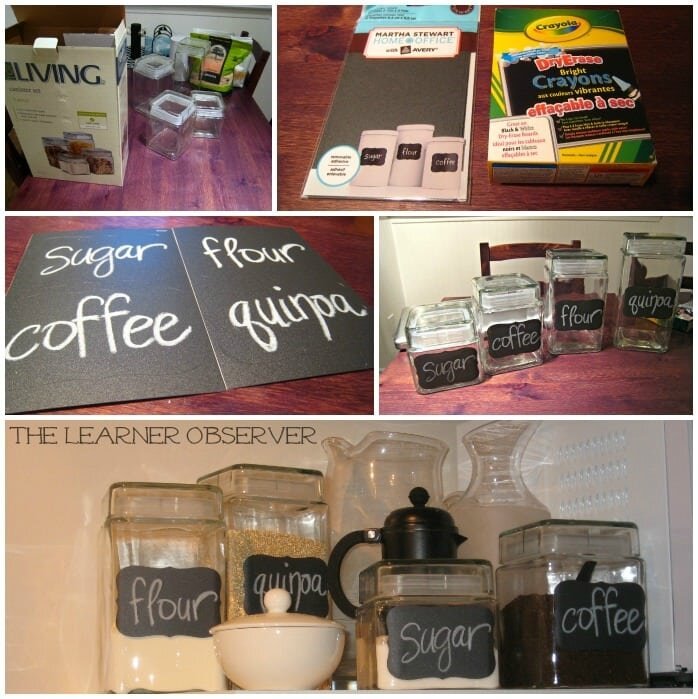
In my quest for attractive organization I bought some glass containers for the kitchen. They are simple, square jars that I thought could be useful for day-to-day items I didn't want to keep in the pantry since our pantry isn't actually inside our kitchen. We're insanely short on counter space in the kitchen, so as tempted as I was to have pretty labelled jars on the counter, the tiny space left on the shelf beside the microwave won!Truth be told - I did this weeks ago, but it didn't turn out the way I had hoped, and that was entirely my fault. I tried too hard to make the writing on the labels seem like my regular handwriting, and I don't even like my own handwriting, so naturally I hated the way it looked. Of course I'm going to share that with you!
 So that's what the shelf looked like for the last few weeks. It only really bothered me for a few days, but every time I thought about other people seeing them, I felt uneasy. Yes, I know how silly that may seem, but in this life we have control over very, very few things. I am someone who likes to control everything, and suddenly this blog post has turned into a therapy session? Anyway, I can control this, so I did! I changed it. Want to see how much better it looks?
If you guessed that this is not my handwriting, you are correct! I cheated... I found a font I really liked (2 actually) and I printed out the words and transferred them onto the labels (step 1). How? I cut them all out, rubbed chalk on the back of the paper (step 2), grabbed my labels (step 3), taped them onto the labels (step 4), and transferred the words by tracing around them with a pen (step 5). Ever done this before? I used to do this as a kid all the time when tracing wasn't an option, but with lead rubbed on the back of the paper instead. Anyway, what I'm saying is this is a tried and true method here folks! Check it out:
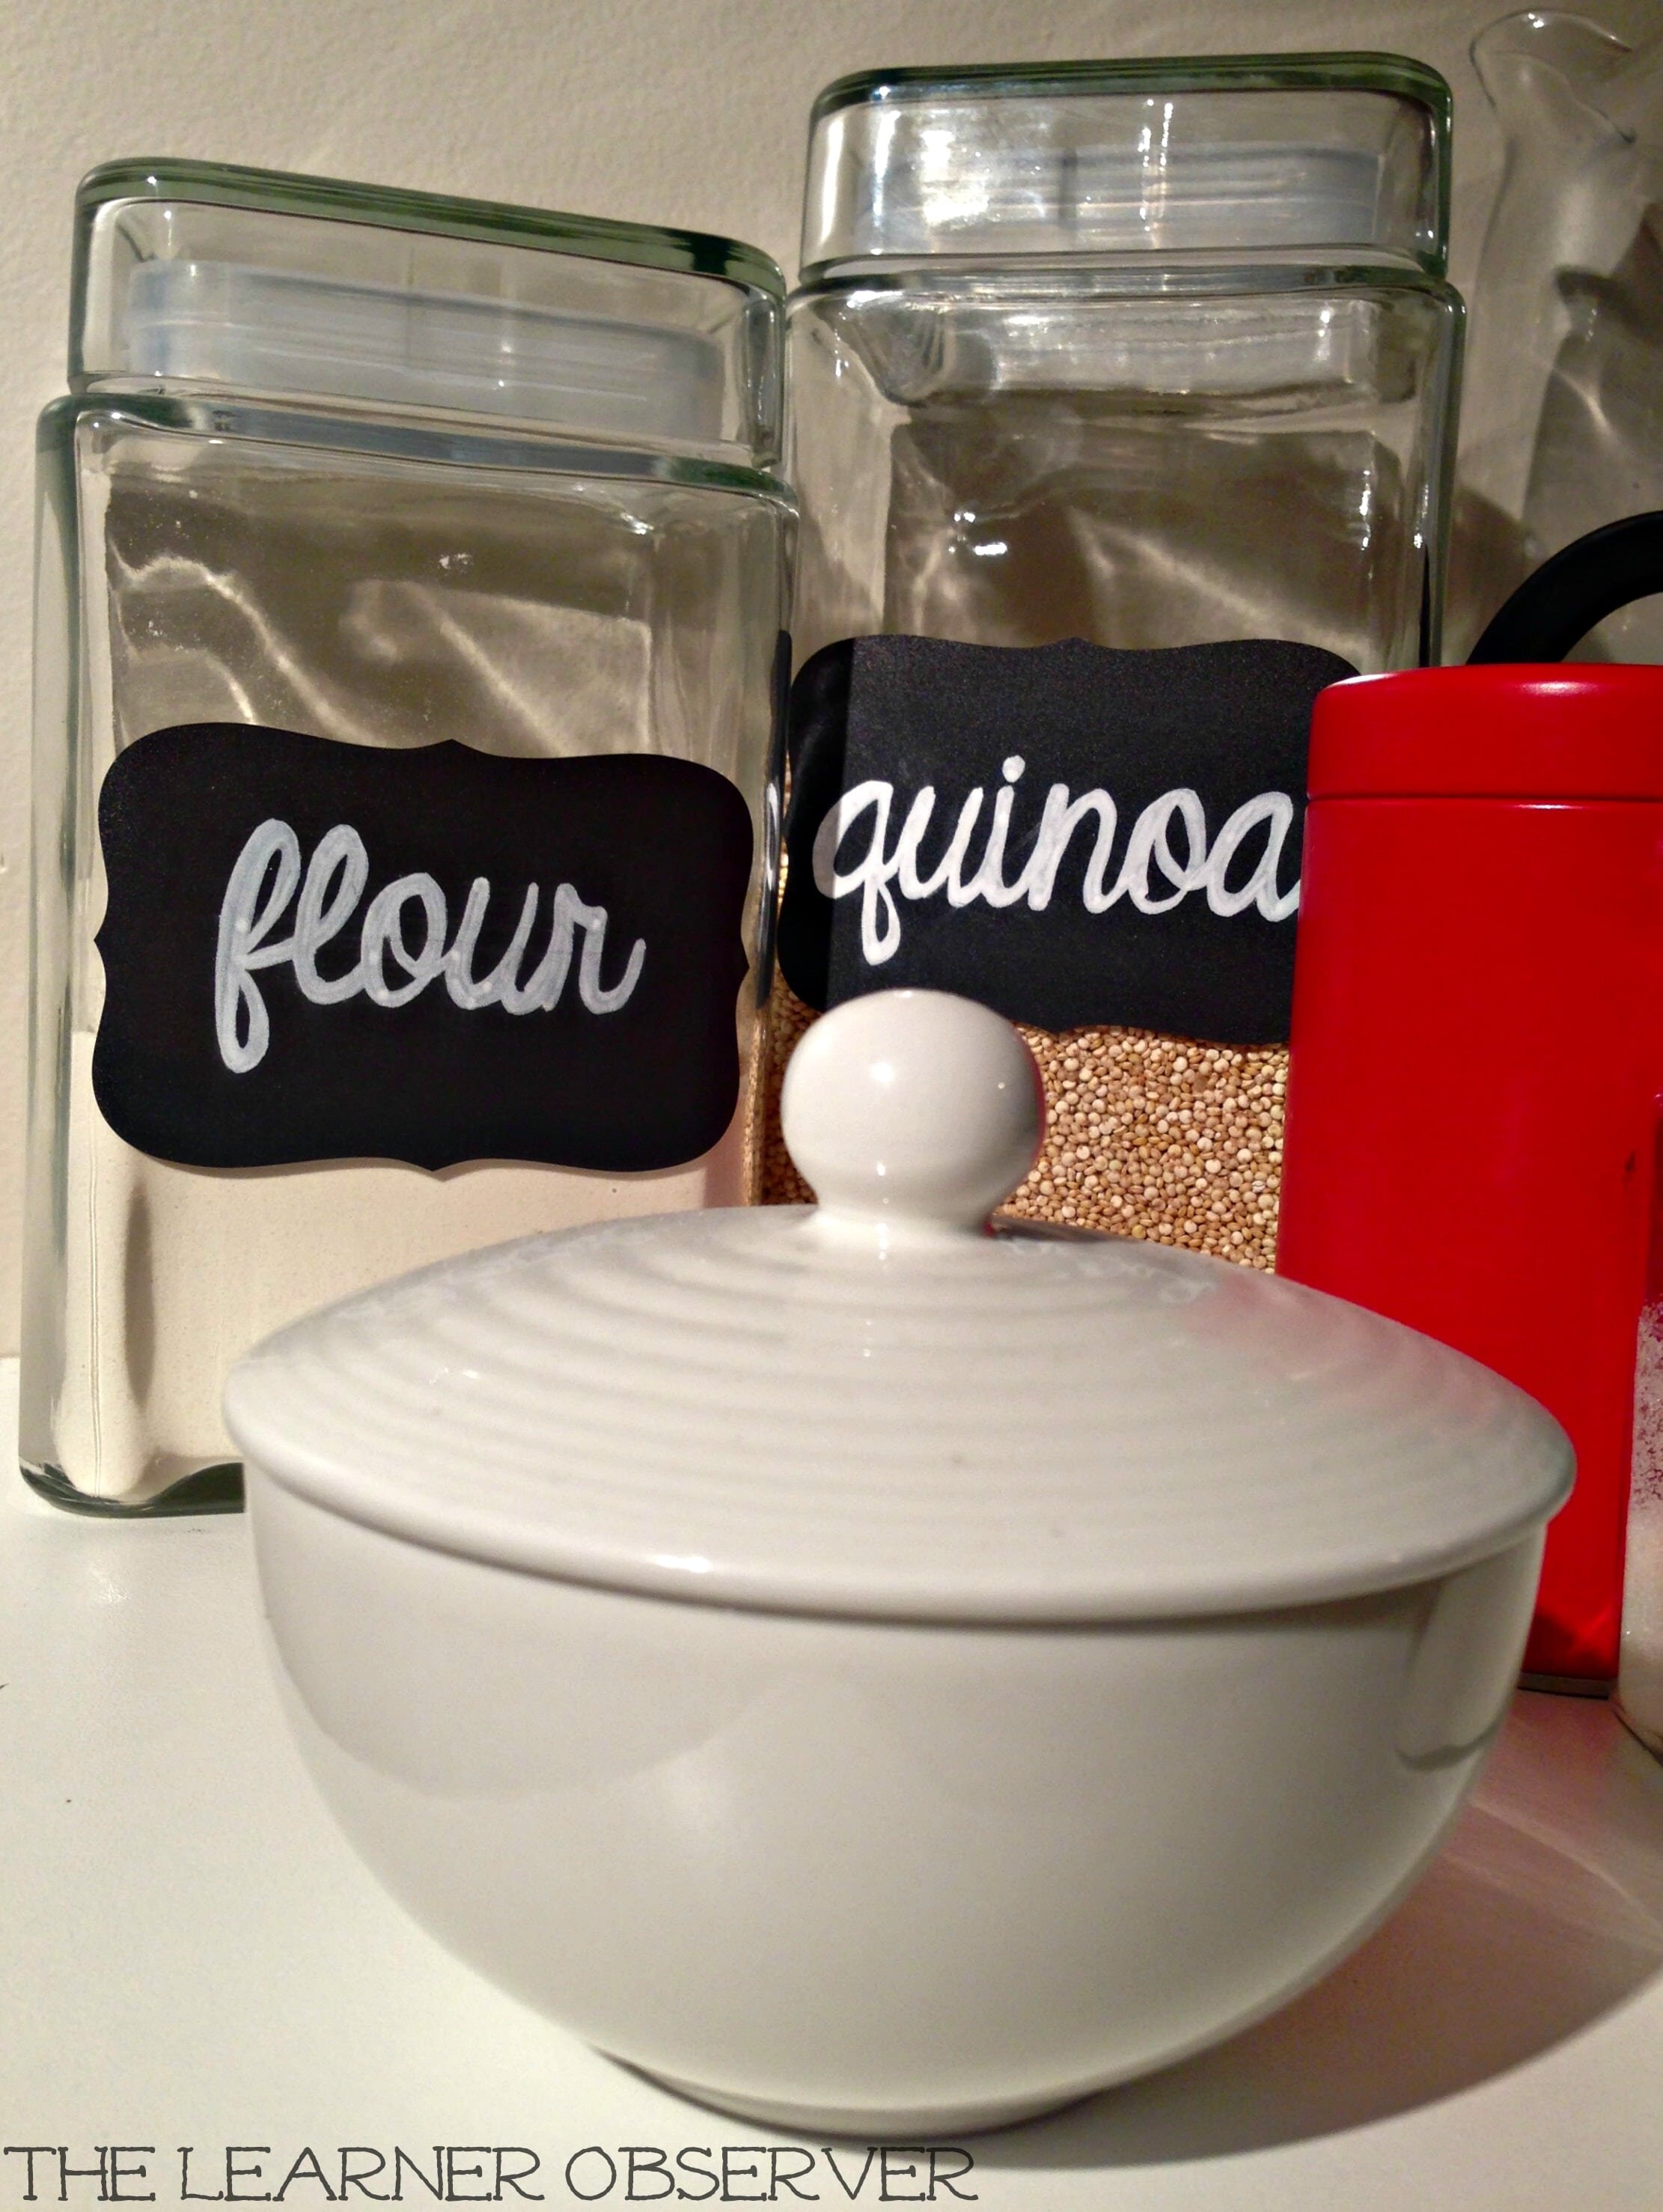
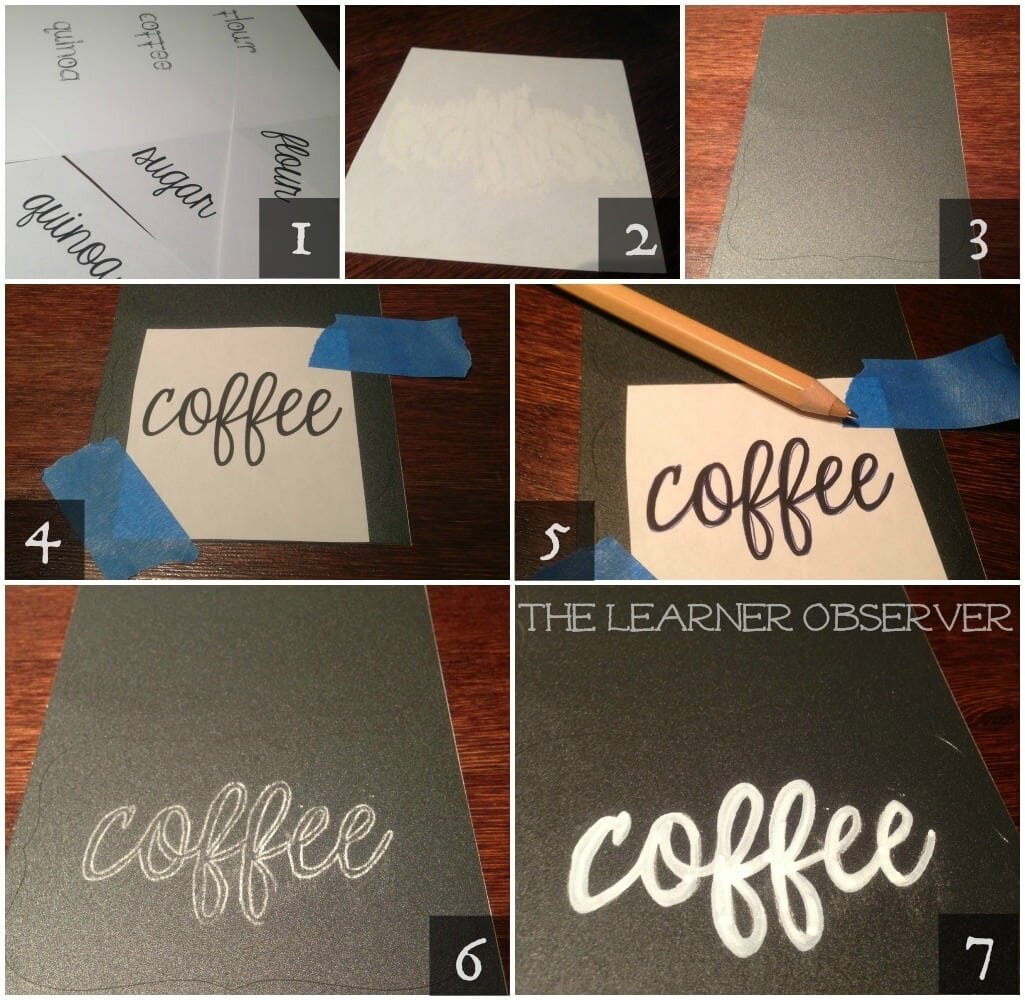 Then I sat back for a second and admired how amazingly this had worked (step 6)!! I went over the writing with a marker because I don't want these to rub off easily since they will be handled often. The Dry-Erase Crayons I used the first time were actually pretty fantastic as well, but I'd rather use them for other projects, plus I would have had to sharpen them about 15 times to get through these.
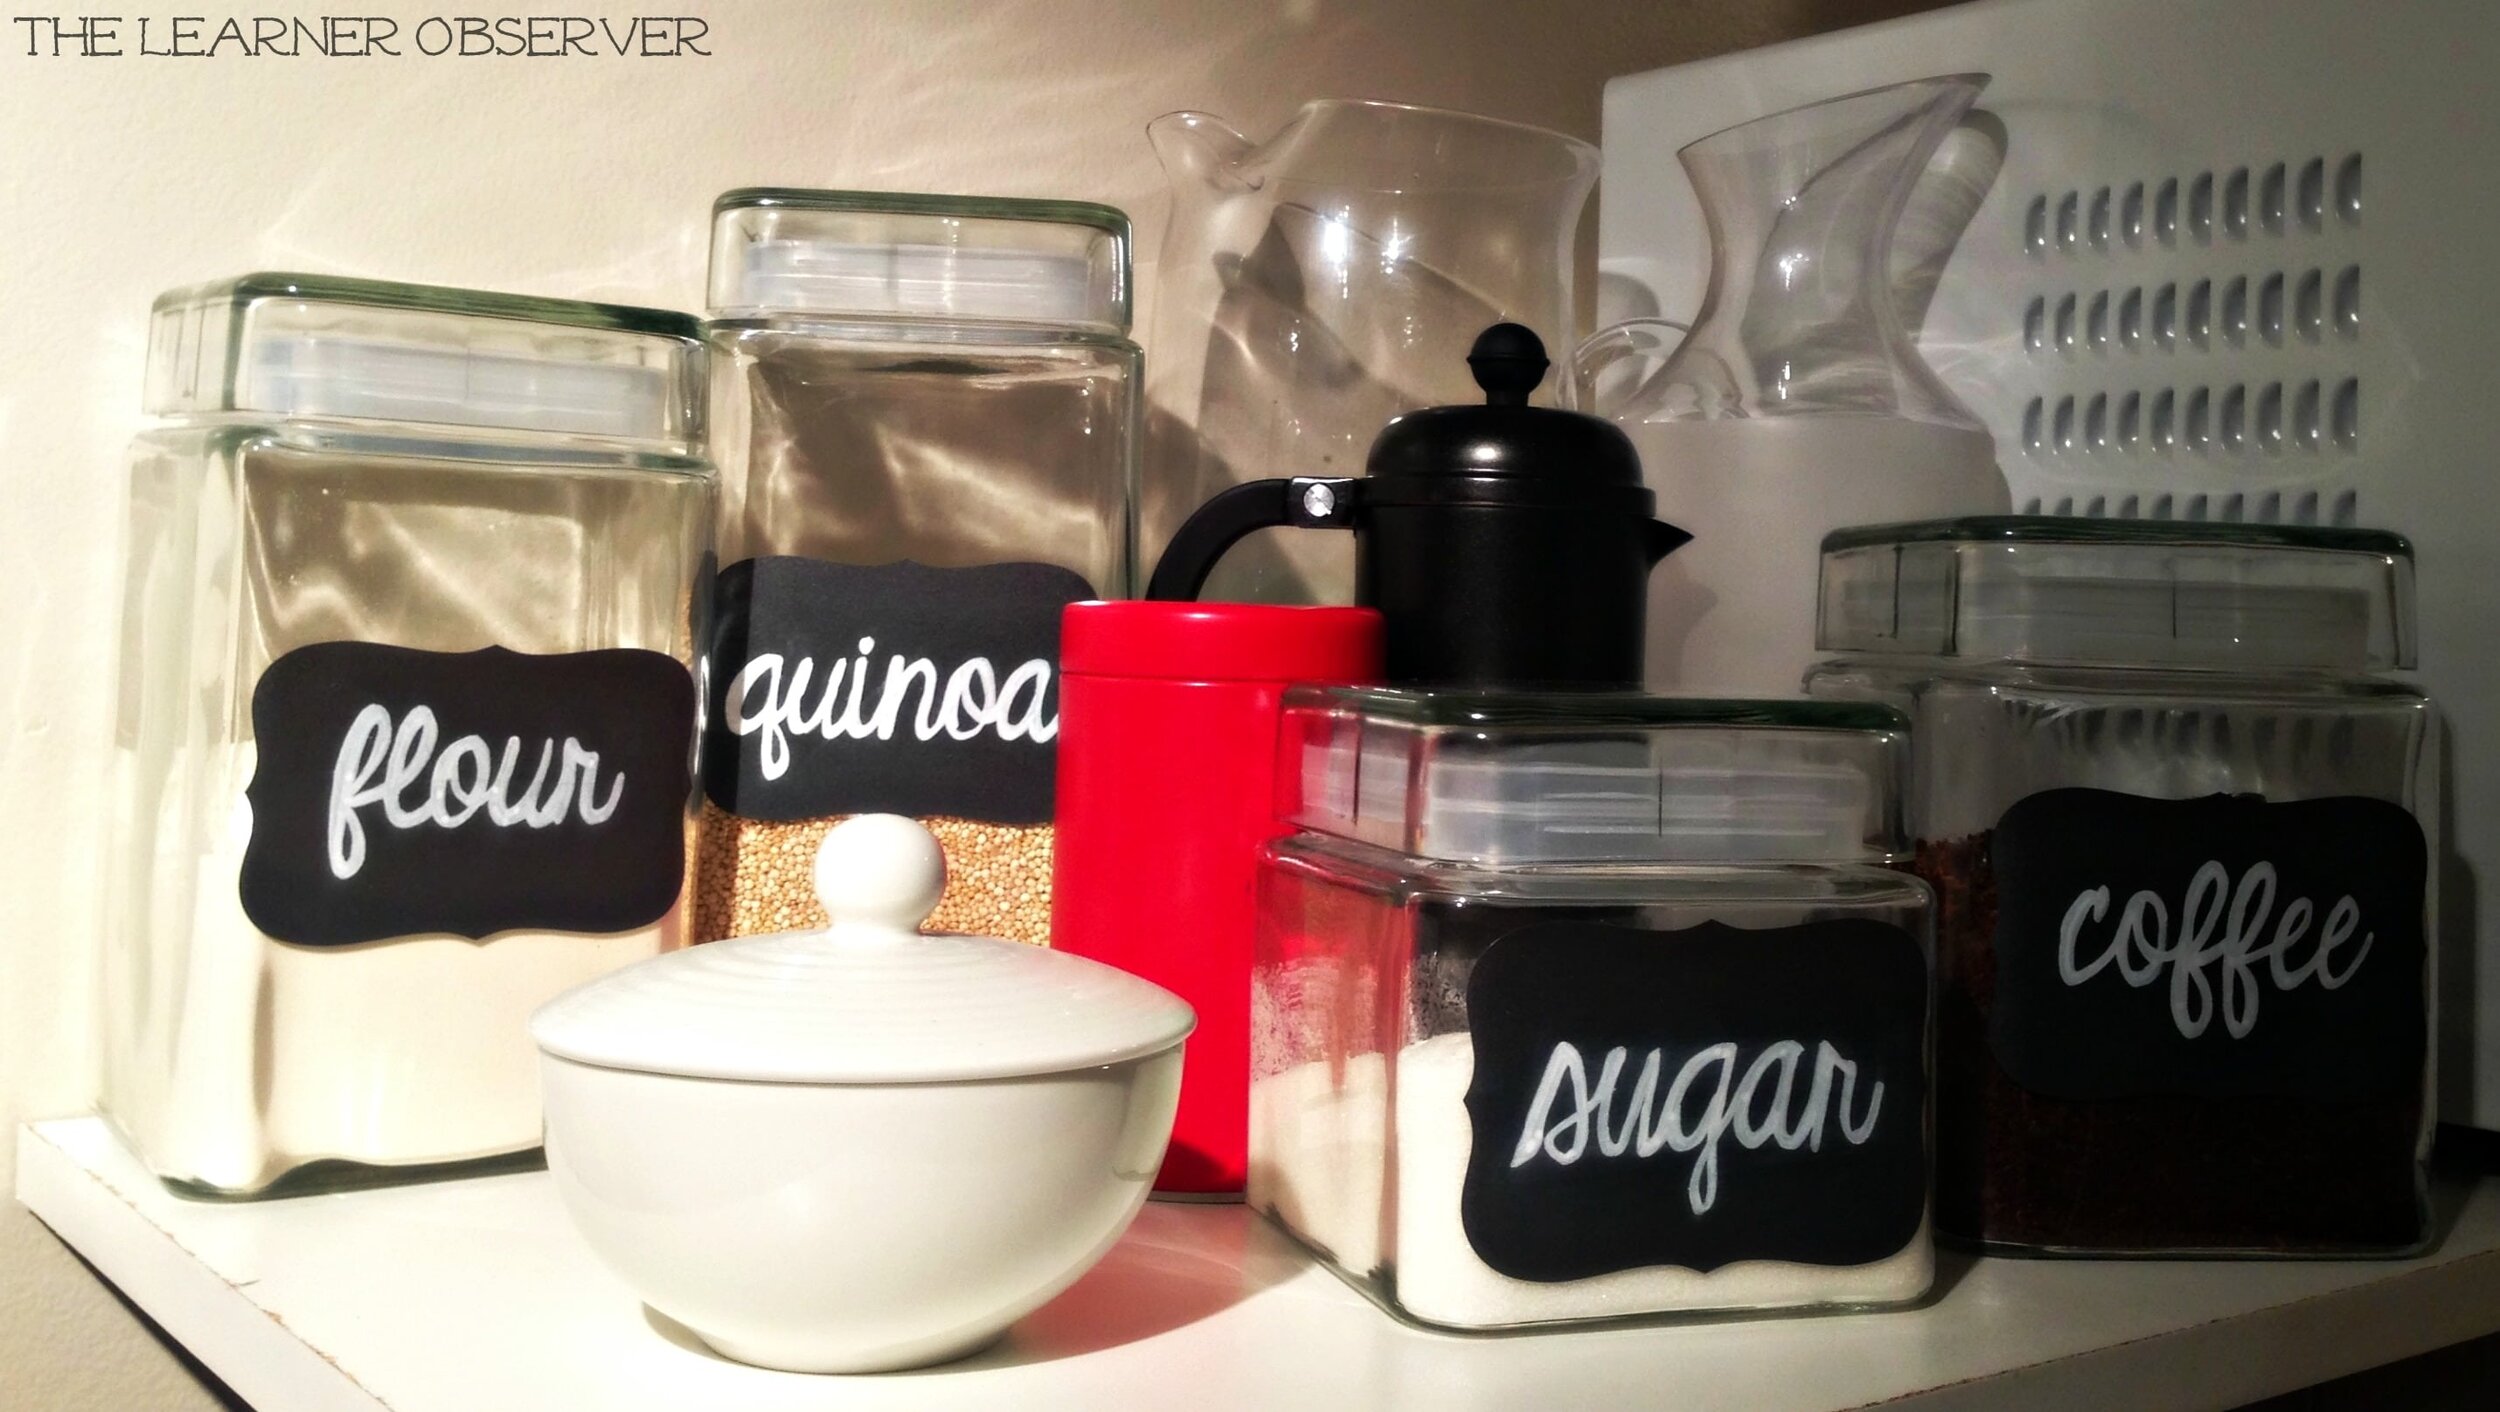 And that's what the shelf looks like now. It's so much better I actually WANT to look at it all the time! And I'm super happy with how the marker looks too. This is going to be a technique I'm sure I'll use a lot once the chalkboard I have been working on for the living room is complete.
I do love The Nester's motto "it doesn't have to be perfect to be beautiful", and this is by no means perfect, but it's much closer to it now the words are at least straight, right?? (That was for you Cheryl and Jon, if you get to read this!):)
 Linking up at these awesome places plus Cheerios and Lattes, The 36th Avenue, Skip To My Lou, The Shabby Creek Cottage, House of Hepworths, WhipperBerry, Savvy Southern Style, and My Repurposed Life.
![]()
