5 Tips For Painting A Buffalo Check Wall

It's possible you may have seen the huge patterned wall I painted in our dining room because I'm pretty much obsessed with it and share it every chance I get! So today I thought it would be appropriate to share with you my 5 best tips for painting a buffalo check wall (or gingham) and what I learned from my experience! You can see more of this room on my Holiday Home Tour and this easy tablescape post, also!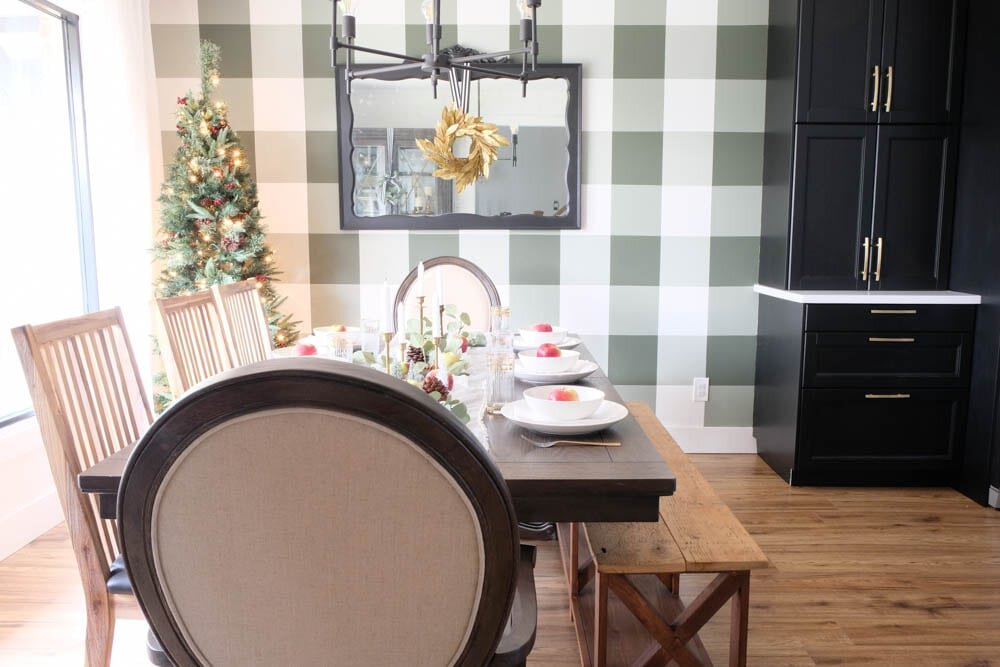
1. How many colours will you use?
This is an important question to ask yourself because you can use 3 colours (a base colour, a light colour and a dark colour) or you can do what I did, and use 4 colours (a base colour, a light colour, a medium colour and a dark colour). These are the shades of green I used from Benjamin Moore: 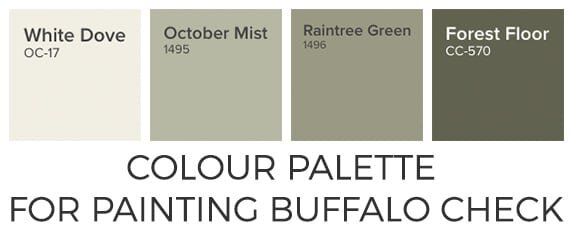 In the spirit of being helpful and honest, I would either have used just 3 colours or I would have gone for a colour one shade darker than Raintree Green for the middle tone. It's a very subtle difference when you look at the whole wall.
2. Width matters, height doesn't
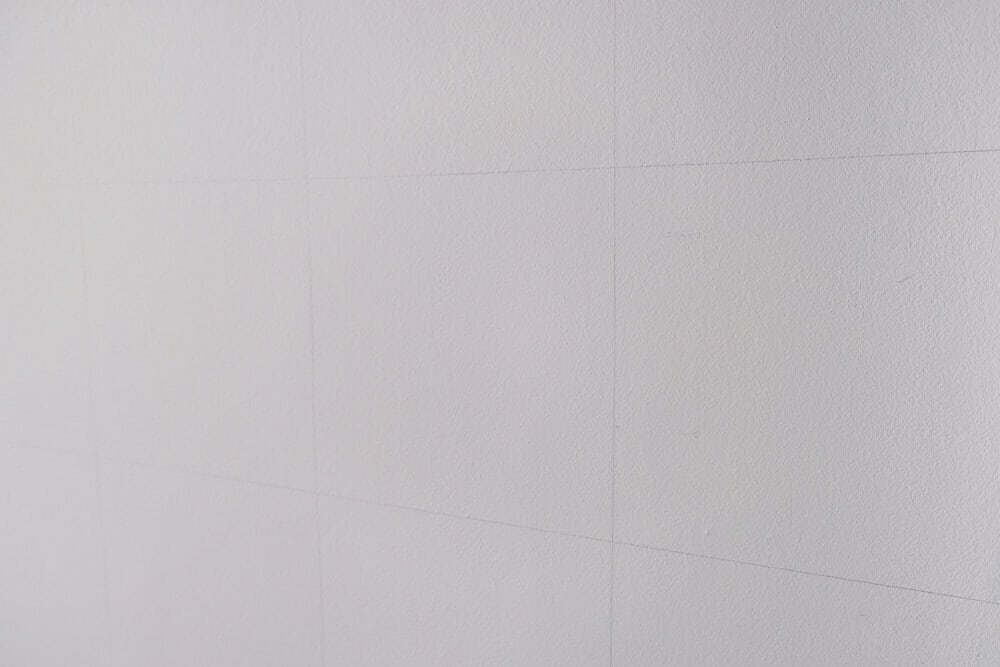
What do I mean by this? I mean that if you want your wall to have a complete pattern, meaning the pattern flows perfectly from one side to the other, measuring the width accurately is most important. See how I didn't have to worry about having the pattern stop on either side of my wall? That's because I have a wall that is 123" wide (also known as 10' 3"), and so instead of making all of my squares exactly 10" wide, I made them 10 3/16", ensuring a perfect pattern!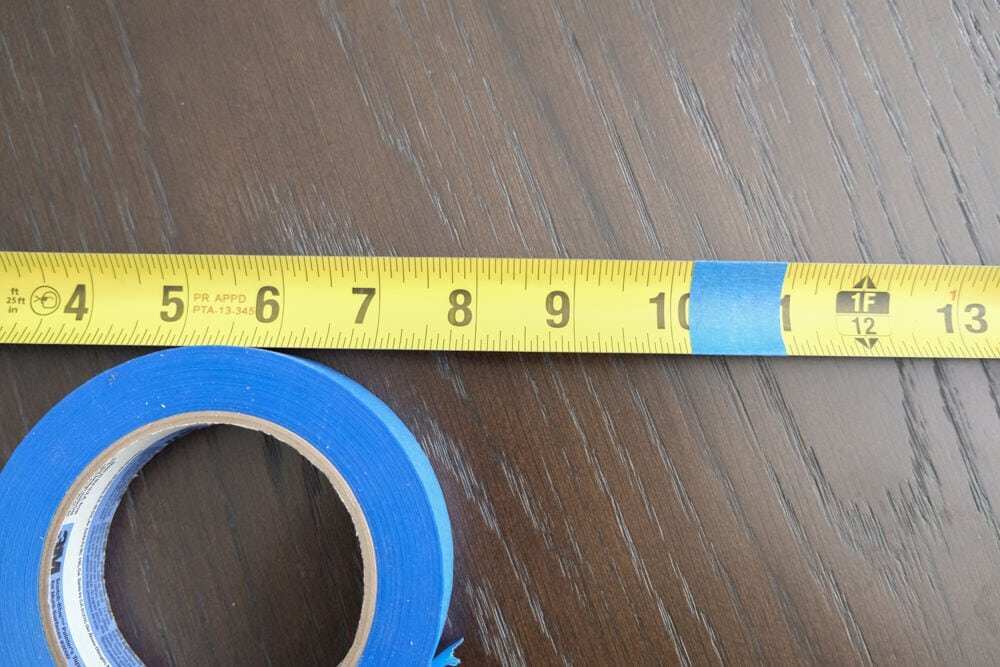
3. Use a level/ruler
Using a good measuring tape and marking my exact measurement on it with painter's tape (as you can see above) was very helpful. Starting from the top of the wall, I drew small dots every 2-3' and connected them by drawing the grid using a 4' level. If the pattern got cut off at the bottom, it's less of a concern because it'll be mostly covered by furniture anyway.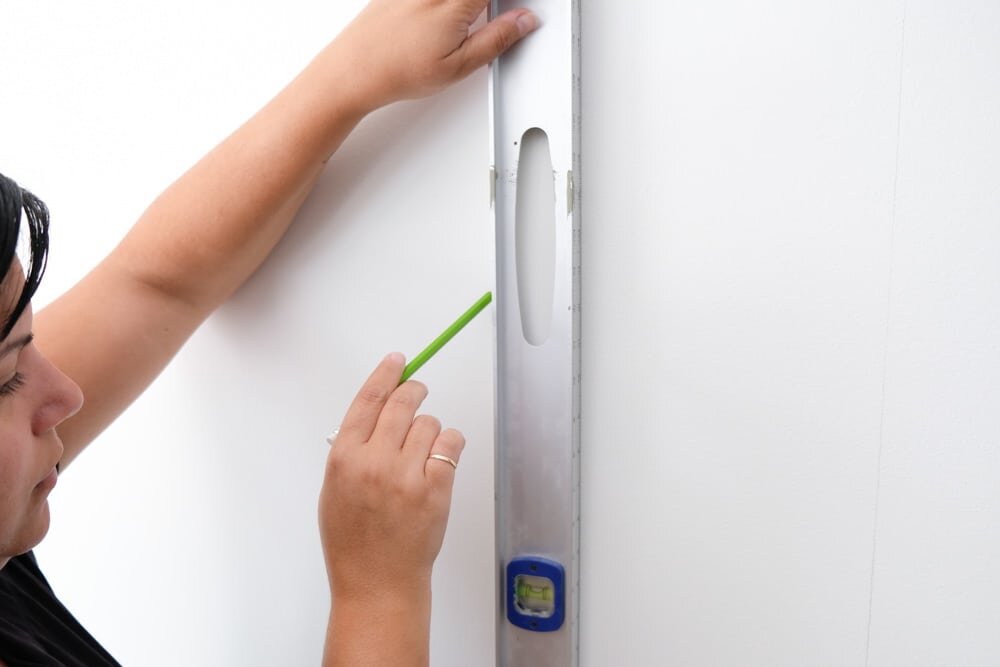
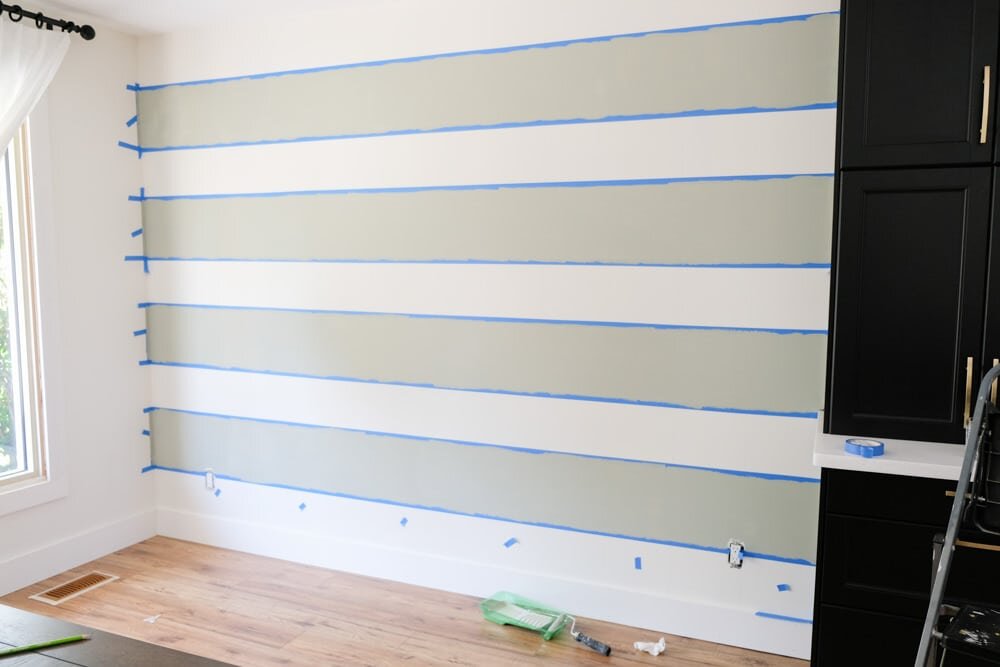
4. Use quality painter's tape
There's no point in going with the cheap stuff for this project, believe me! Starting with the lightest shade of green, I taped off every other horizontal line, putting pressure on the tape as I went along. If you wear the roll of tape as a bracelet, it makes the taping process easier and means you can do each line with just one piece of tape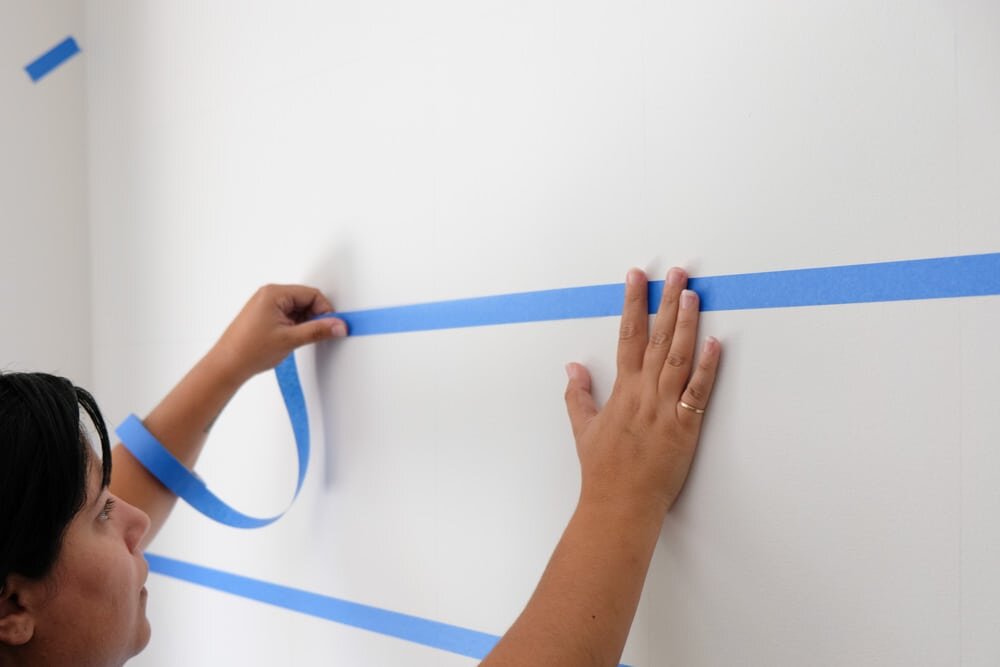 I also used the tape to help me see where I needed to paint and the next colour would go by putting little pieces along the baseboard.
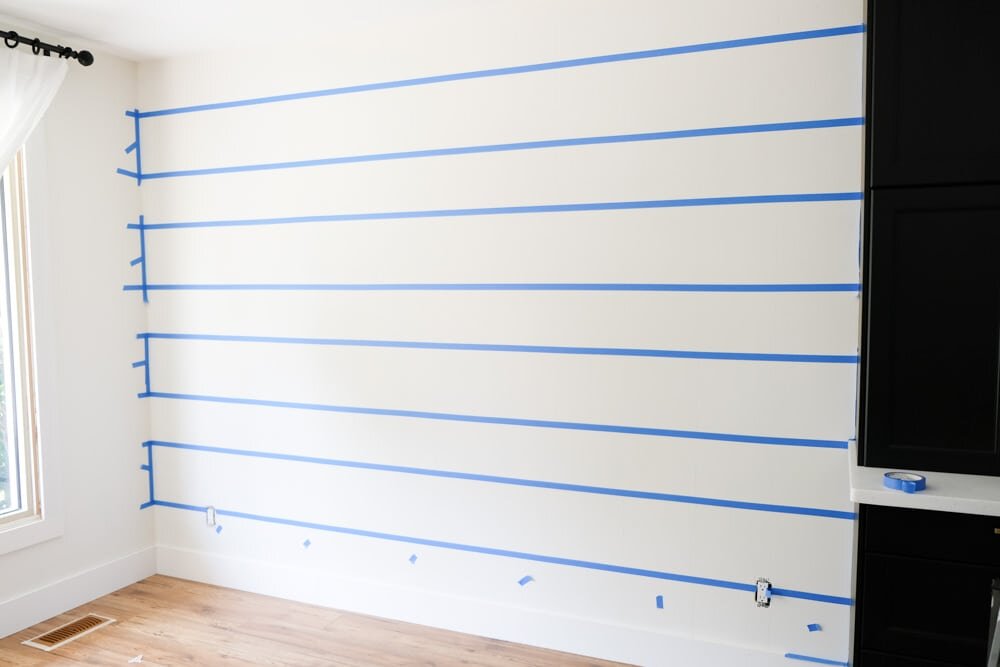
 I removed the painter's tape almost immediately after painting then waited about 24 hours before the next coat would go on. Here's a tip about painter's tape: most high-quality brands will have different grades. Get the tape meant for fresh paint and you'll ensure your fresh paint doesn't get peeled off!
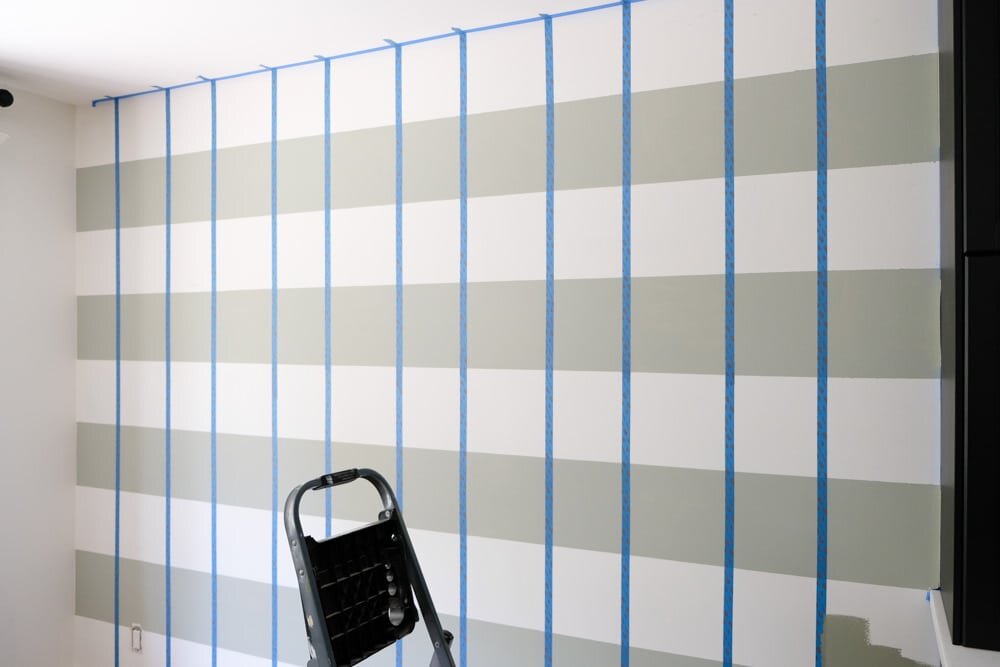 I didn't paint the vertical stripes all the way down because there the light and middle tones meet is where the darkest shade will go.
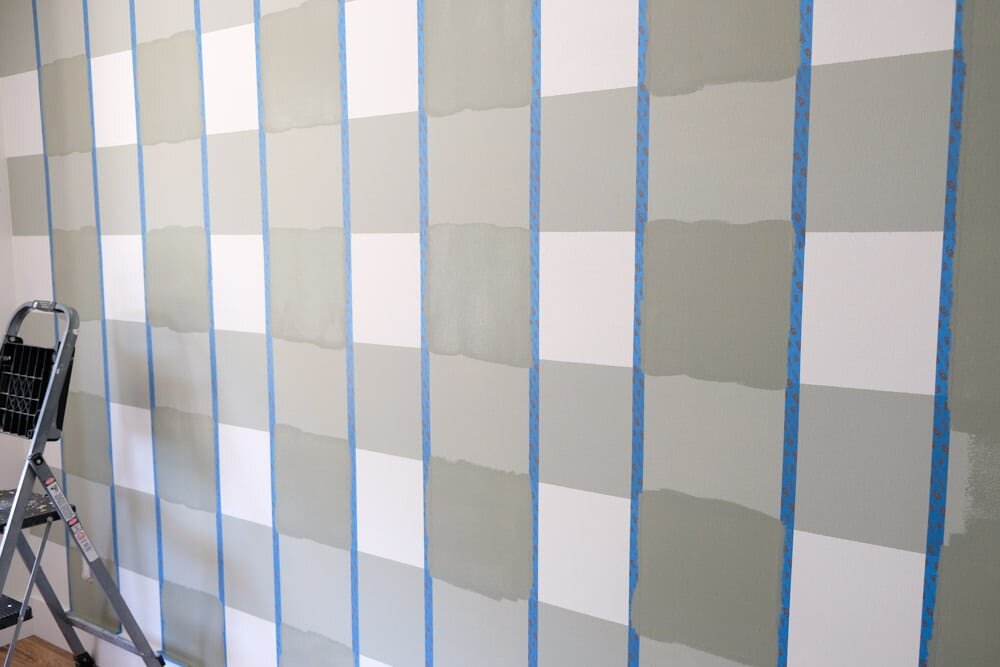 Finally, another 24 hours later (though truthfully, I only waited for a few), tape off those last few squares, and you're all set!
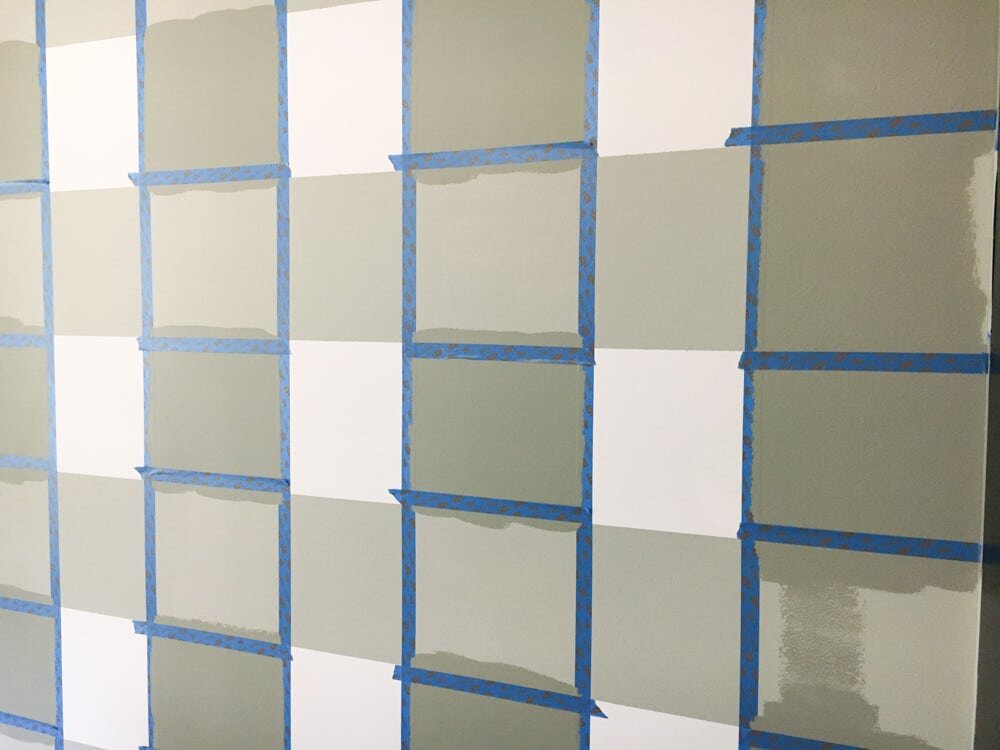
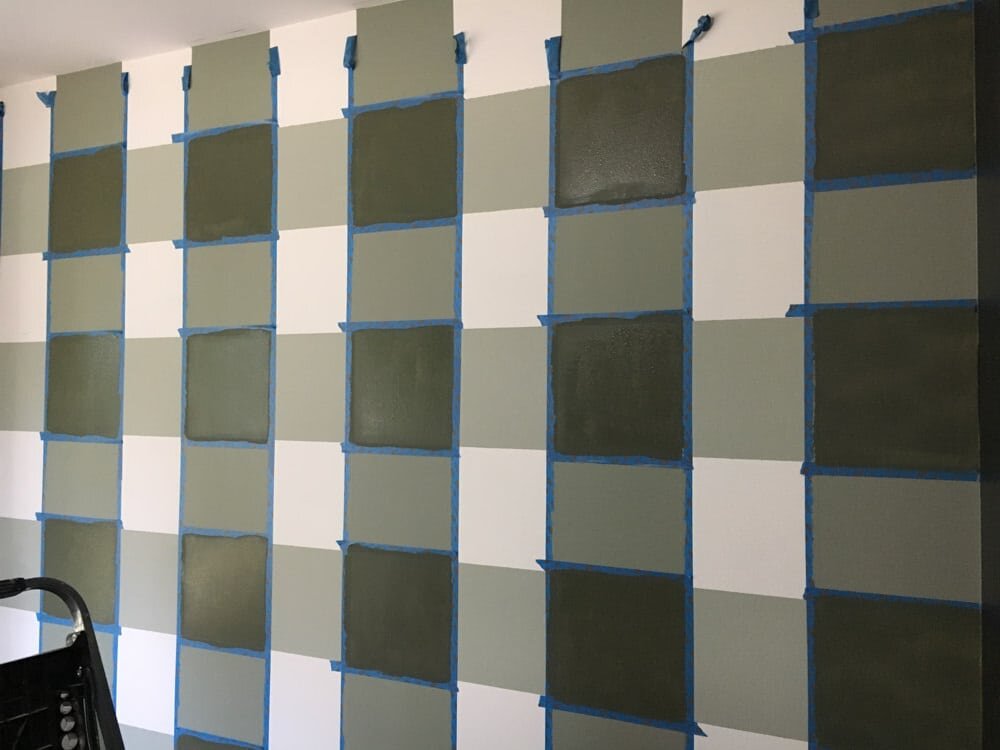 Peel off the tape immediately, and stand back and admire your beautiful handiwork.
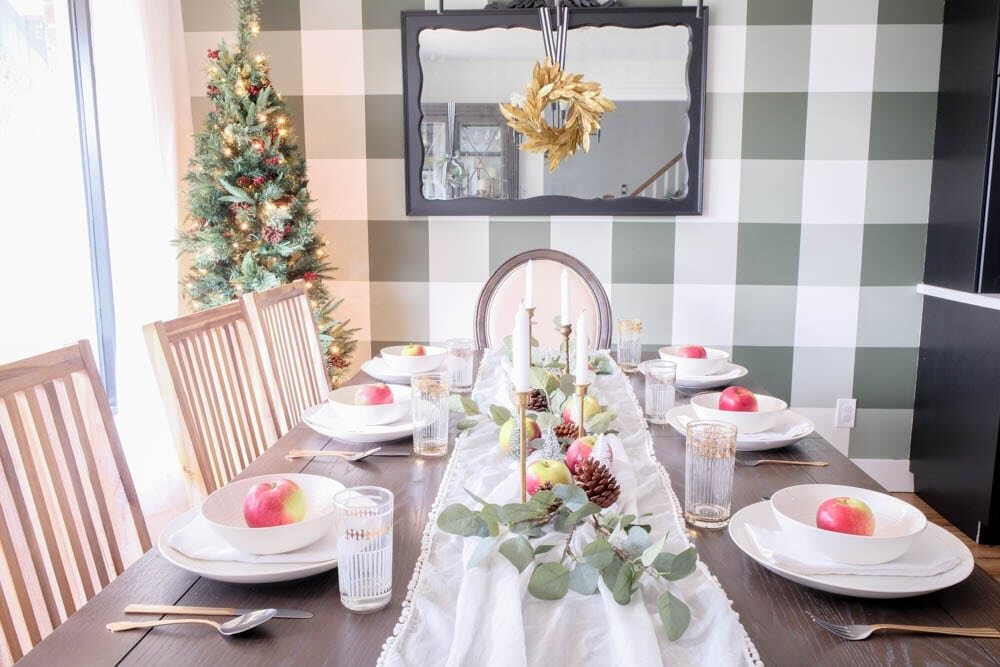
5. Use a damp washcloth
This is an extra step you can take in making sure you get absolutely zero bleeding happening from the paint. It won't take very long and is absolutely worth it. Ready? Go over your tape (before painting) with a damp washcloth. This is meant to activate the glue and make the tape stick even more to the wall, ensuring no bleeding. I learned about this from my friend Gemma over on The Sweetest Digs! If you'd like some more information on how to paint a Buffalo Check wall, you can also see these tutorials from Classy Clutter and Better Homes & Gardens because having information from multiple sources is never a bad thing, right?Definitely let me know if there are any questions I can answer about this for you, and if you try this out yourself, tag me on Instagram or email me! I love hearing about other people trying out things I've done, too!