A Modern Office for a Modern Man

This is a sponsored post written by me on behalf of Cricut. All opinions are 100% mine.A few weeks ago we decided to actually complete my husband's office. He has been working from home for approximately 3 years and has shuffled from the basement to the dining room table to a makeshift spare bedroom turned office until now. After a new desk, built-ins and window covering, I used my Cricut to make a piece of art that is custom for the space.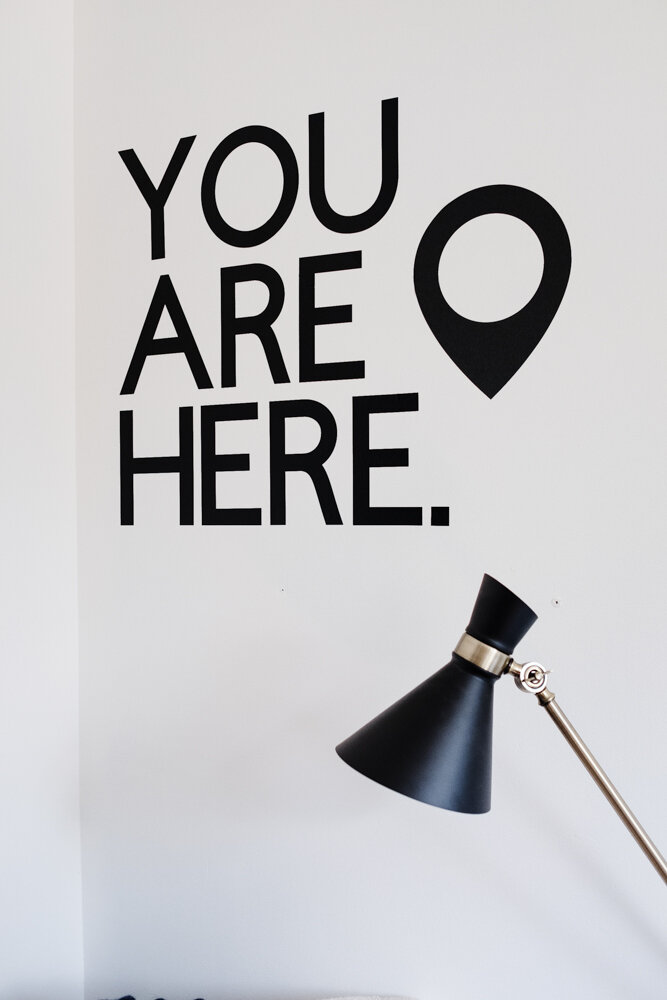 I take no credit for the actual concept - he totally came up with this himself as a way to both remind himself to be present, and to signify how far he has come since starting his own business. Pretty darn proud of his guy!Using the Cricut Air 2 was the obvious way to go, as it can cut 100 materials (like cork, iron-on, glitter paper, bonded fabric and paper) and it's so easy to set up - I have mine in a little craft area in our basement, and all I do is bring my laptop down once I have the design I want and let the machine do the work!
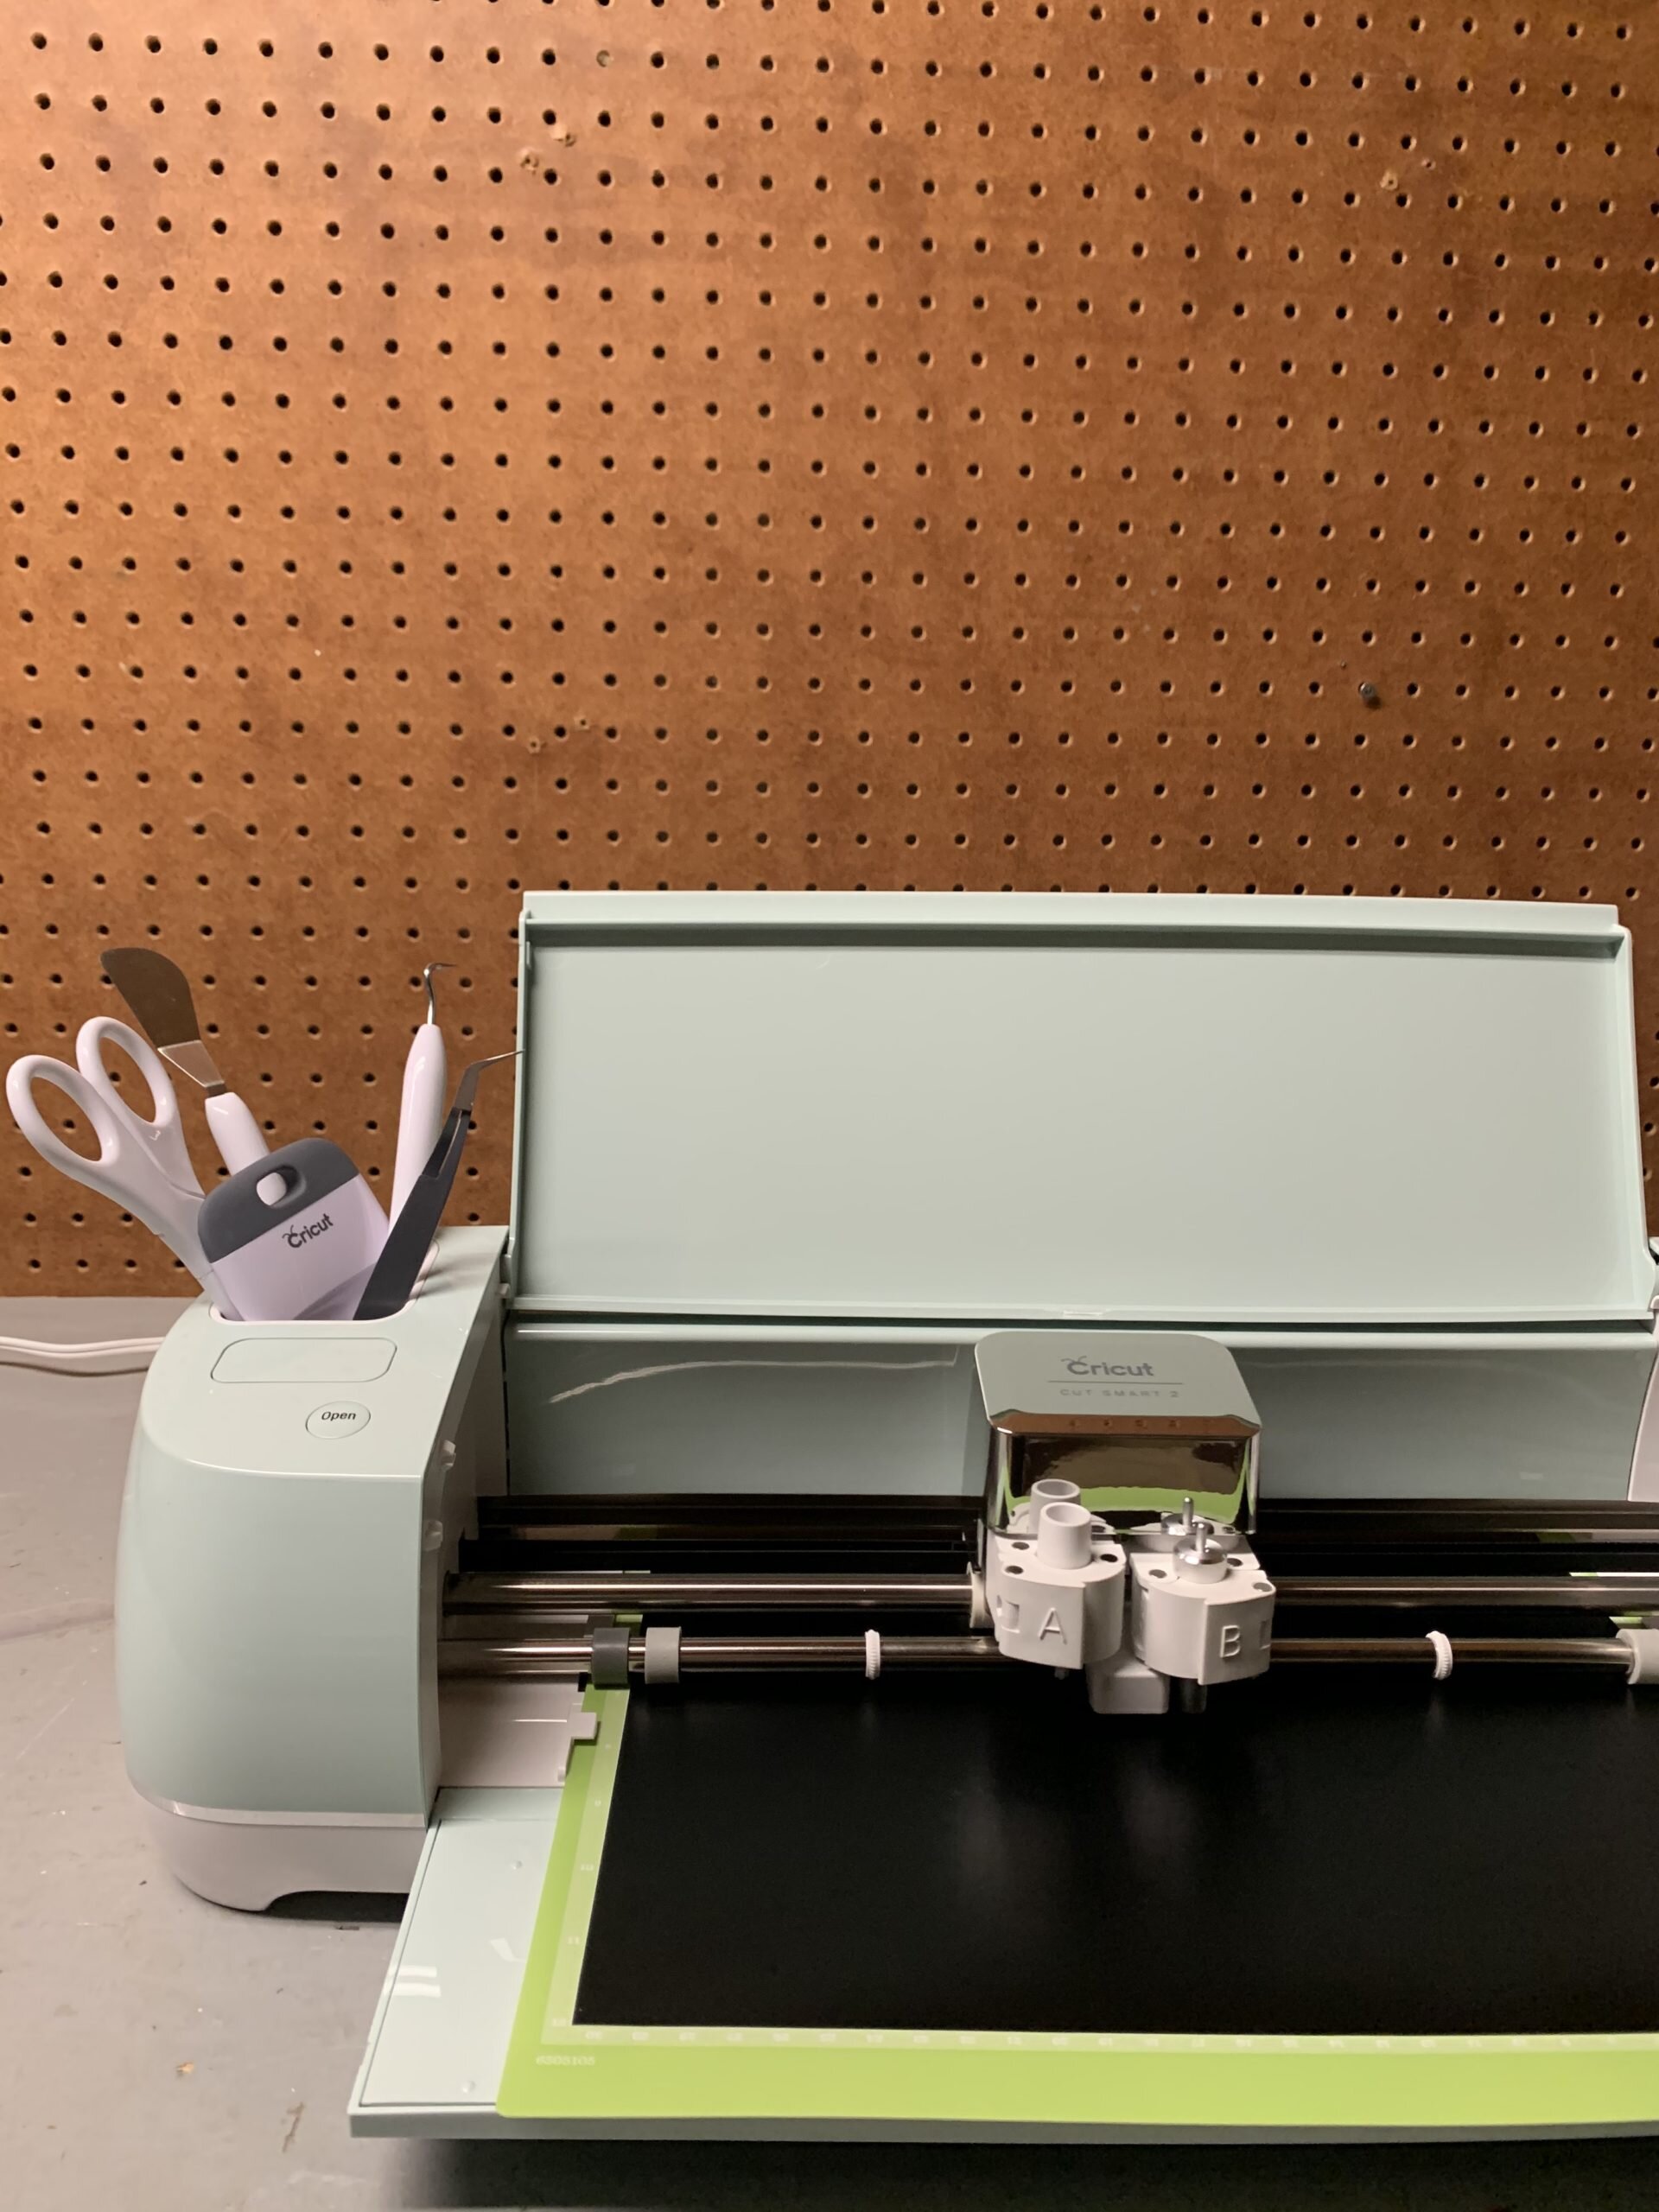 To start, I found a GPS arrow in the Cricut Design Space images and added the text, then I resized the letters to the size I needed to create the large wall decal. This is pretty straight forward once you know the size of our wall. We had about a 3-foot wide space, so making each letter about 6 inches wide would fill the space well!
 I knew I wanted the letters cut in black, but the GPS arrow needed to be something a little more special. While the letters are in removable vinyl (which, by the way, makes them so easy to put on the walls and move if needed), the arrow is in a True Brushed vinyl.
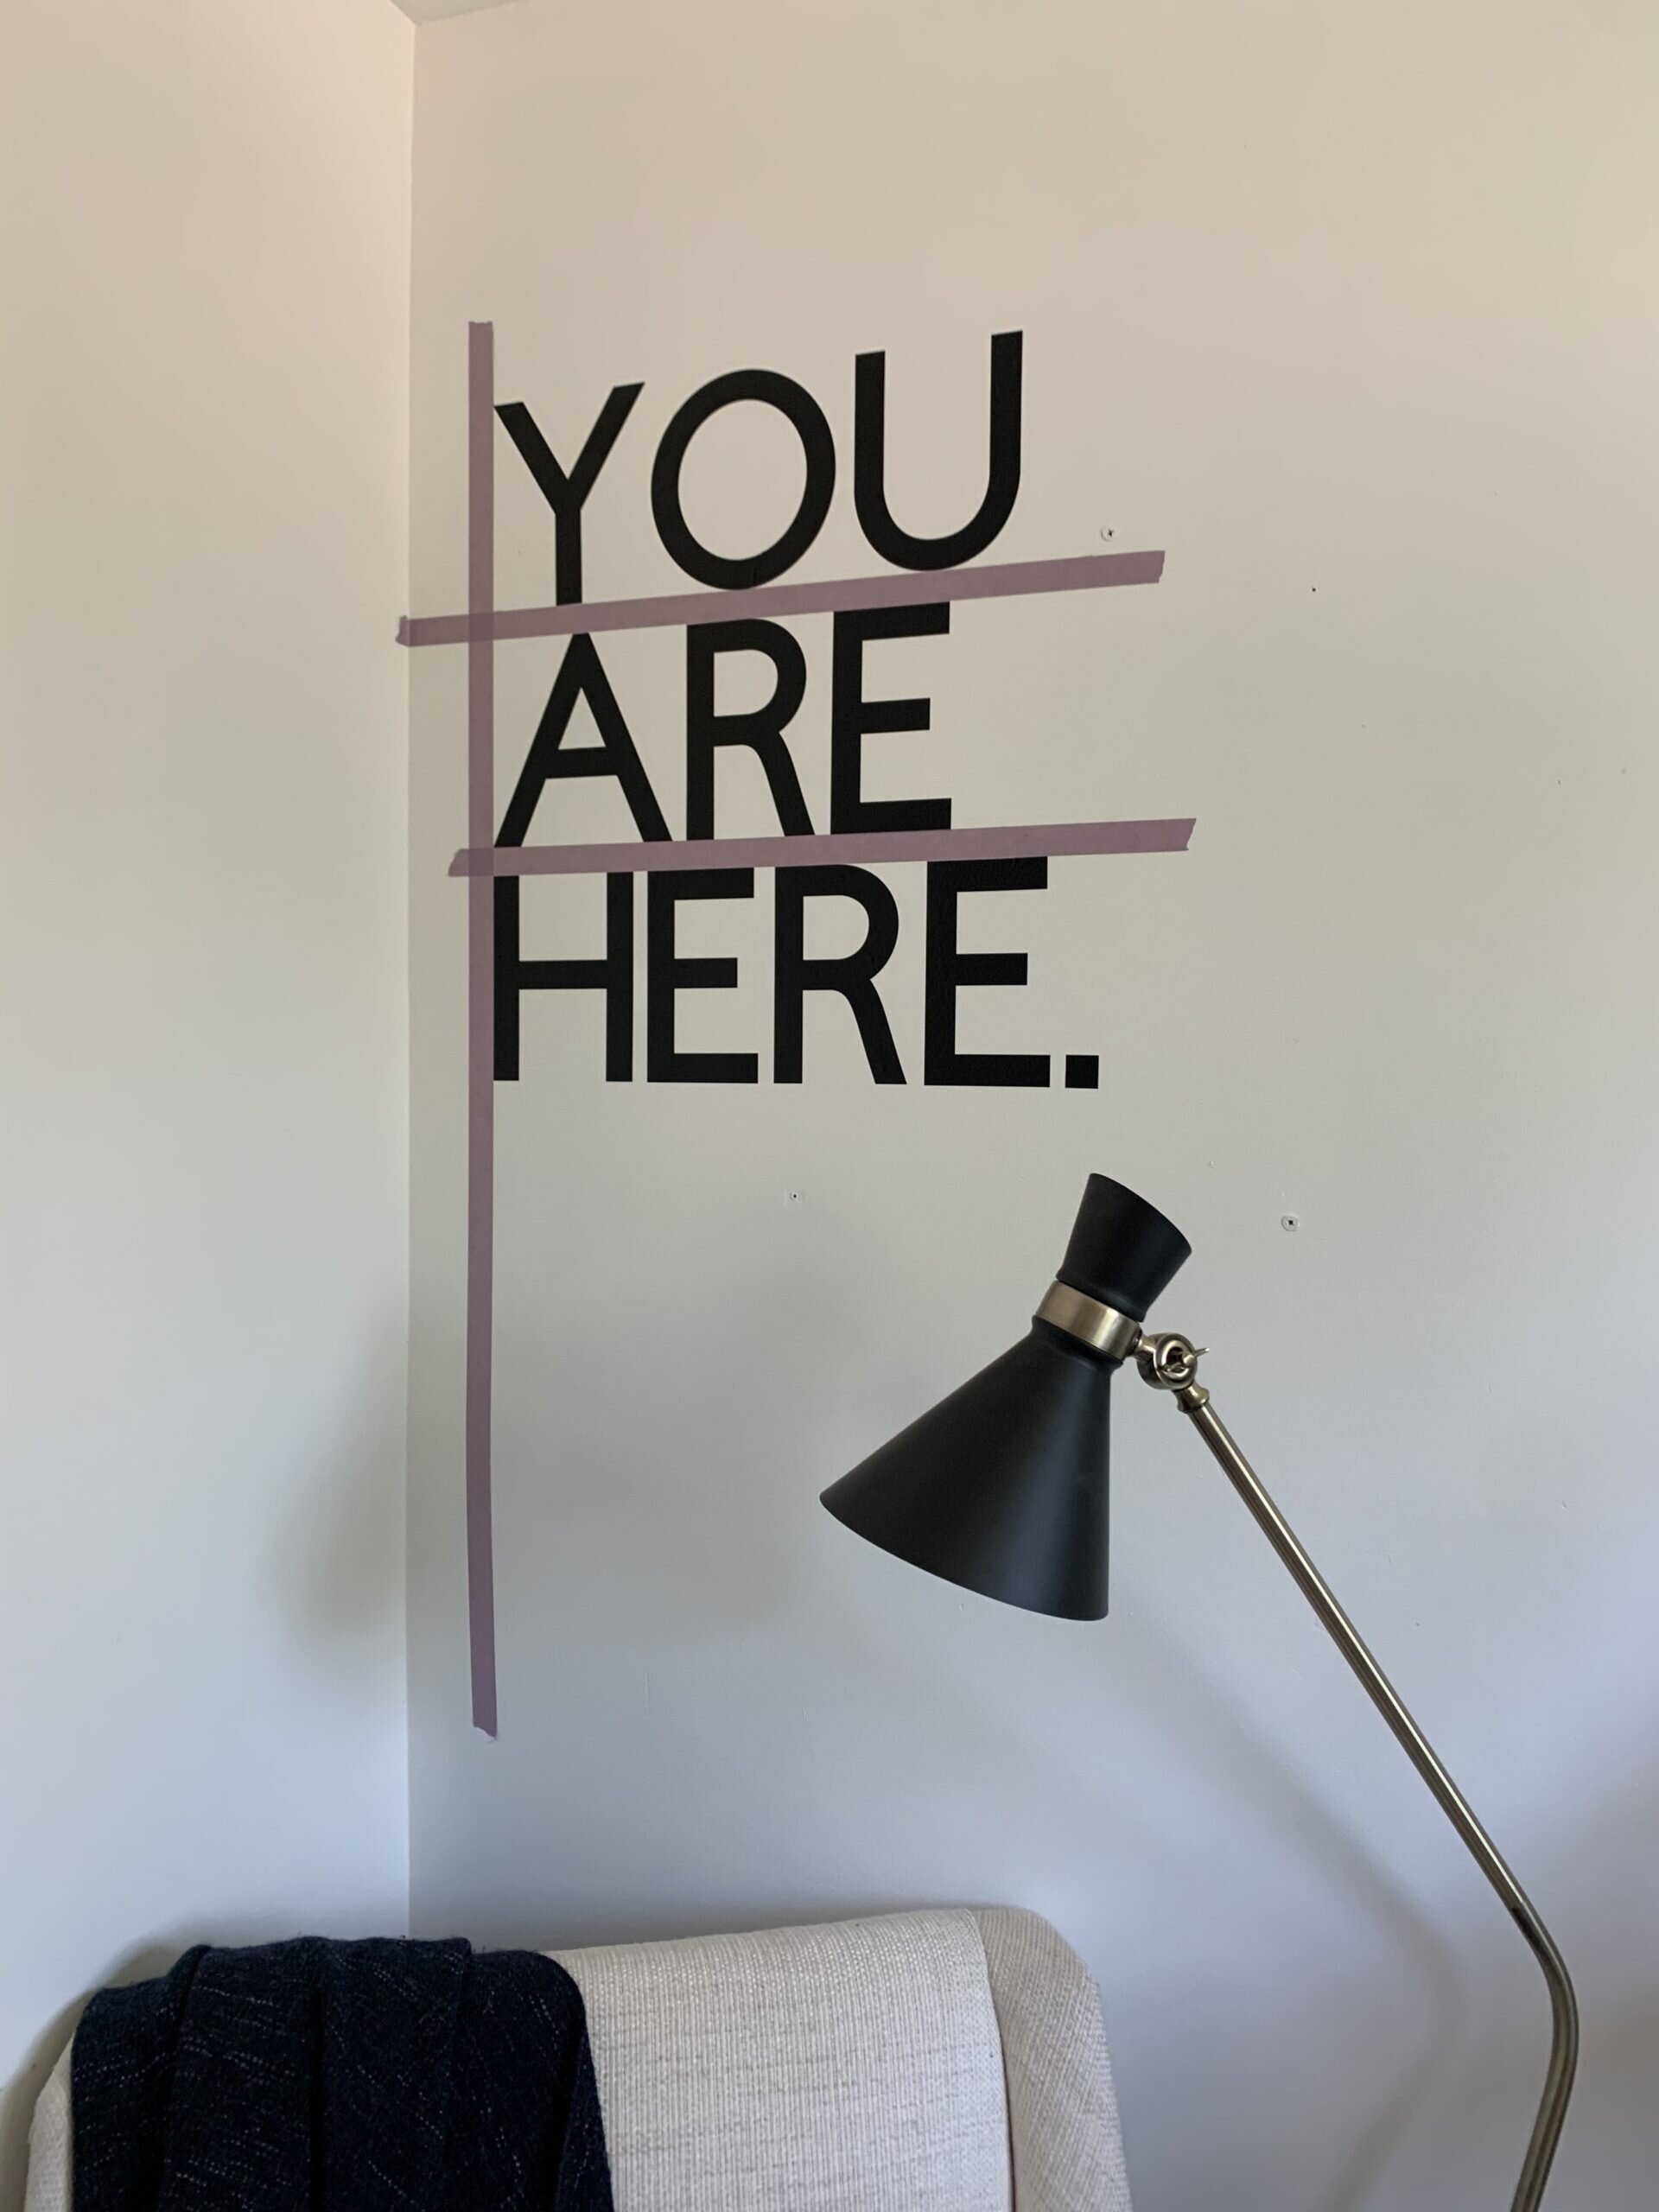
 Before cutting, I made sure to detach the letters so that I can make the most of the vinyl. I used a level to draw make a couple of marks on the wall, but rather than drawing on the wall, I used painter's tape to make the straight line to add the letters on top of.
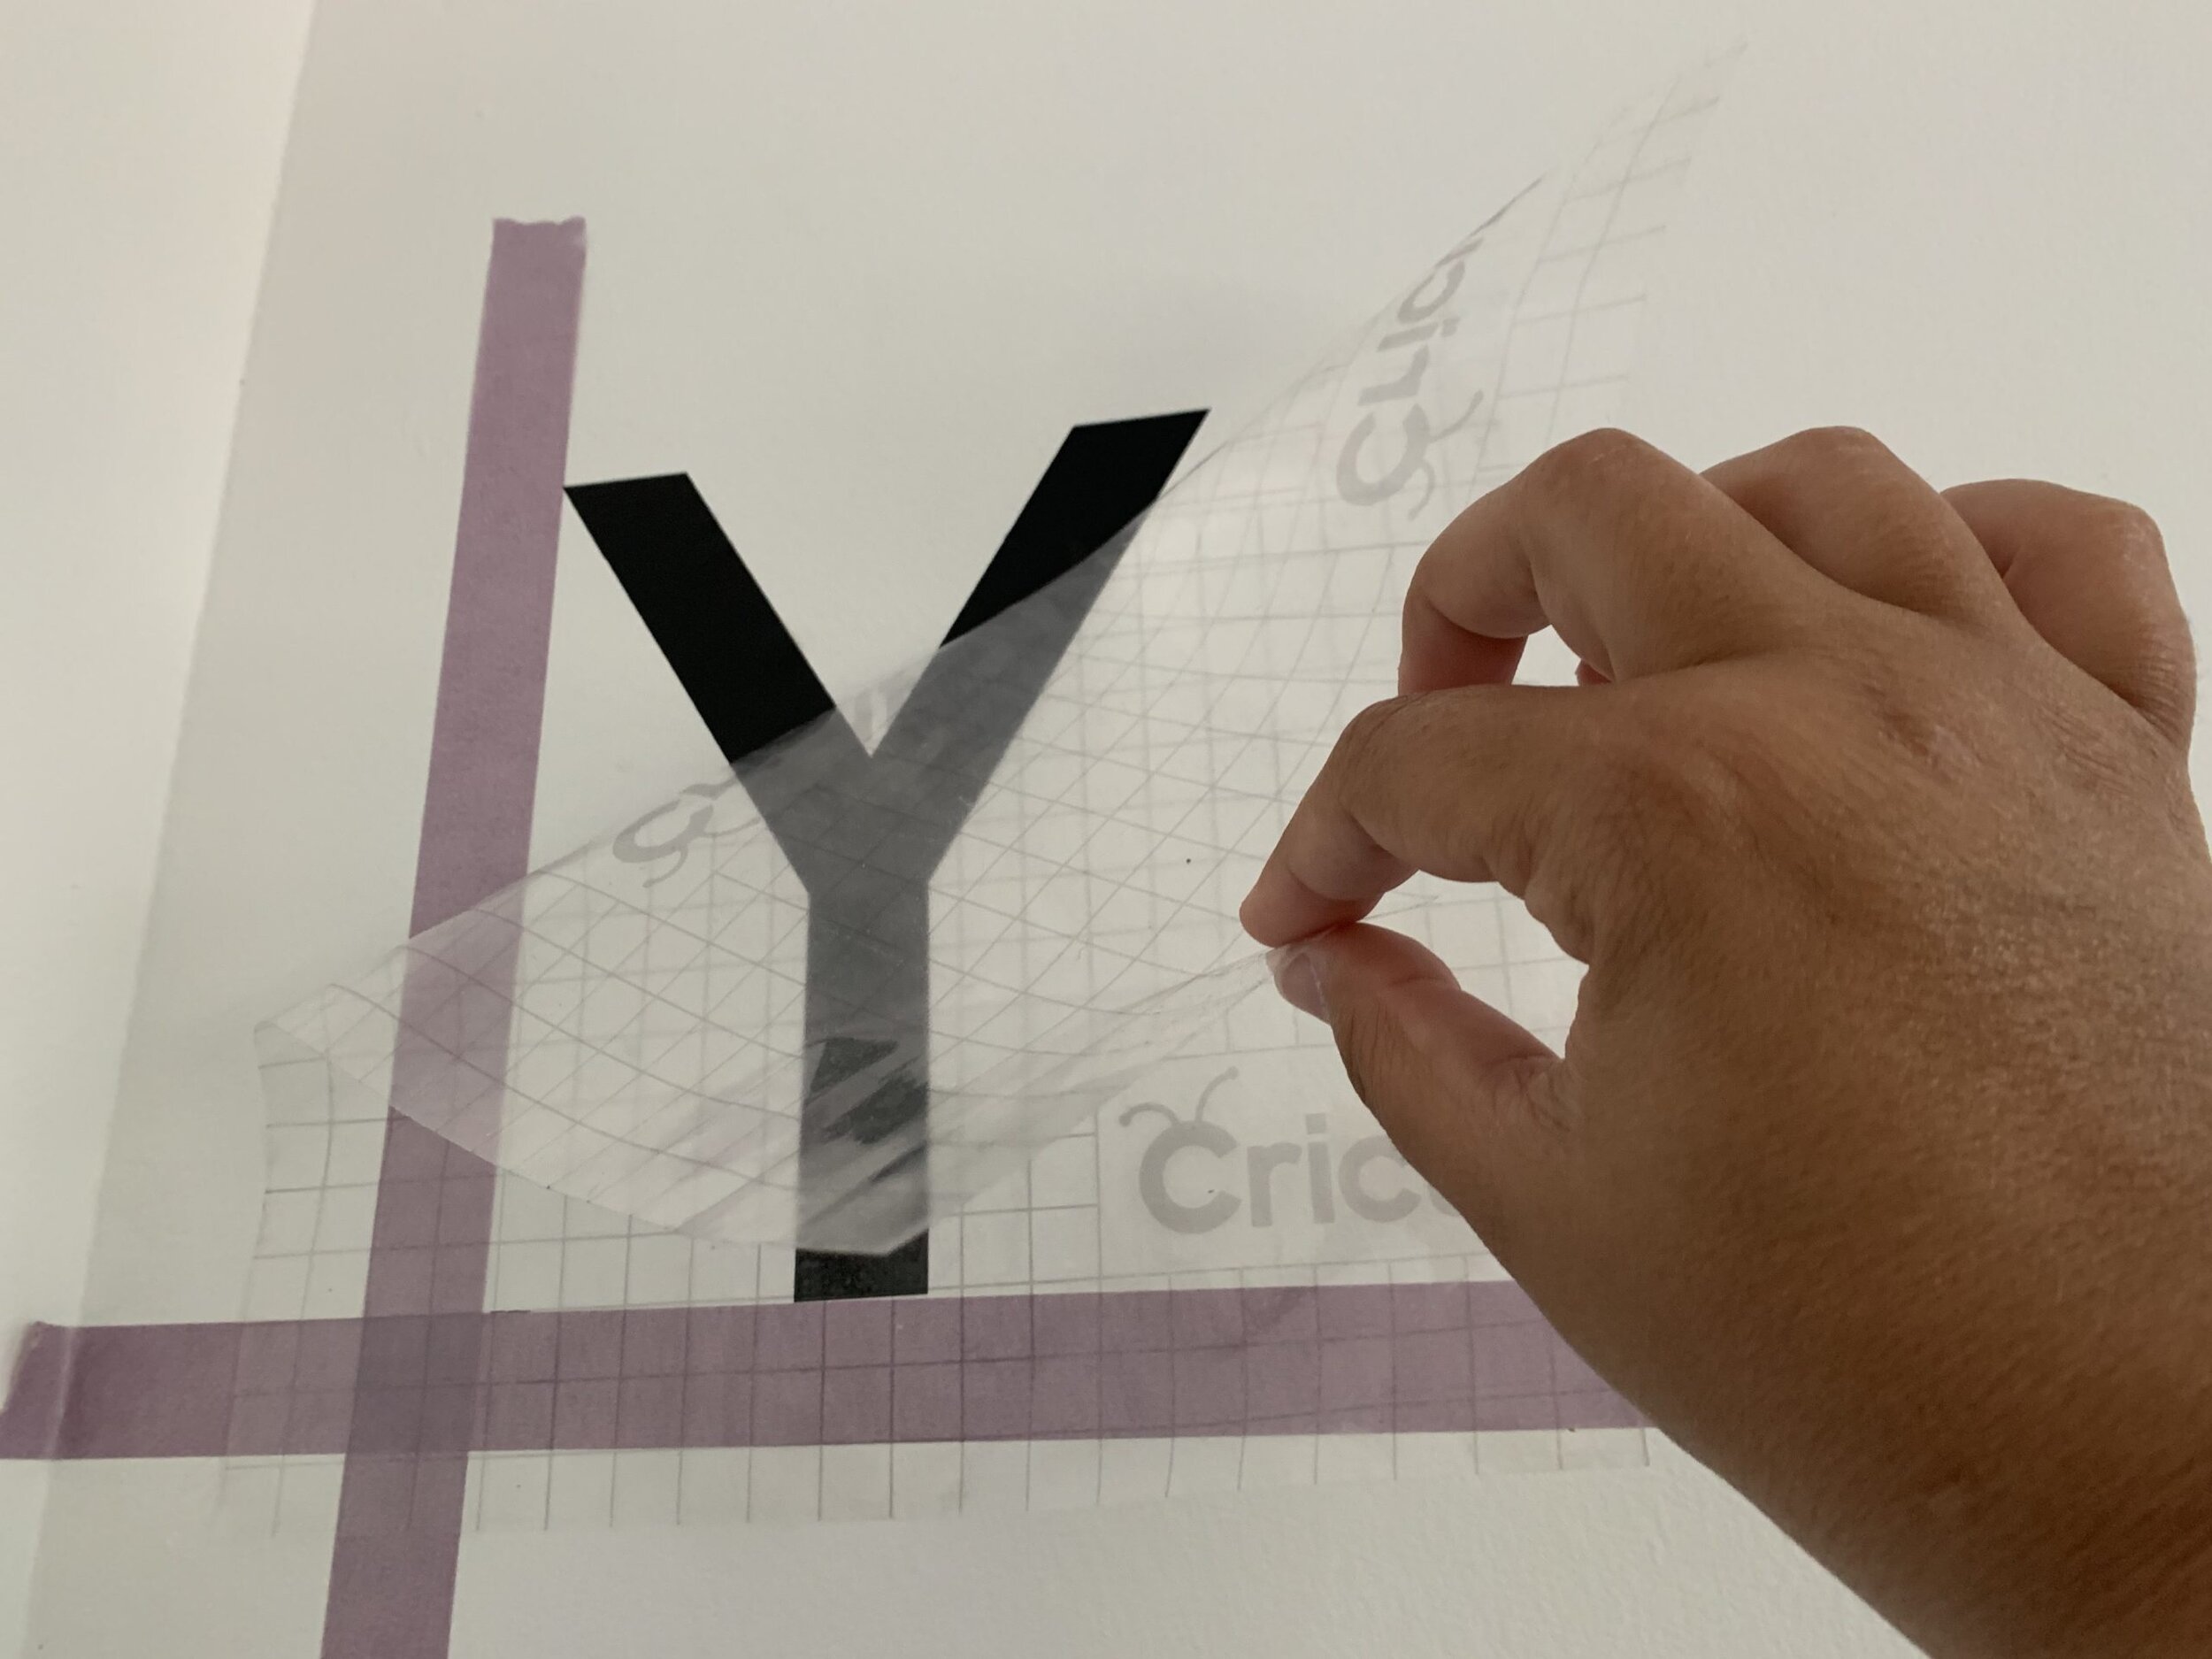
 Overall, the entire process was so simple! Here are the materials I used:
- Premium Vinyl™ Value Pack, Basic - Removable (20 ct)
- Premium Vinyl™ True Brushed Sampler, Classics - Permanent
- Cricut Explore Air™ 2, Mint
- Cricut Tools Basic Set WM
- Transfer Tape
- painter's tape
- 48" long level
And here's how the room looks now that it's all done!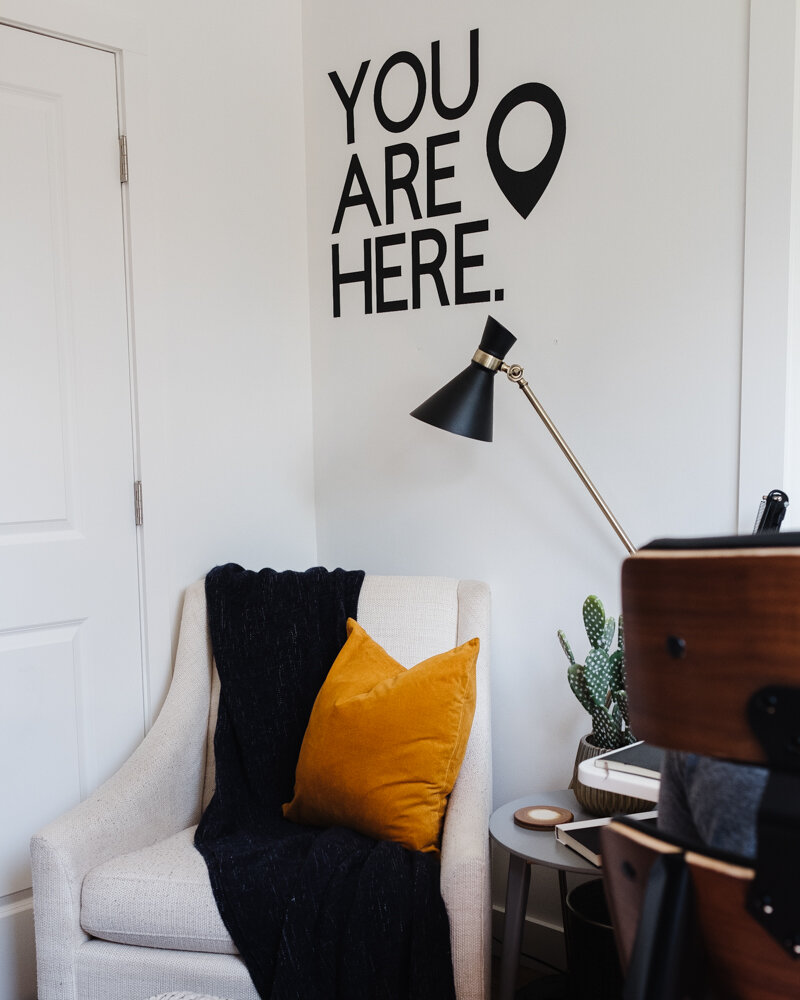
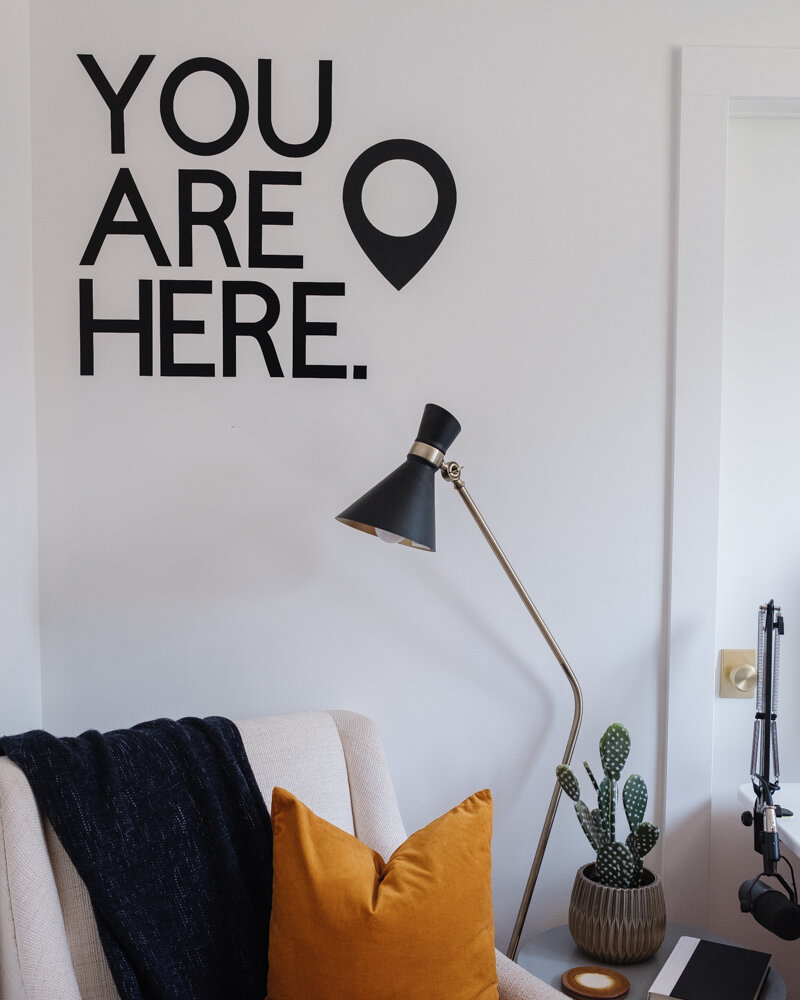 I'm so happy with how the space turned out (and I think my husband is, too!) and if you want more ideas, visit the Cricut blog for a ton of inspiration!