Dining Room Reveal - One Room Challenge Week 8
Even without having to do any tiling or major renovations... even without choosing a complicated space... even with two extra weeks to complete the challenge, I STILL did not make it to my dining room reveal on time. But who cares, because I'd rather have it done and looking the way I wanted than to have made the deadline with an unfinished space.This room truly is everything I had hoped for, and I'm not even exaggerating. At this point, the only thing that could improve it would be a magic fairy to clean up all of the constant crumbs on the floor under the table. A mom can dream.Ok so let's see this thing, shall we? But let's start with the before. Like the BEFORE the before.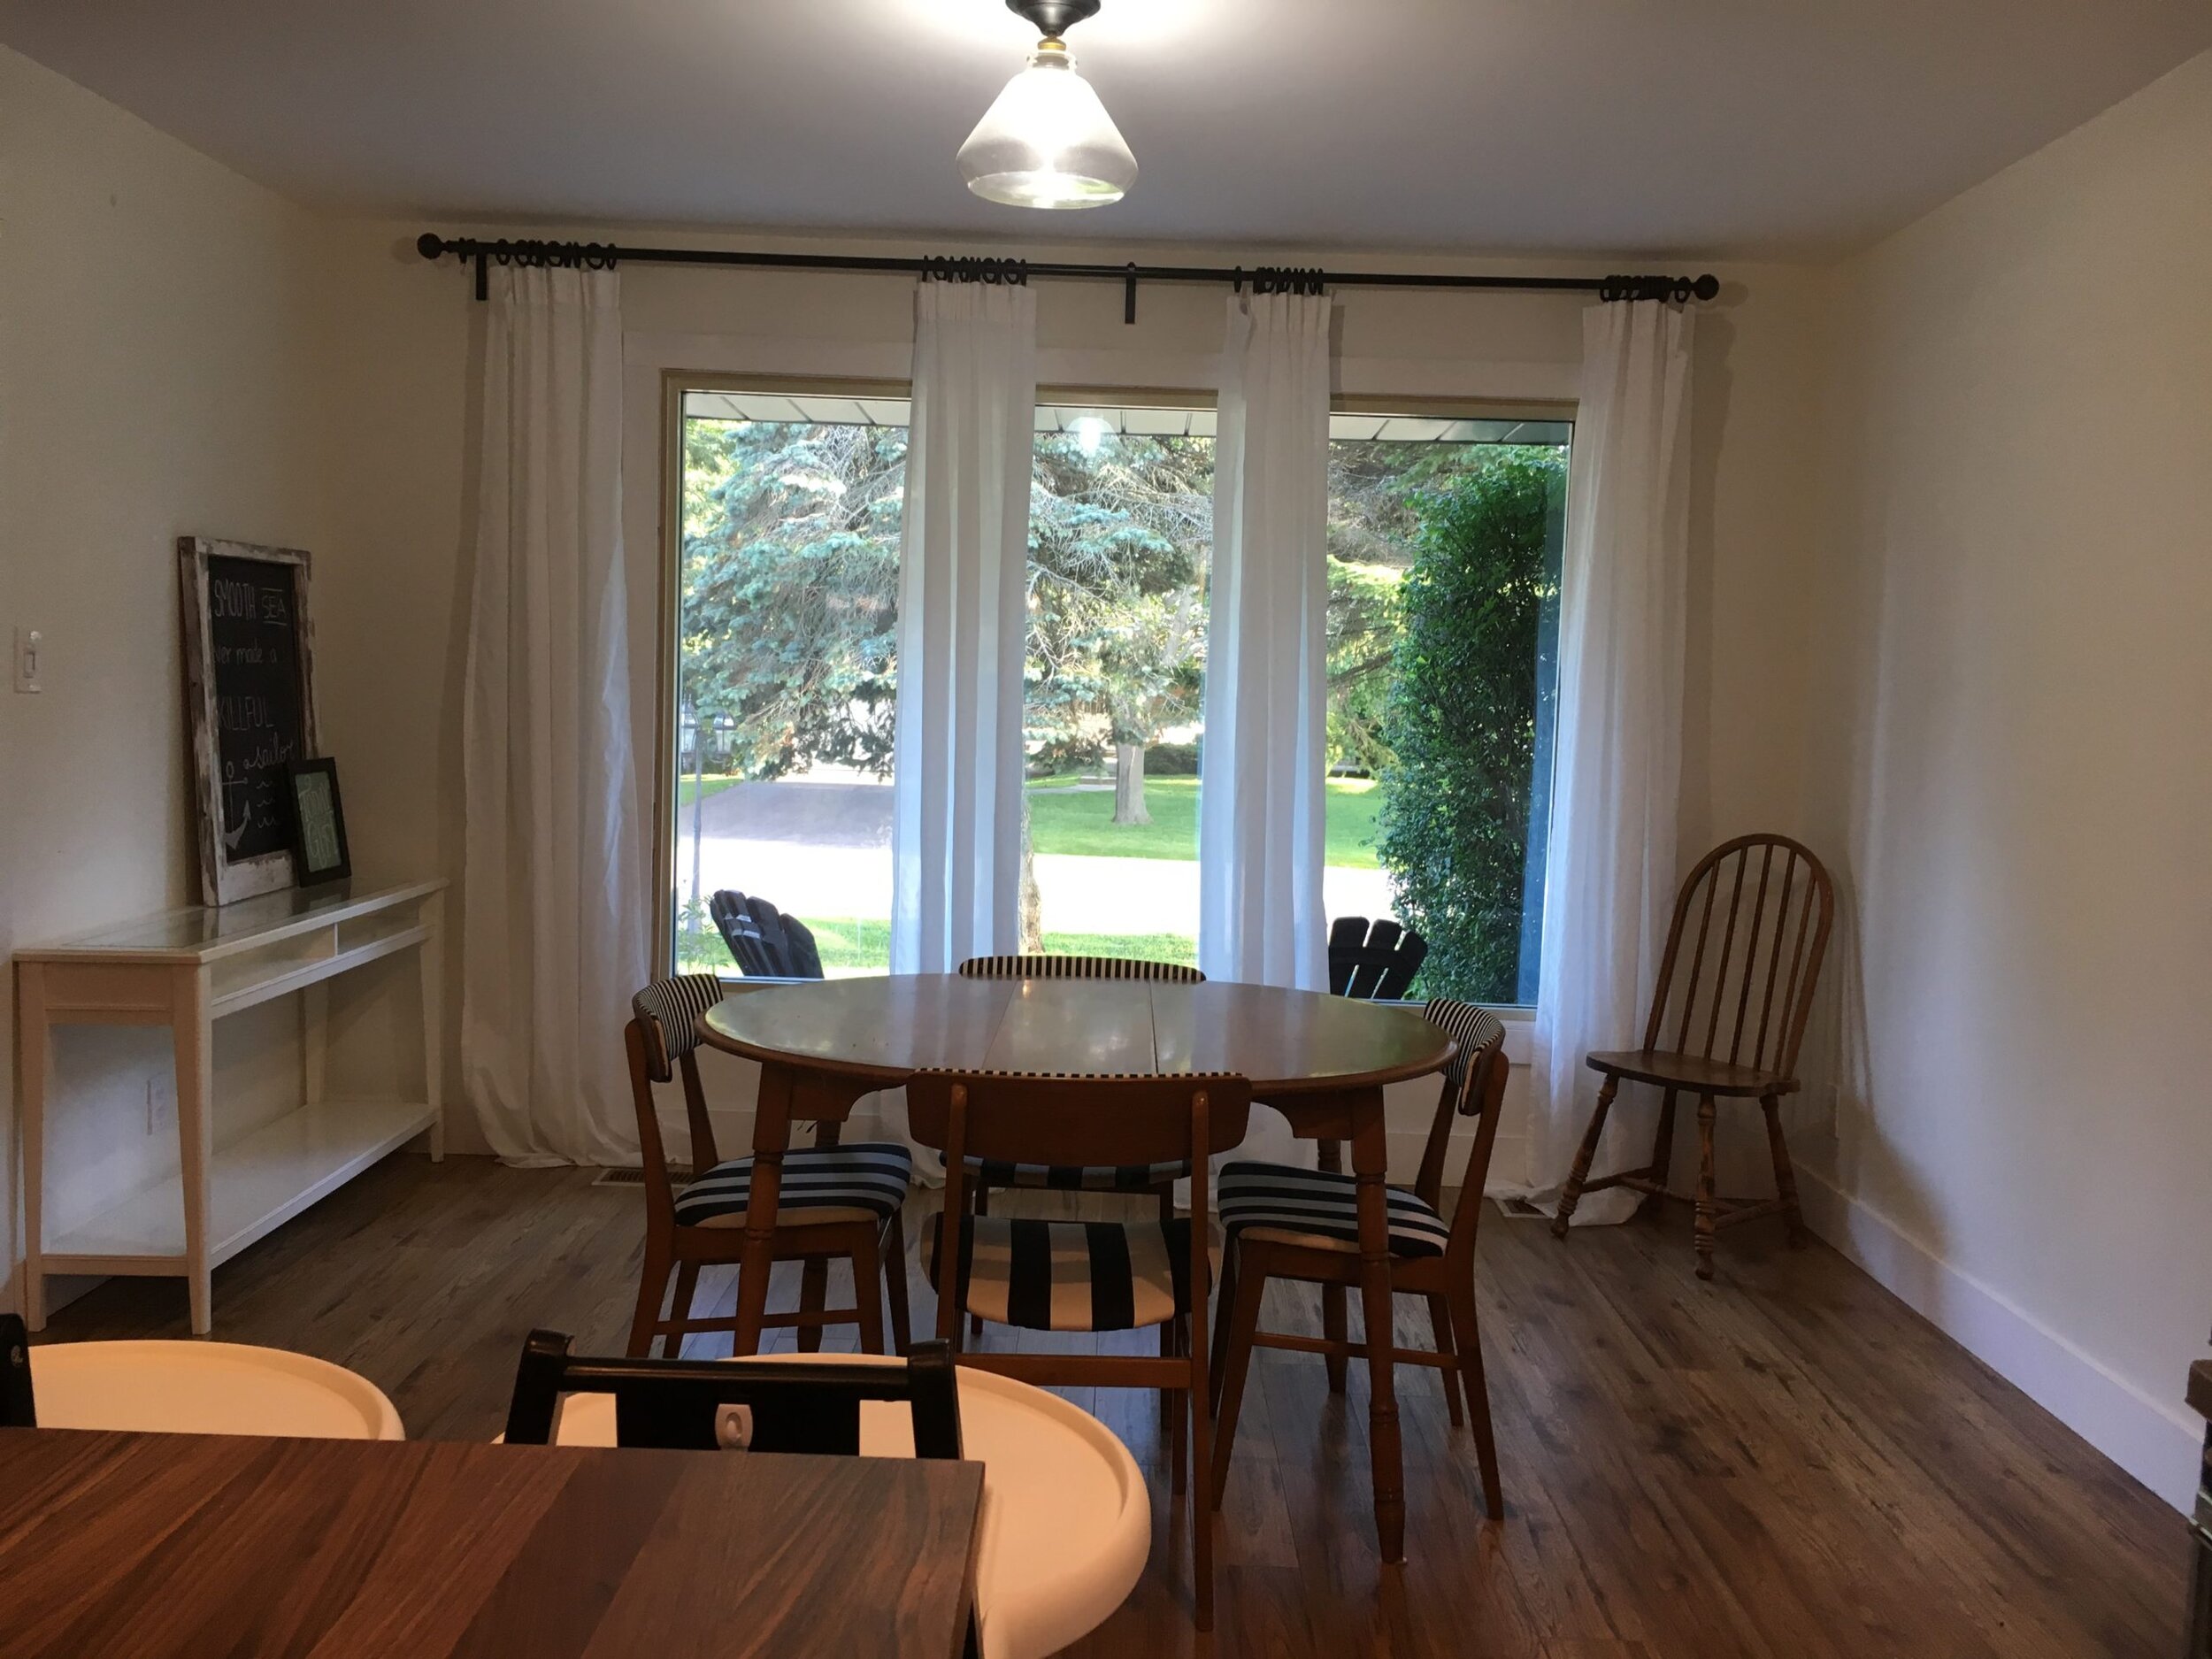 And here's were we were before this makeover started:
 The changes we made:
- new Bellewood Grey Toille wall mural (see blog post here)
- reupholstered chairs in Trend Fabrics 04105, Limestone
- upholstered counter stools in Trend Fabrics, 04105, Russet
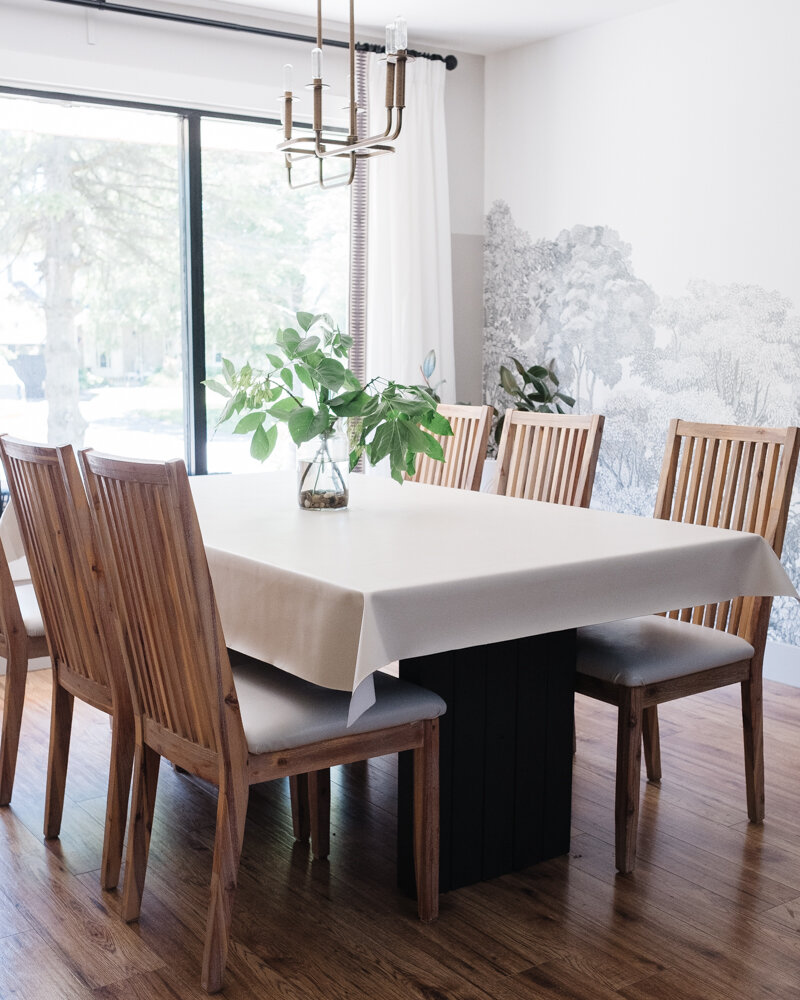
- made new tablecloth and placemats using Trend 04105, Eggshell
- rebuilt table legs using 4x4's (tutorial to come)
- built new floating shelf unit (tutorial to come)
- painted the dining room table in Farrow & Ball Studio Green
- added Trend trim 04540 Grey to the white curtains
- changed chandelier to Kichler Lighting's Alden 6 Light Linear Chandelier Natural Brass
- changed kitchen cabinet hardware to Emtek's Warwick Pull in satin brass
And here's how it all came together.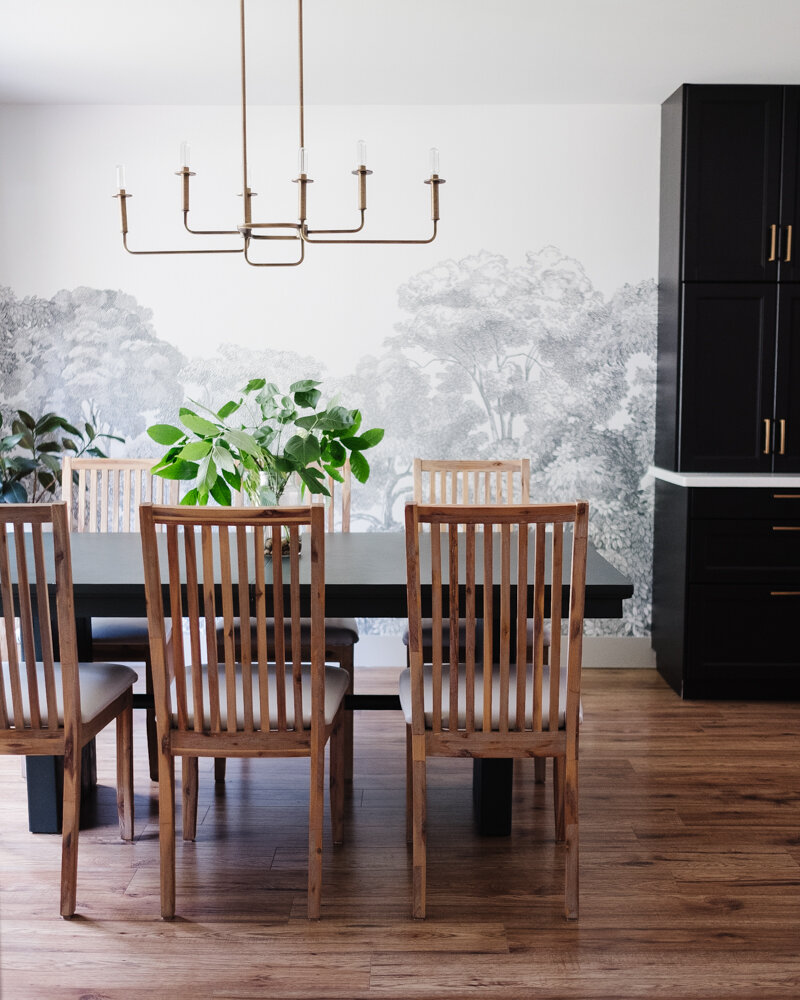

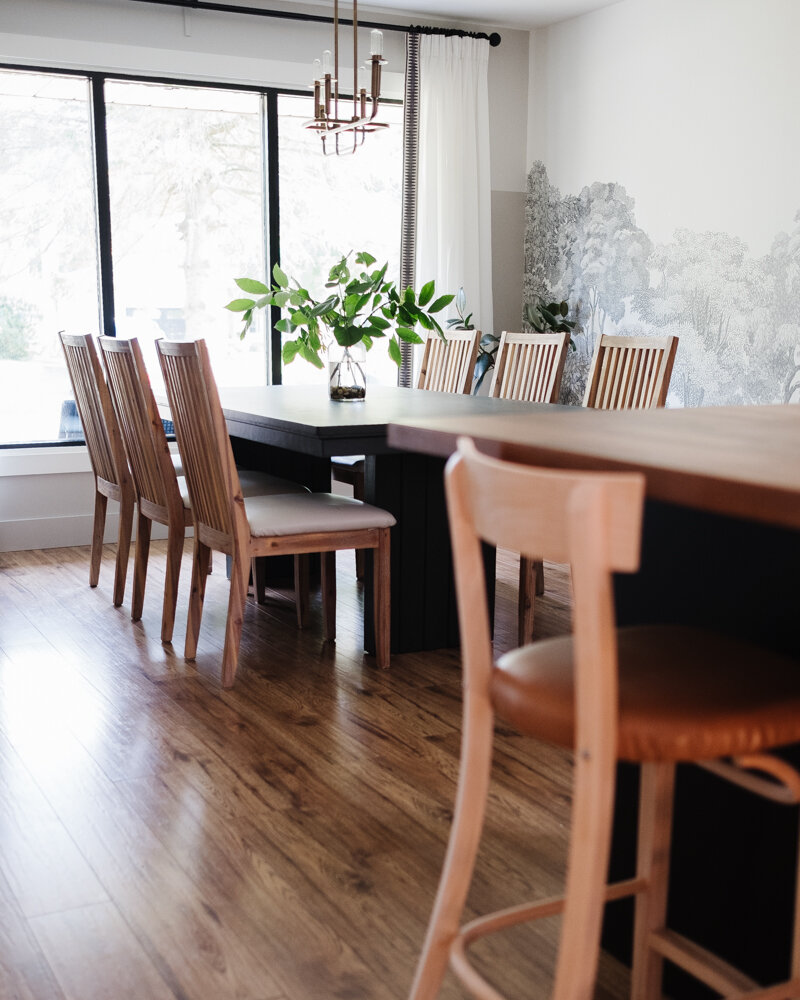 I mean, SERIOUSLY! I'm actually obsessed with the whole space, and a little in awe of the fact that my vision came to life in a way that makes this room feel like it was always meant to look this way in our house. It doesn't matter how many times I design spaces for myself or other people - seeing it all come together in a final reveal is ALWAYS exciting. Now let's see some more details.The counter stools are admittedly not all done, but this one looked so great I had to show it off in a few images. These are really old IKEA stools my mom bought second-hand for me several years ago, and they never felt quite right being all white.
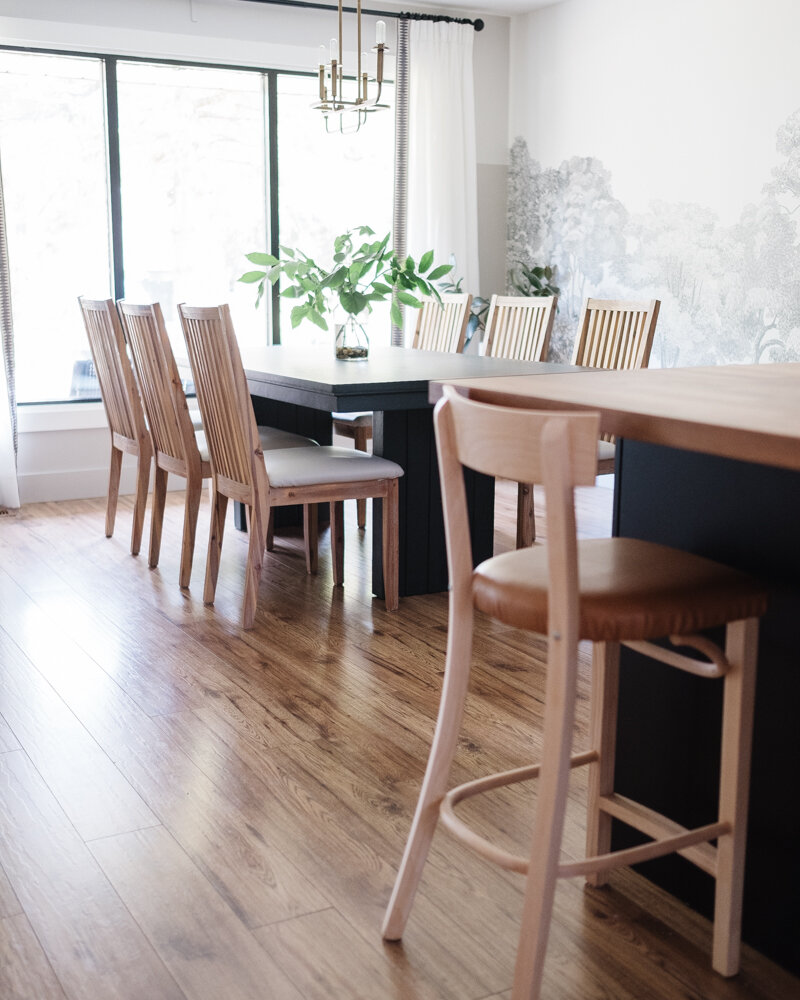 The base of our table was always a major pain point for me. I never loved the scroll-ey look and food/dust/crumbs always collected in the grooves and under the base, which was such a pain to keep clean. After making this base with Marquis out of 4x4's and using the old base's support rod, I'm so much happier!The deep green is the same colour we used in our boys' shared bedroom, and though it does read as quite black in some photos, it's definitely green!
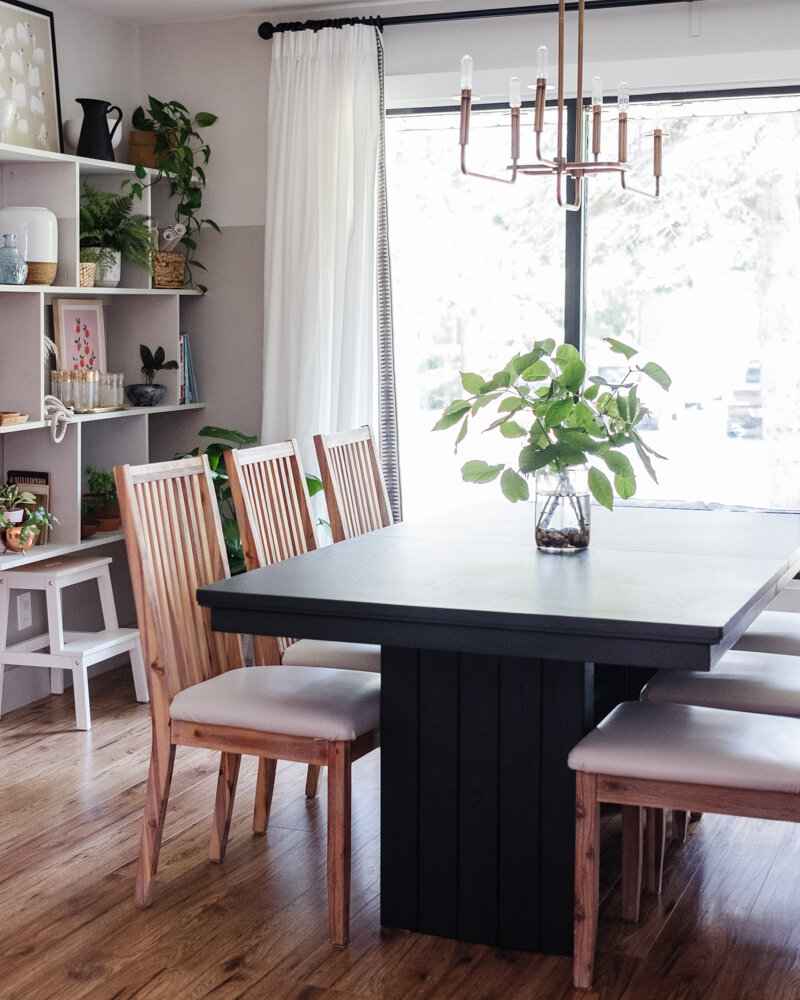

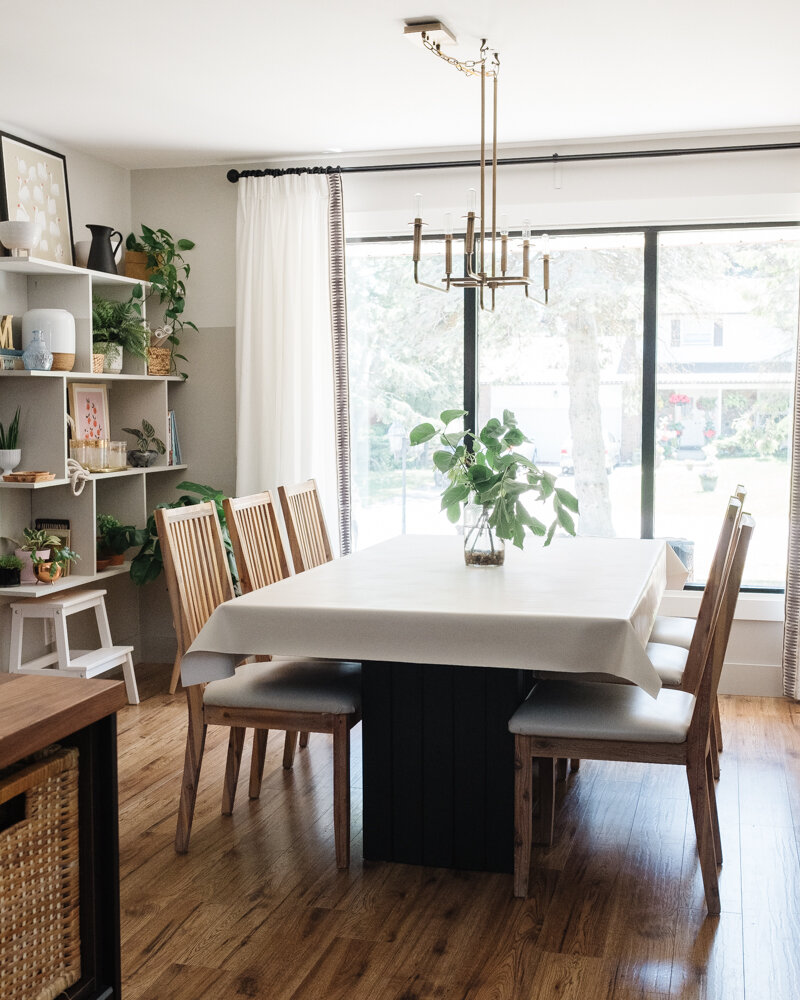
 The floating shelf was something I built over a weekend, and I'm still surprised at how well it worked! I'll share a tutorial for it soon. I almost left it in the raw pine, but now I'm glad I decided to go with the same colours as the wall, keeping the colour blocking.


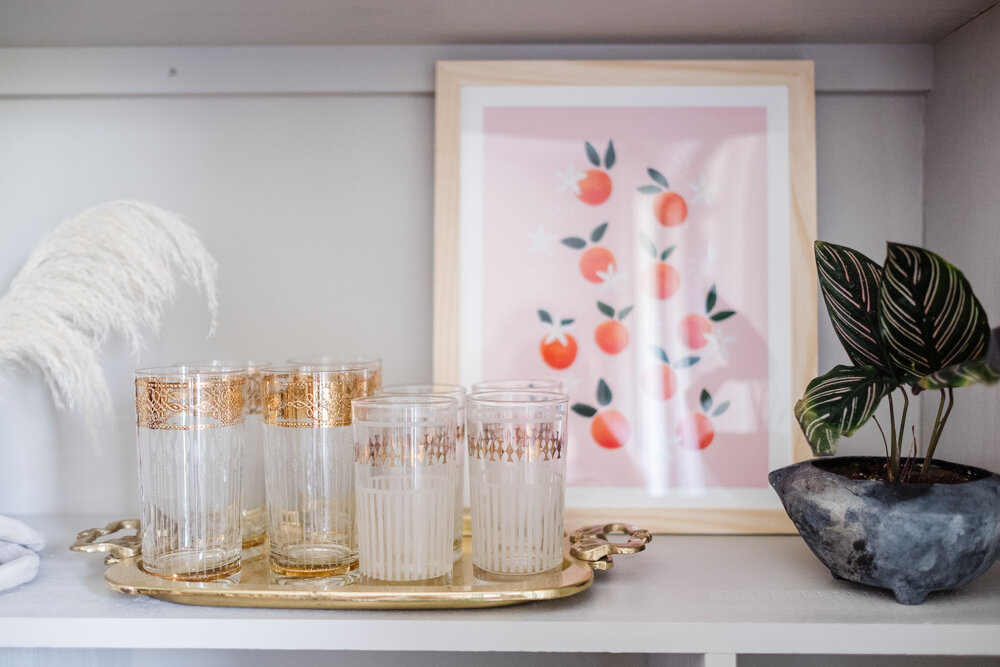
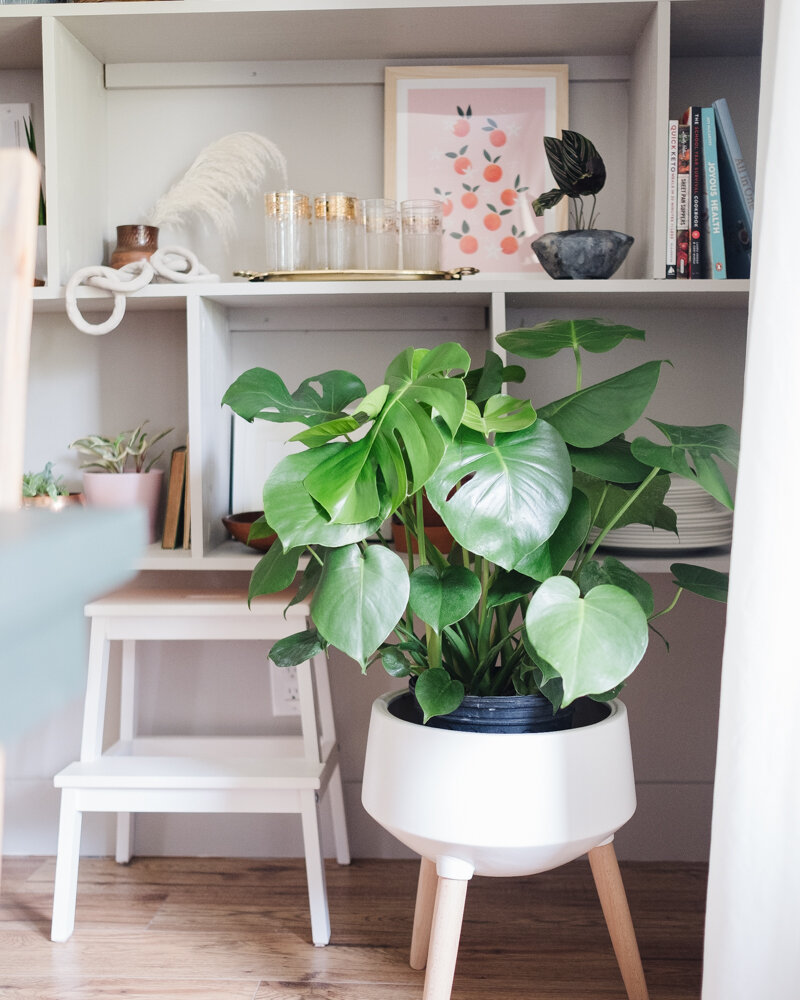 Some of my favourite details on these shelves are my new prints from Fy! I got the Tangerienes print and Flock of Geese art print. I made sure to mix in lots of plants since I took a shelf away in the kitchen that had mostly plants on it before (I'll show you shortly). The basket with the rolled-up placemats inside will be so handy for the kids, and I just couldn't resist adding some of my favourite thrifted pieces, like the glassware, ceramic vase (made in 1972), and my grandmother's blue vase.
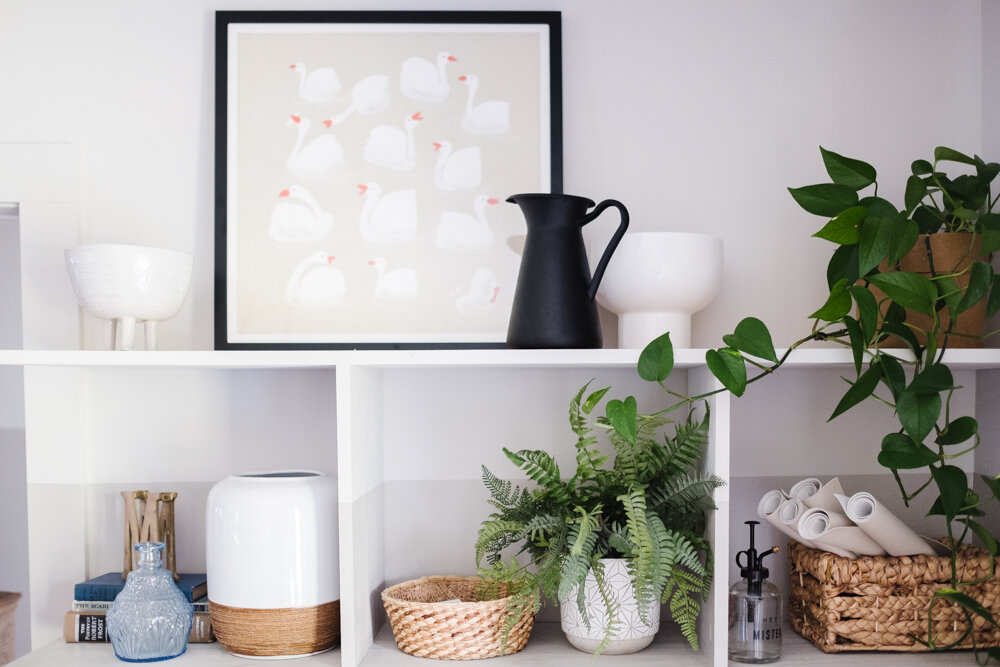
 Over in the kitchen, I made a few small changes as well. We used to have two black shelves attached to the fridge gable, and we were always hitting our arms or heads on them because they were slightly too deep. With all of the addition of lighter-toned woods to this space, I decided to build a peg shelf and have the upper she'd be shallower. It's WAY better!Here's the before and after:

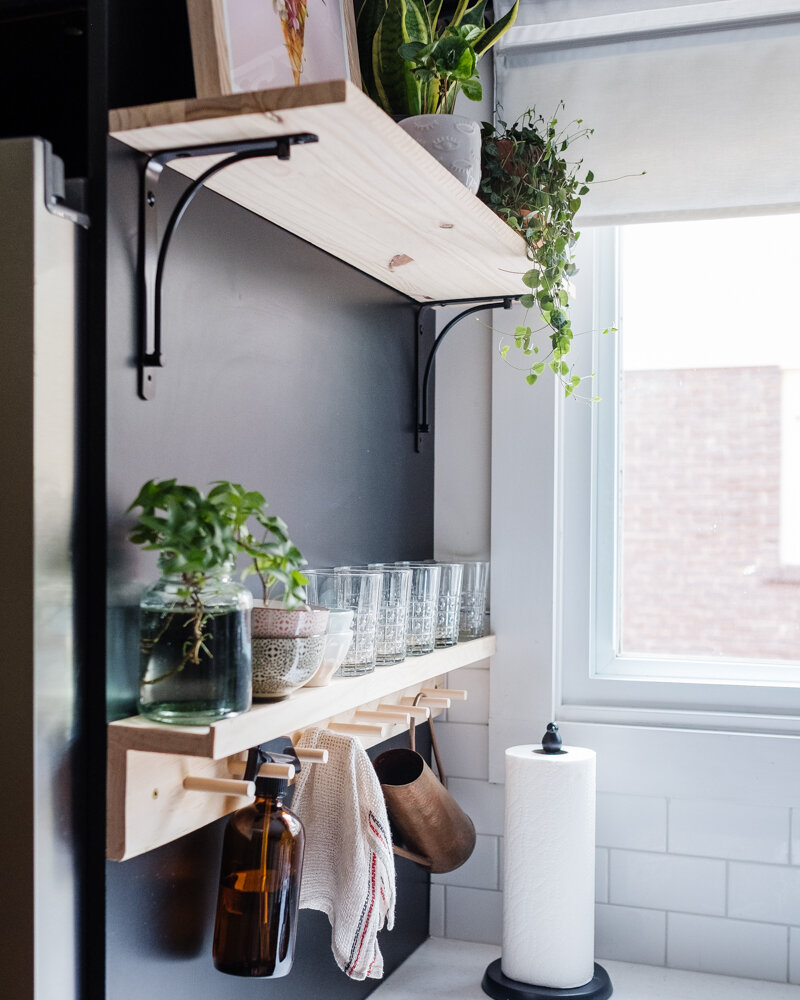
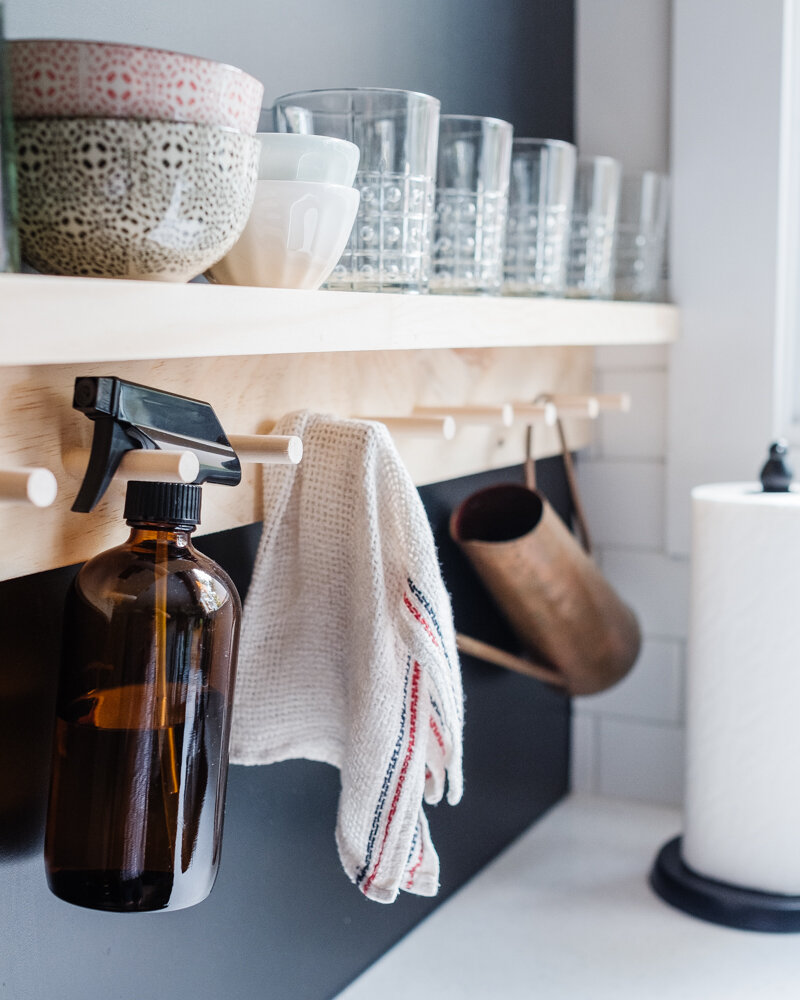 The Floral pizza art print is my favourite fun piece in the kitchen, though none of the boys in the house like it because of the flowers - ha!It's been great to still have a spot for the bowls and glasses we use daily to be accessible, for the plants to enjoy a little sunshine, and for me to hang a few essentials, like cleaning supplies and my favourite watering can of all time (2 $3.99 thrifted piece from many years ago).And the final thing I'll show you is how different the room looks when we have the tablecloth on (which will be like 95% of the time because KIDS!)
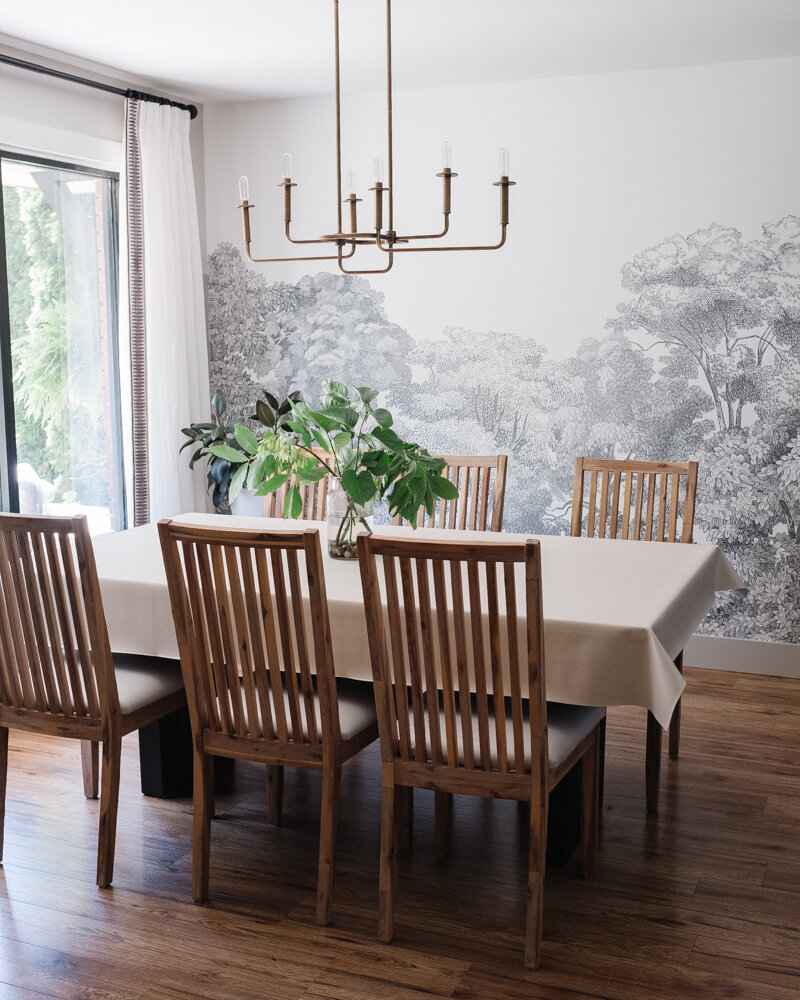
 And that's all I have. Phew!Huge thanks as always to the One Room Challenge for pushing me to finish another space in our home! Can you believe this was number 10! Wow!Until the next one!