Updating a fire pit table with spray paint and a Cricut stencil
It’s no secret that I love my Cricut machines. I’m consistently using them for projects, and this year the outdoor projects have taken over. I recently made this banner for our sunroom and may even have a little update on some pillows for coming soon! It’s just such a versatile machine, and this time I stretched myself to try something that honestly intimidated me: a stencil project!
*this post is sponsored by Cricut - all opinions are my own
First, let me say this: I am NOT a perfectionist. Not in any way, shape or form. The reason I was reluctant to try a stencil project is that I feel like it has to be perfect, and man oh man, I struggle with super fine details. I’ll keep telling myself that this was meant to look a little imperfect and “handmade” so we’re gonna go with that, ok? Let me show you what it looks like.

All in all, it’s not bad, right? Honestly, compared to what it used to look like, this is a DRASTIC improvement. See what I mean?

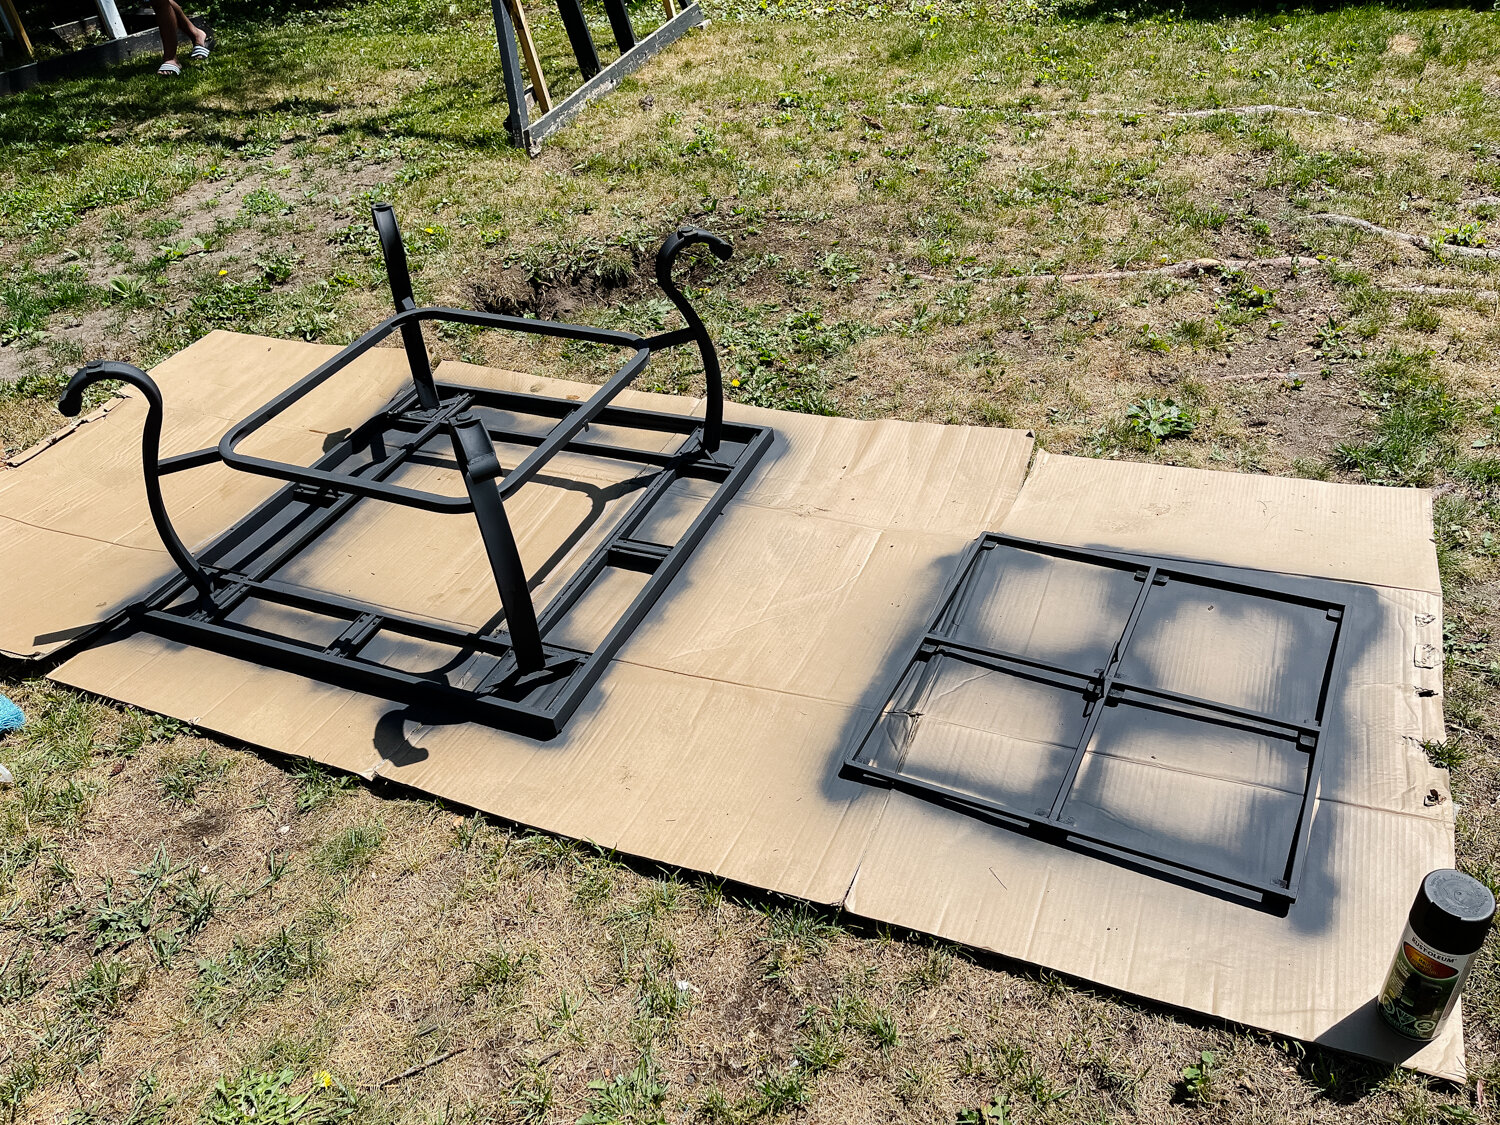
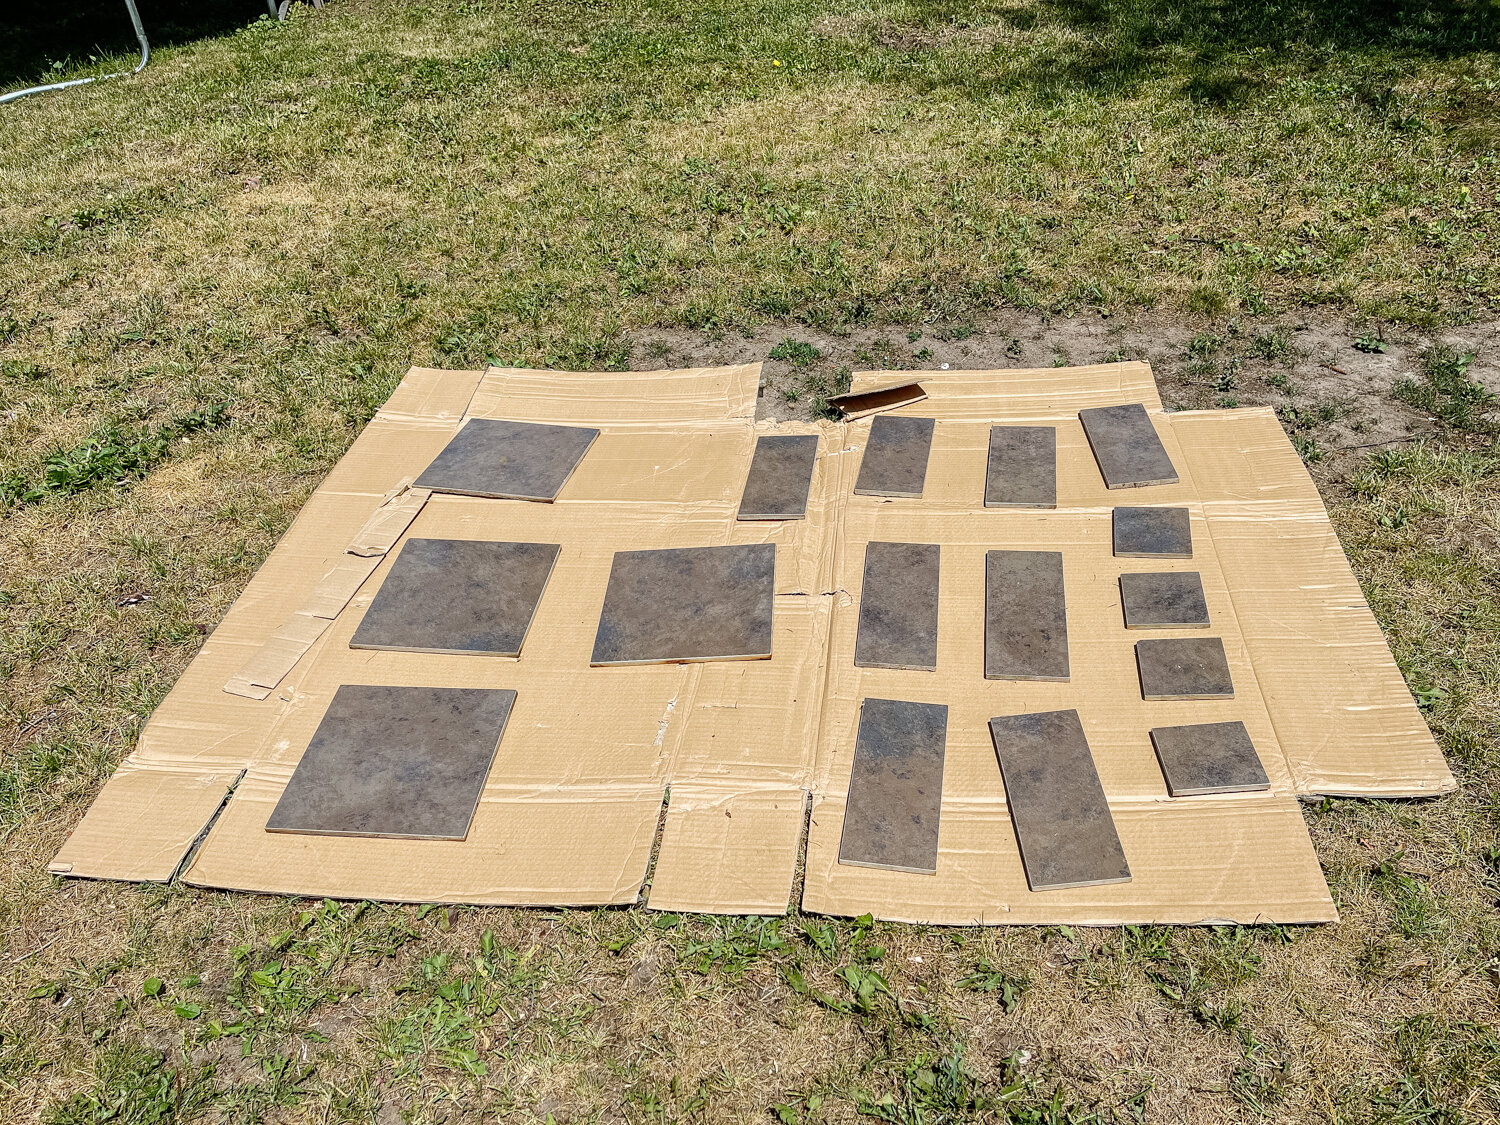
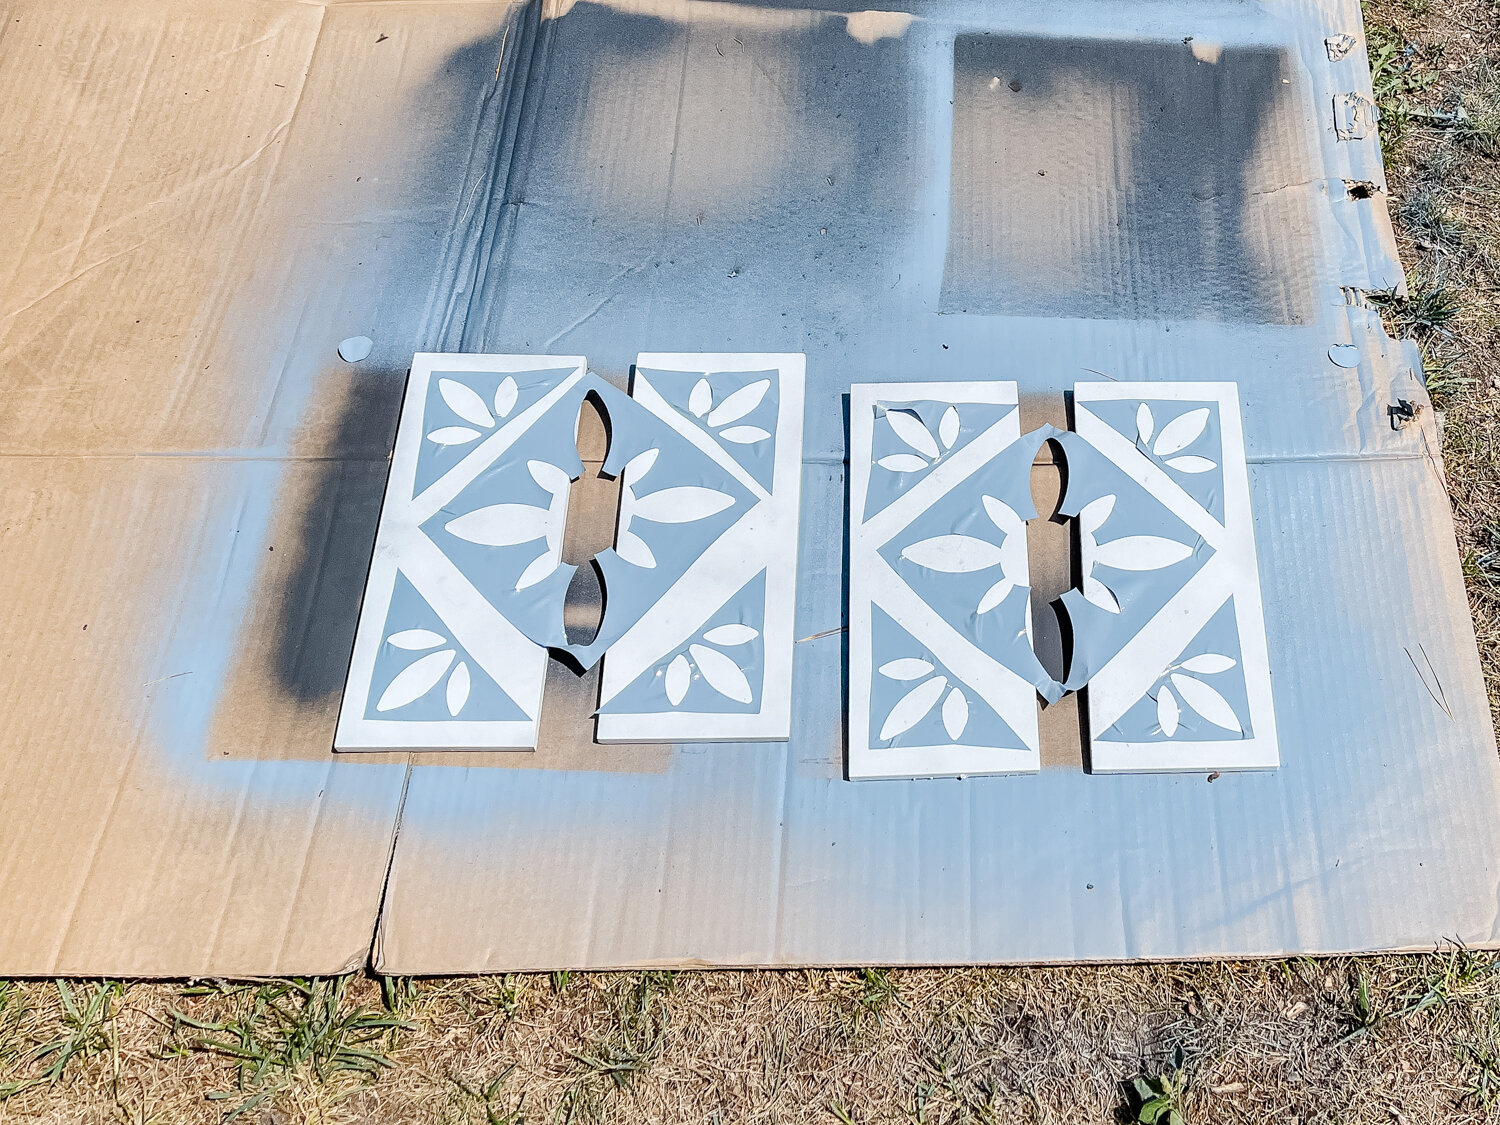
The very first step was to take off the tiles and put everything on cardboard, ready to be spray painted. I used a heat-safe spray paint for the frame, since some of those parts will come quite close to the fire. For the tiles, just regular exterior spray paint.

Now it’s time to make the stencil! The materials for this are so minimal. I used my Cricut Explore Air 2 and Stencil Vinyl - that’s it!

I did make the stencil twice, and in hindsight, I wish I had made it more times. I had enough material to make about 4 of them, and that would have sped up the process significantly! Because the Stencil Vinyl is sticky, I was able to easily reuse it multiple times.

The shape of the stencil itself was pulled from the Cricut Design Space and I cut it exactly as it was - easy peasy! If you search for “tile”, a lot of designs like this come up, and there are other projects done with stencils that you can search for as well!
Ok, so the next crucial step was the actual stencilling part! I used spray paint to keep things moving quickly.
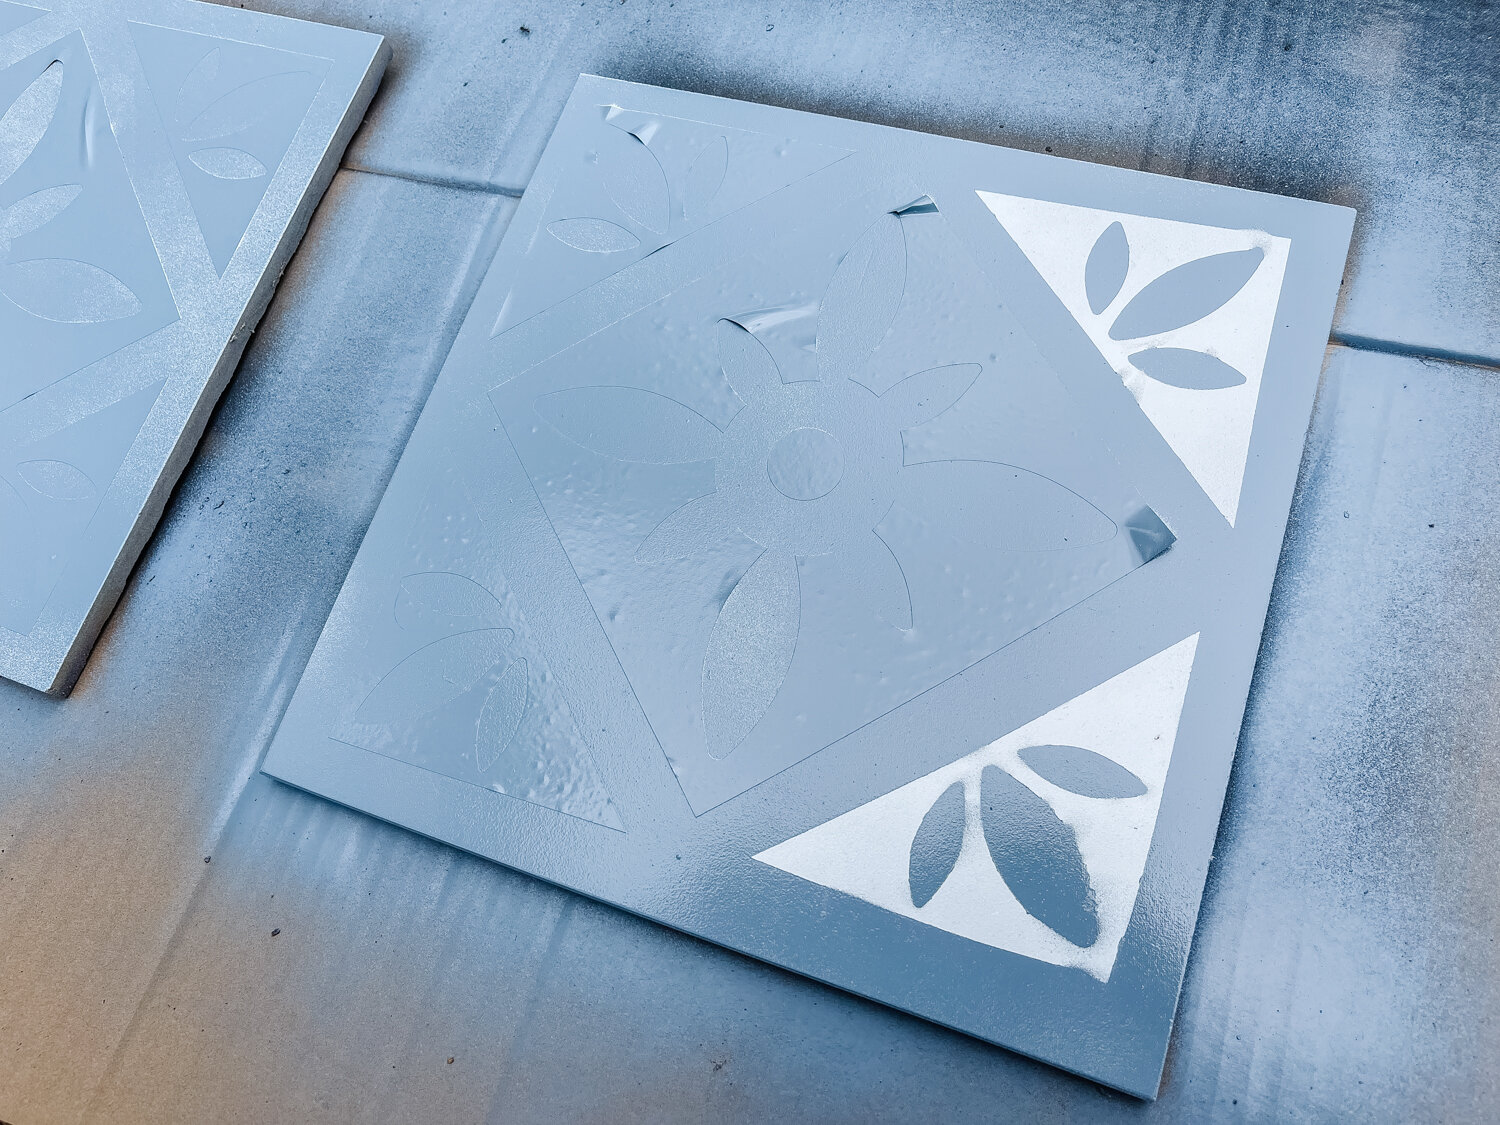
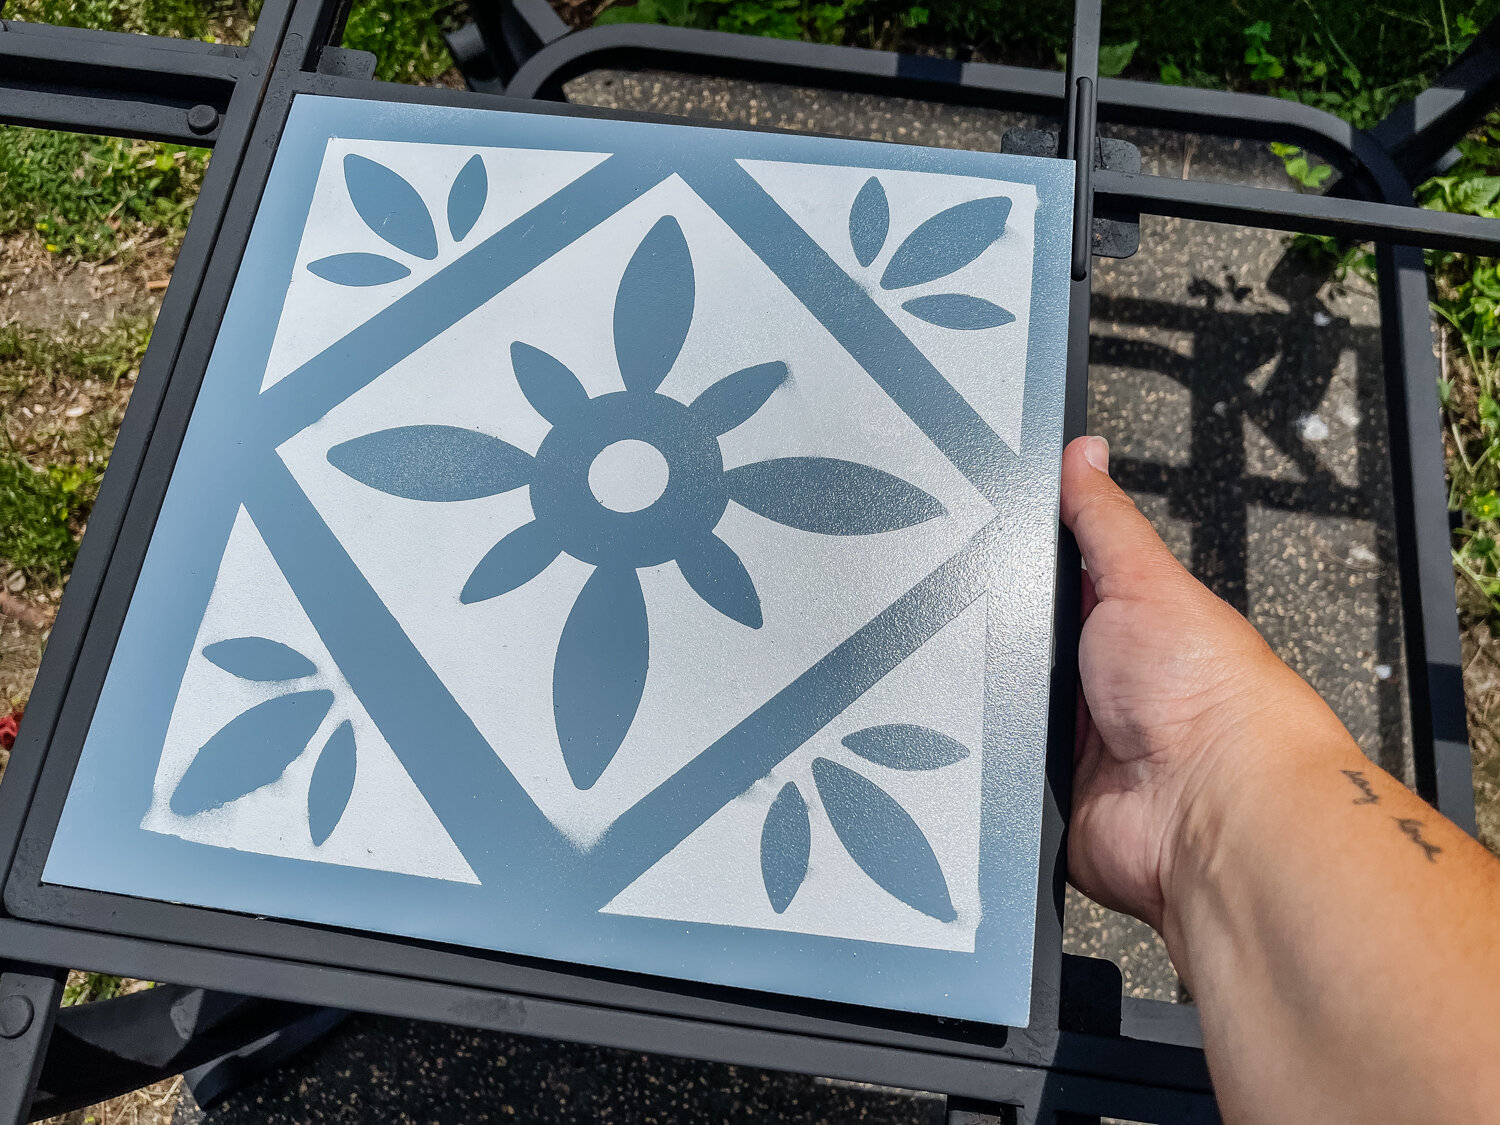
As the paint dried in the sun, the stencil naturally started to peel up a bit, which made it even easier to remove. You can see that the lines aren’t perfect (perfection is overrated, am I right?), and I was totally ok with that. The tiles ended up looking very handmade and a little less like they were spray painted, also.
I put all of the tiles back in the frame, and that’s when it really hit. This fire pit table is completely transformed! By something as simple to make as a stencil!!! I couldn’t believe it.
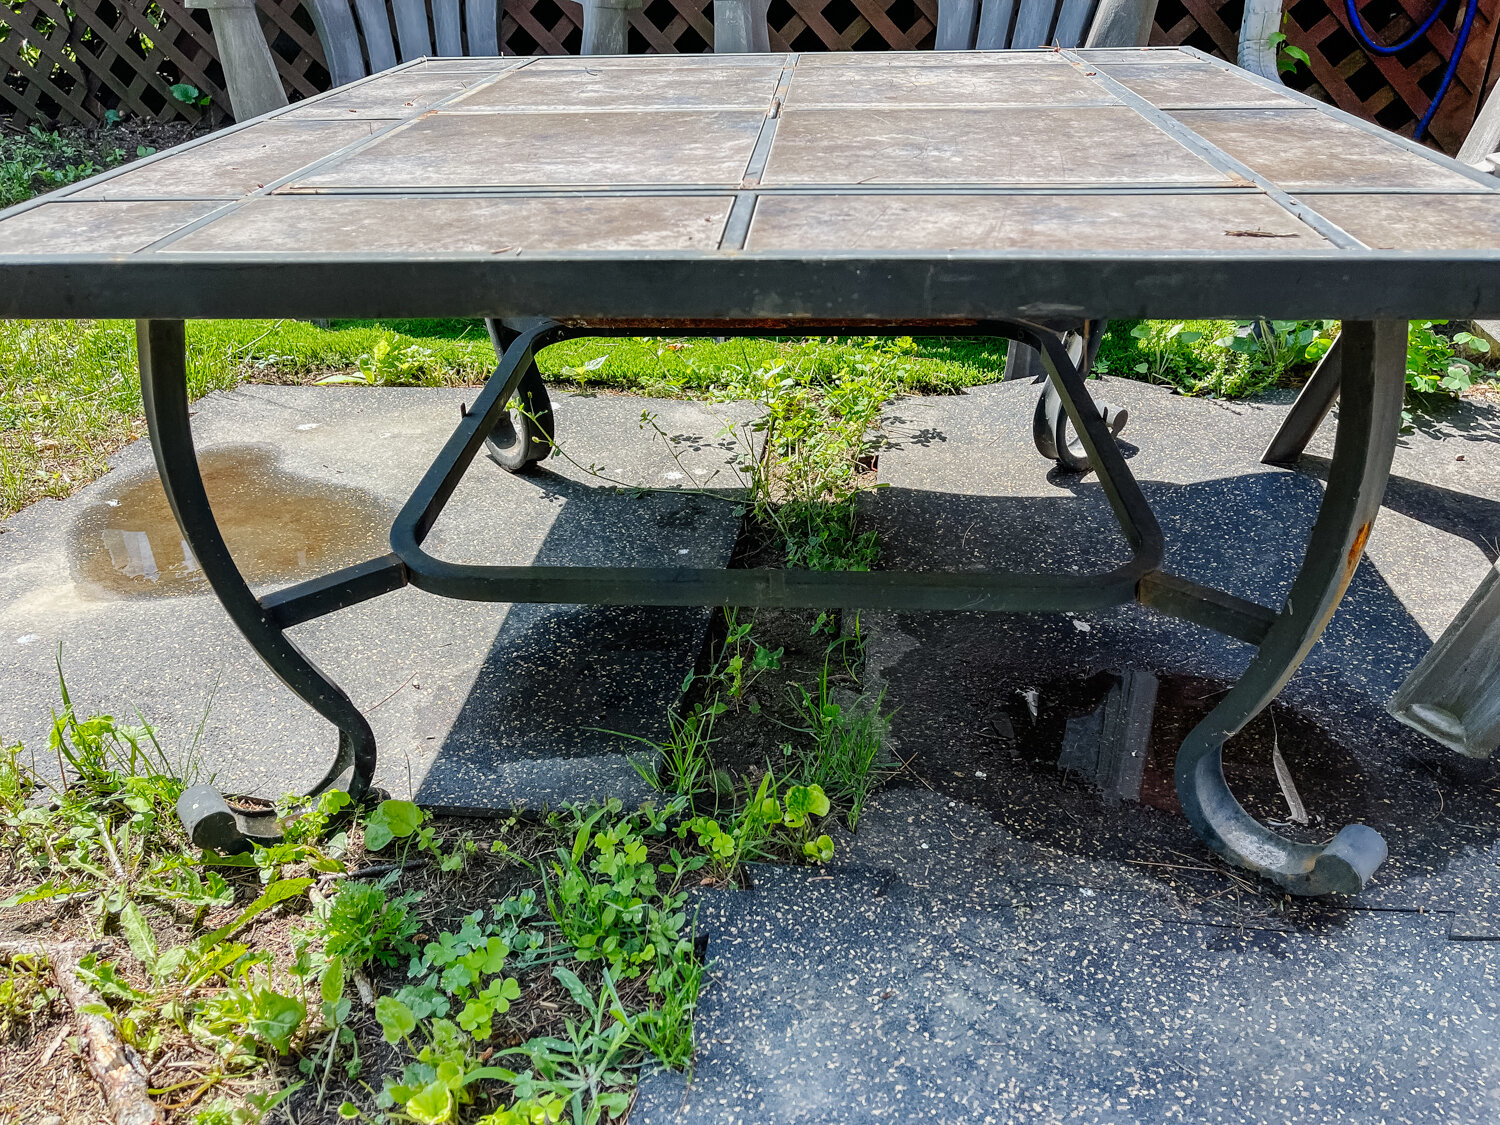
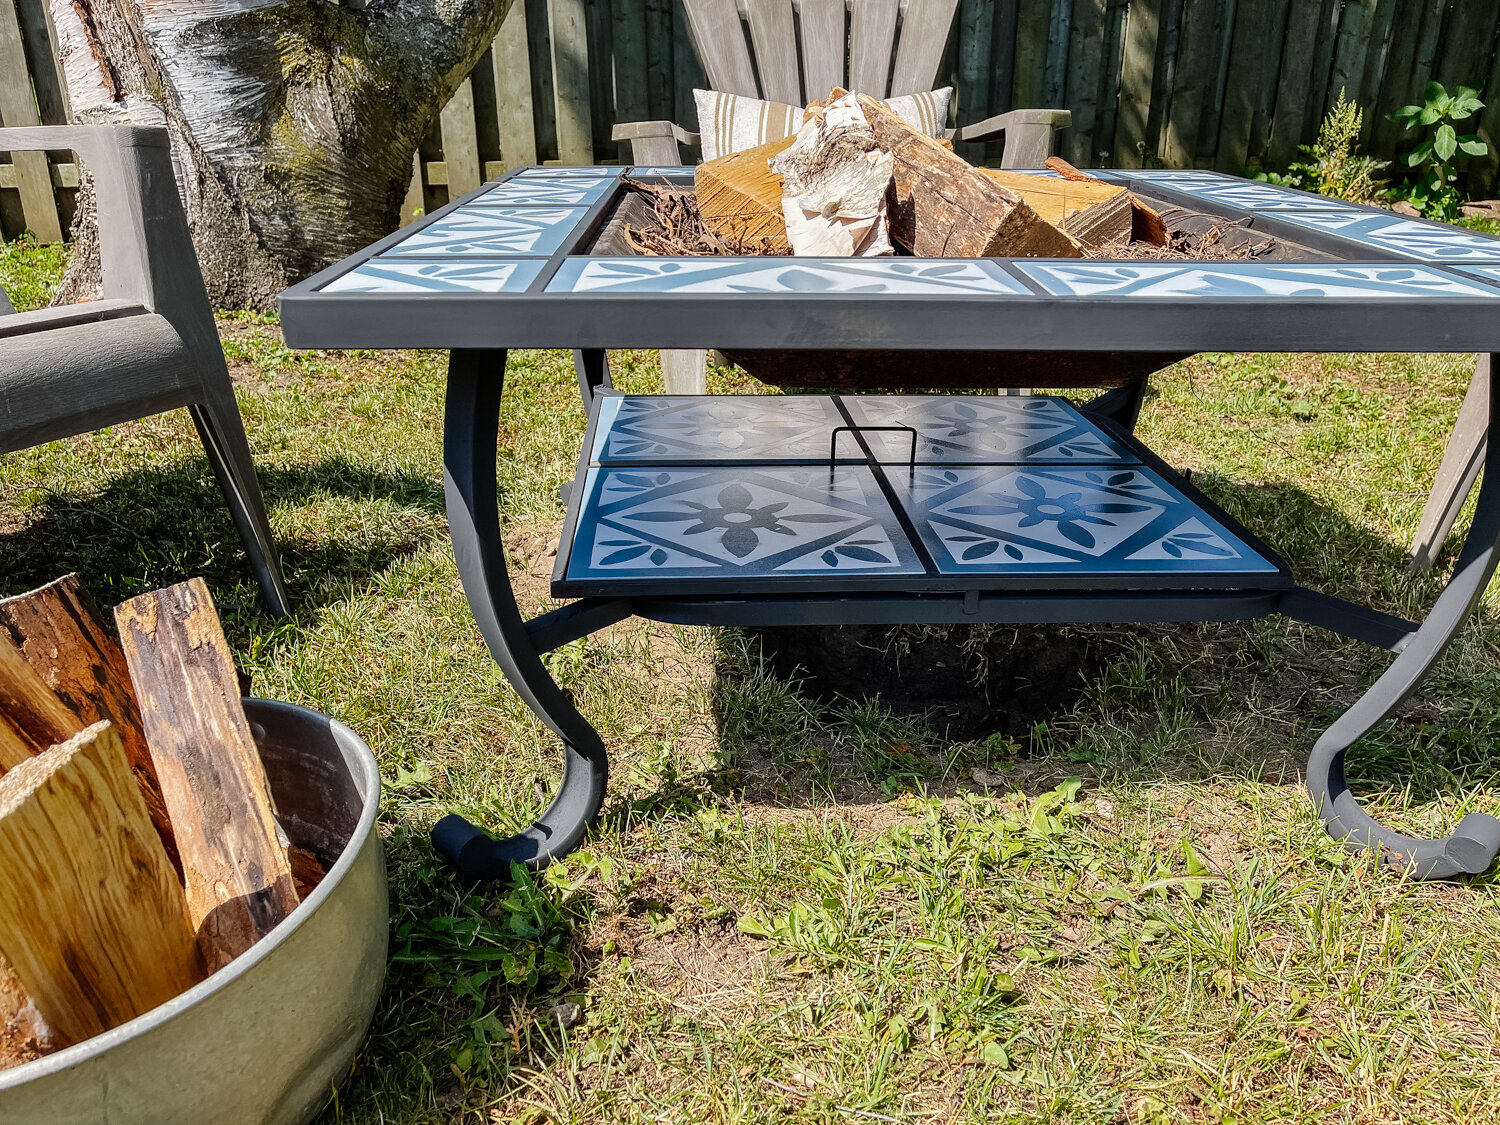
I love that it now looks great whether as a table or a fire pit - before, the only time I felt like it actually looked ok was when we had a fire going. Because then you couldn’t really see the ugly tiles haha!

Now the faded Adirondack chairs need a makeover because they look a little sad next to this bright fire pit table! Maybe that will be the next outdoor Cricut project.

Have you tried a stencil project before? Think you might after seeing how easy it is?