Backyard Makeover Part 1

 It's DECEMBER. I know, you all already know this, but I need to point this out because it's December and I'm writing about a project we completed months ago. Actual months!If you keep up on Instagram, you have already seen that we took on a rather large project this Summer - the backyard makeover! Yep, the whole thing! There was landscaping, deck cleaning and painting, and it's not even finished yet, but the hardest parts are done. Here's where we started:
THE LANDSCAPING:
So this was a big undertaking - like 60 square feet of undertaking! We started with the digging, which is so stinking hard! Six inches deep and so, so, so many roots from those lovely bushes on the other side of the fence. My mom, Alex and I managed to get this done on the first day: The next time we dug, my dad came along and, of course, it was a huge help because he's the master landscaper. We definitely could not have ever done this without him and my mom! Here is the other side:
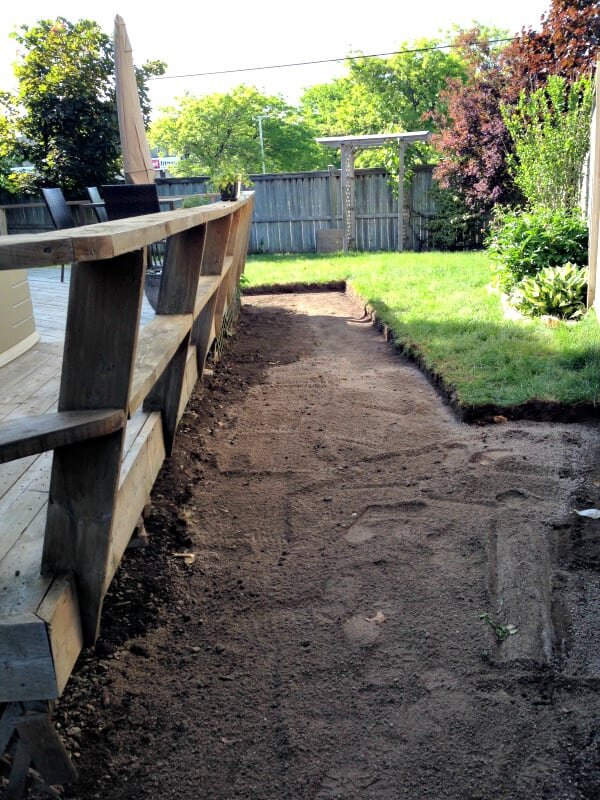 Next, we removes all of the old lattice underneath the deck. It was super torn up and not pretty, so it had to go!
 We then put down a layer of gravel, rented this lovely machine from The Home Depot and made everything all nice and flat!
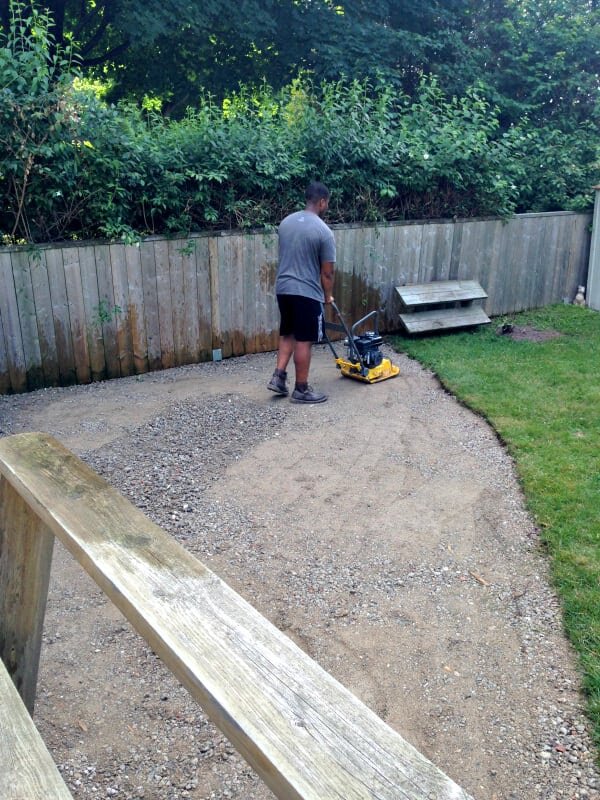 Here's a full view of the yard:
 Then all of the brick had to be moved from our garage out to the backyard. So. Many. Bricks. I never want to see that many bricks again!
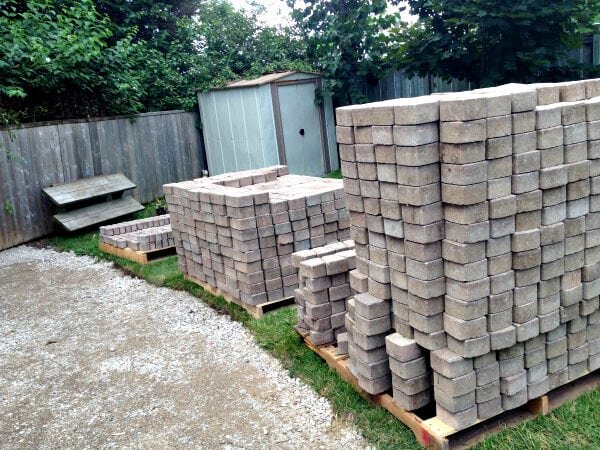 We started with the area closest to the fence, and it has a cool circular design, which I looooove! We got all of this done in one day, which I thought was pretty amazing considering how much we covered! My dad is a machine!
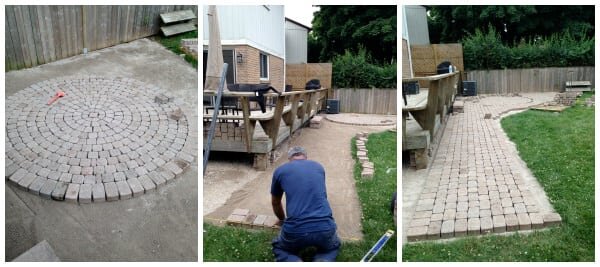 Once all of the bricks were down, came time for the sand. Basically you sweep this stuff on until all of the teeny tiny holes are filled. Water it, and you're done. It makes a huge difference, as you can see here.
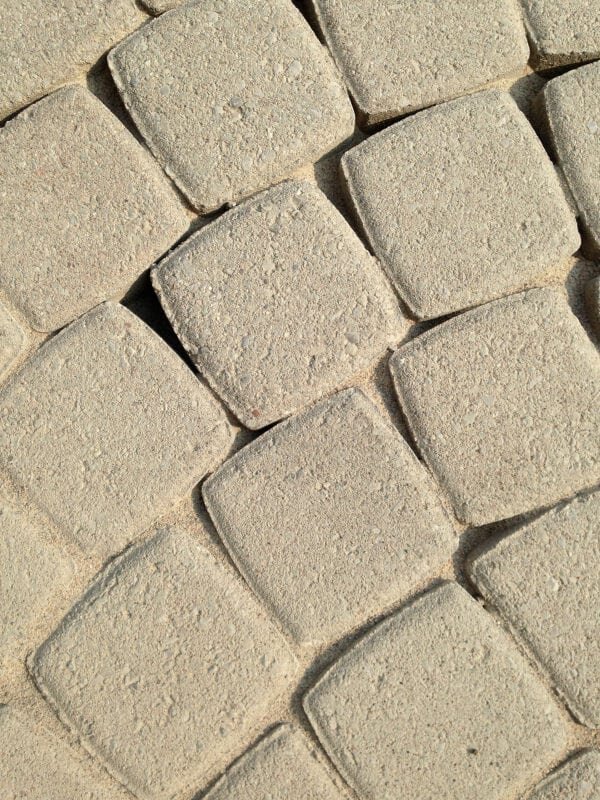 That's it! It sounds like it's no work at all, but this took us weeks to complete because our schedules didn't allow for all of the work to be done at once. Next came the lights! Yep... lights went up before the deck was painted because we wanted to use the patio and the fire pit!
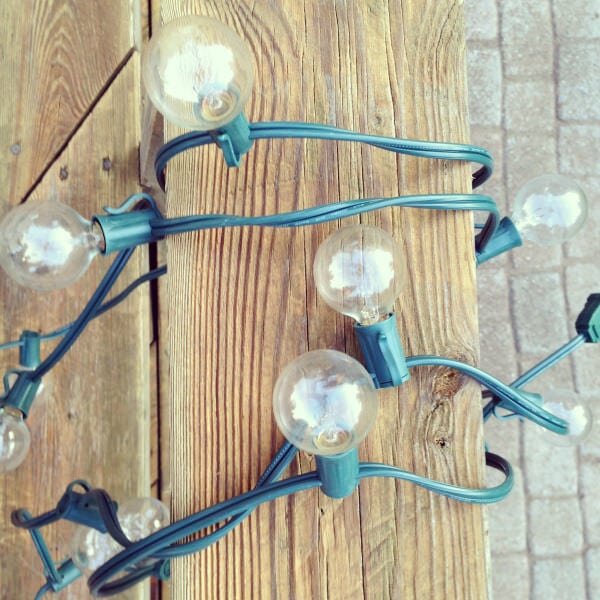 Oh my gosh... I love it so much!
THE DECK:
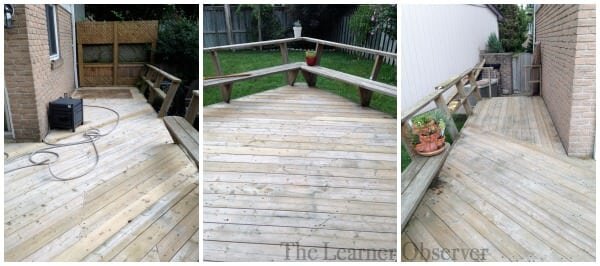
Here's where the Home Depot REALLY came to the rescue! With 400 square feet of deck to clean and stain, we had our work cut out for us. Frequent trips to HD and relying on quality product and tools was key for this part of the makeover!Step 1 was cleaning, and boy, did this deck ever need it! It had been so long since it was last stained that there was no stain left, except in a few corners and underneath the shed! See how the handle on that brush is bending in the photo? Not long after, the whole thing broke in half - and he kept going anyway! We used a deck cleaner first to get all the grimy stuff off the deck, and you can see there was a lot of it!Before cleaning, the deck looked grey when dry, but as soon as water touched it the mossy green came right out and it was super slippery! Didn't seem safe... We moved the shed off the deck because it made no sense up there. You can see a more natural colour back in the wood after it was cleaned - so much better!
 We then proceeded to power wash the deck because it still seemed a bit dirty despite the first clean. Again, HUGE difference! This step really helped the wood to kind of shrink a bit so there were fewer gaps in the grain.
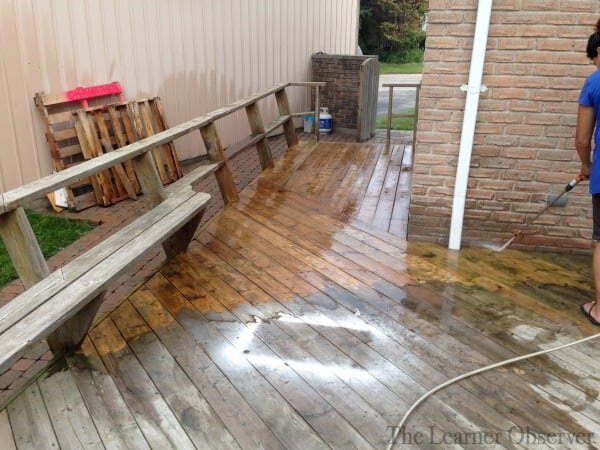 Tip- wear pants when power washing or your legs will look like this:
 Also, consider real shoes and not flip-flops. I clearly had never done this before!After all the cleaning was finished, I got to painting! Starting with the railing and seating around our deck. Here was coat #1:
 I ended up putting on 2 thick coats and some spots needed a touch up/3rd coat. Being that there was nothing on the wood and I was going for opaque white, it wasn't so bad! A gallon of stain did the trick!
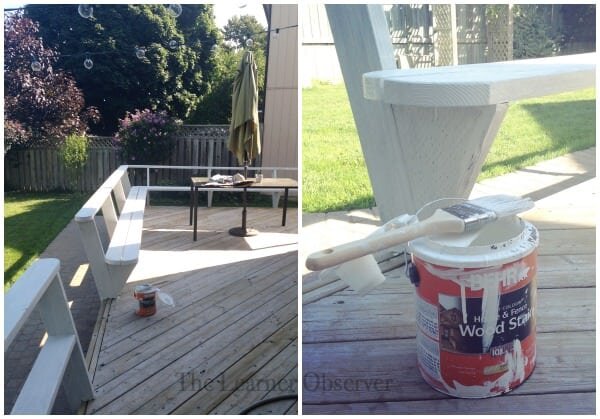 Then came time for the floors. I used a 4 inch brush and good knee pads for this part. No rolling for this gal! Because of the deep grooves in the wood, I wanted to be able to get in there properly with a brush. In all honesty, it wasn't that bad. I got the whole deck done (only one coat of stain because this is awesome stain) over two days.
 And just like that, our deck and the patio are finished!
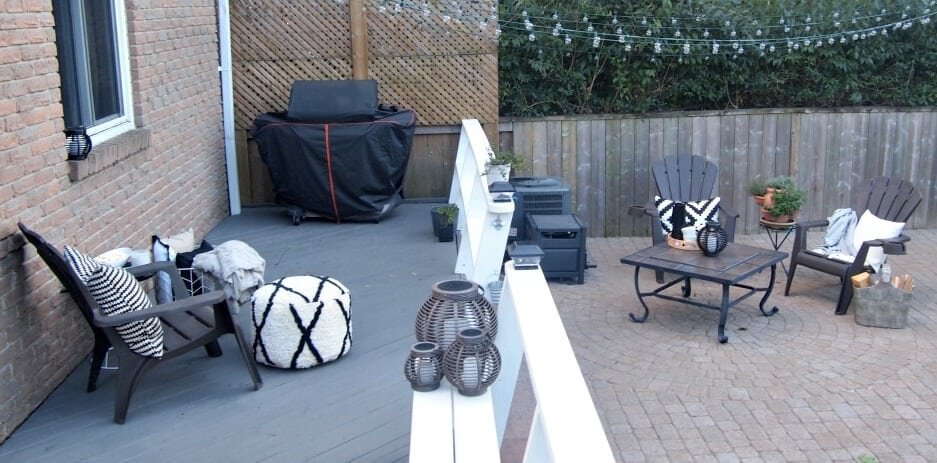


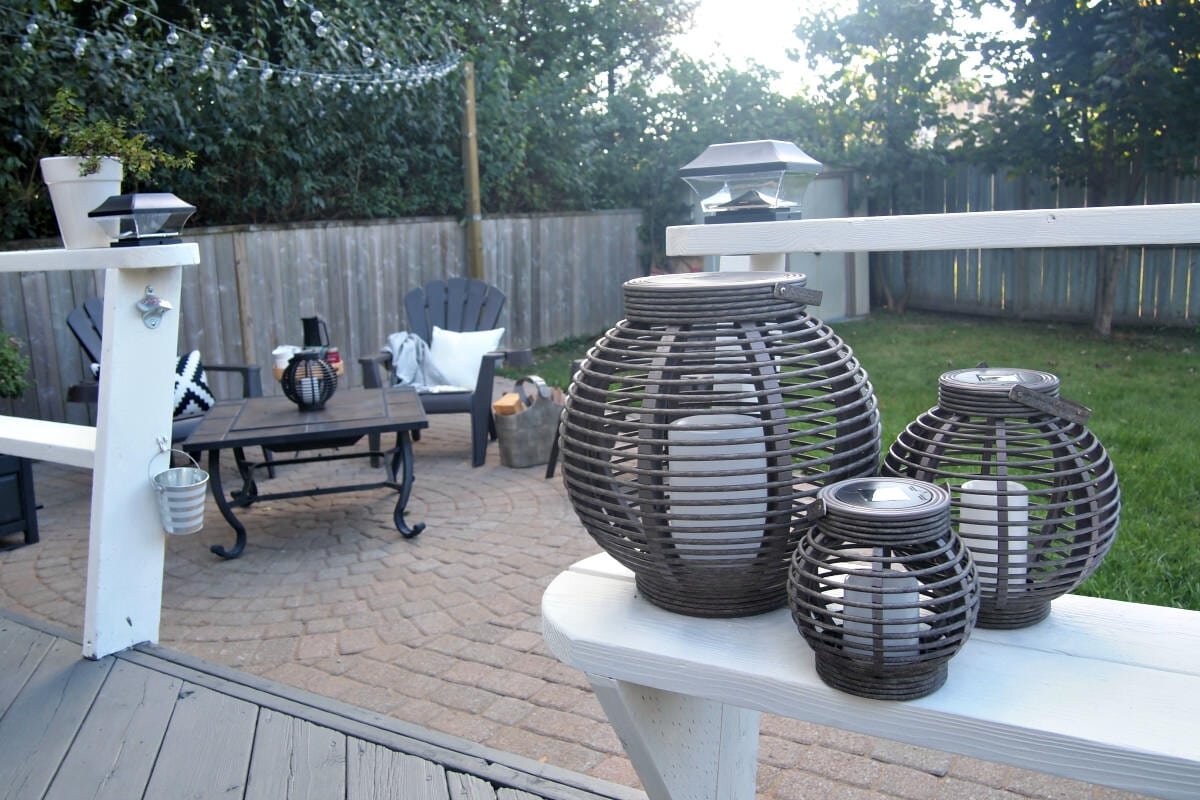

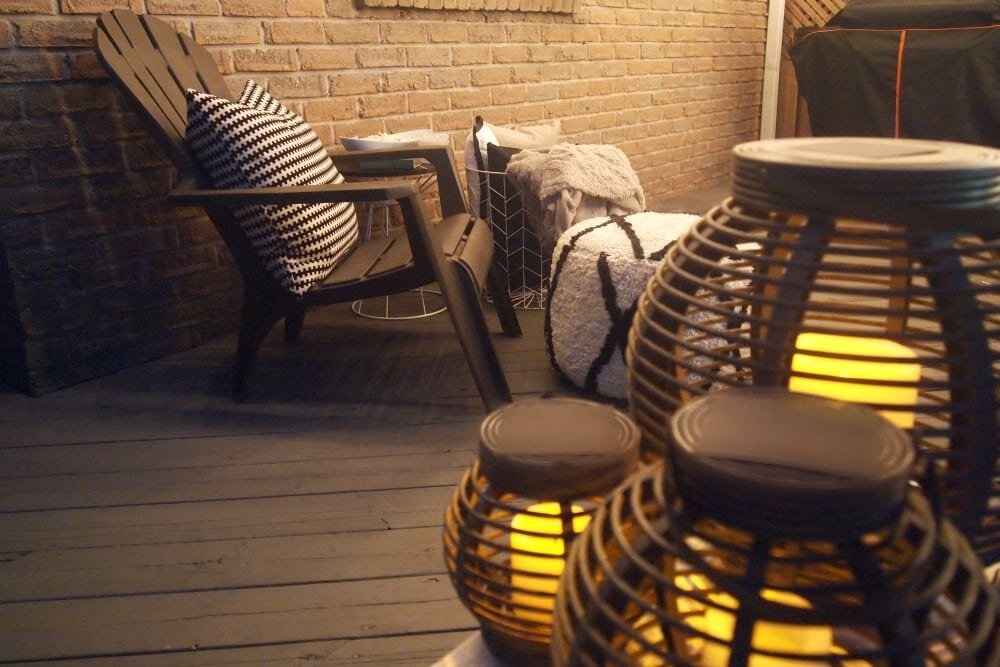
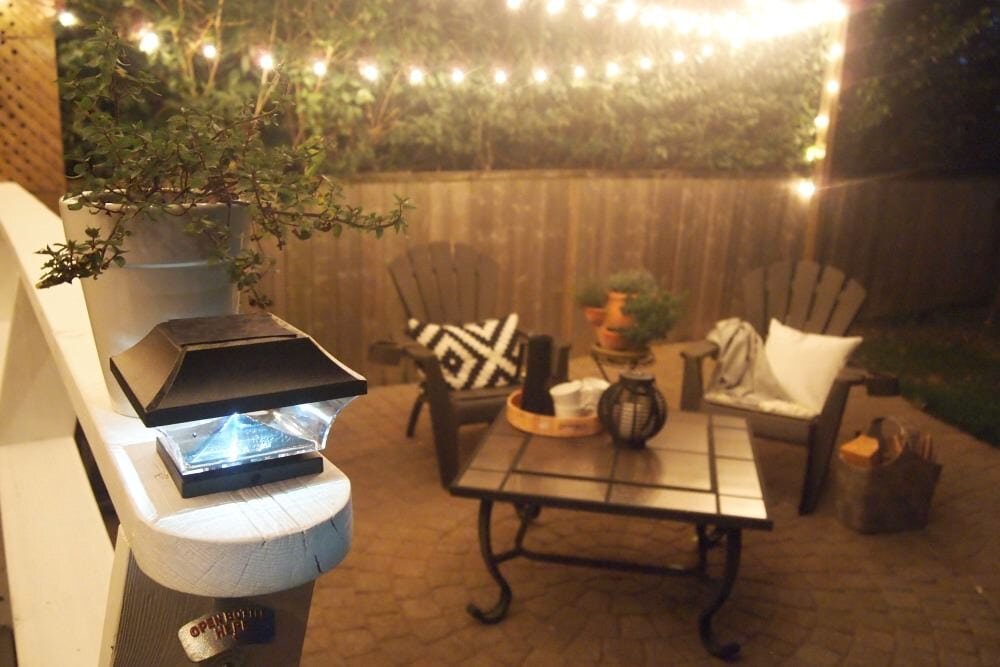
 And here it is at night!!!
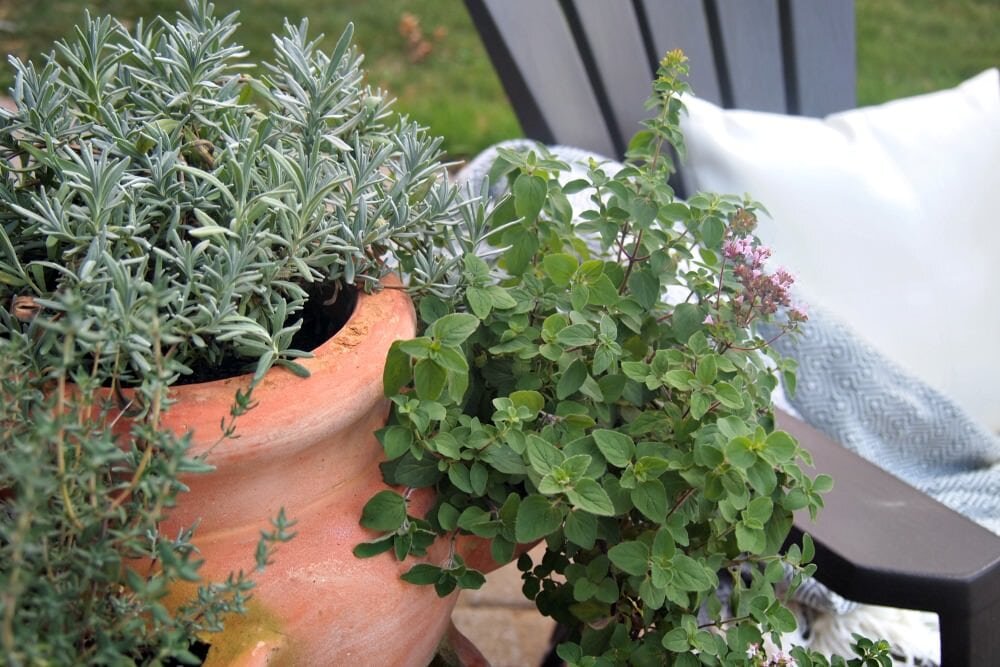
 That's it, you guys. That's the yard. And in case you're wondering, we've been able to use this space well into the chilly weather because roasting marshmallows and cooking hot dogs on the fire pit is pretty much the best ever!A big huge massive thanks to The Home Depot for helping us out with this project. No way we would have been able to do this without them!Now we just need Summer to come back! The backyard makeover will continue, but just some minor changes and gardening so we can enjoy our new amazing space!Oh, and don't forget about the Penny Paper Co. Giveaway! You have until Friday to enter!!